Dehumidifiers serve an important task of managing excessive humidity to improve indoor air quality but, if not serviced regularly, they can also offer the best conditions for mold to flourish. Mold inside a dehumidifier reduces operational efficiency and releases spores into the air, posing a health risk and sabotaging the device’s very objective. This guide answers all your questions, such as ‘What are the reasons behind mold growth in the dehumidifier?’, ‘Is it dangerous to forget dehumidifier maintenance?’ and ‘How would I know that my unit needs attention?’. It also explains how to clean the device step by step, what cleaning agents or ways work best, and how to minimize the risk of contamination in the first place so that the dehumidifier remains free of mold. Knowing these basic things will help you make your device last longer and allow you to breathe with less risk indoors.
Why Does Mold Grow in Dehumidifiers?
In dehumidifiers, the combination of moisture and organic debris leads to mold alge growth. Moreover, stagnant water, which is combined with a damp environment in the reservoir or internal components, serves as an ideal condition for mold spores to thrive. Mold growth can easily take place if a dehumidifier is neglected for cleaning. Additionally, inadequate airflow or drainage can worsen a dehumidifier’s internal components by trapping moisture for long periods, serving as an additional leak point.
Evaluating Mold Growth Conditions
To facilitate mold growth, the relative humidity must remain within a 60 – 100% range and oxygen is required. For dehumidifiers to function correctly, the water reservoir must be emptied and cleaned thoroughly, otherwise, it will become a location for stagnant water aiding in debris, dust, and organic matter accumulation, which contains nutrients required by mold. Moreover, temperature also serves an important role in assisting mold growth, with 70-90 degrees Fahrenheit being ideal along with prolonged moisture retention. For cleanliness purposes, dehumidifiers are recommended to maintain indoor humidity at 30-50%.
Density Control Units and Their Role in Mold Development
Due to inadequate servicing or the presence of conditions that favor mold development, dehumidifiers, if not maintained, can harbor mold. Dust and organic matter fill the void in the filter and serve as a food source for the mold. Furthermore, not cleaning the components or filters properly can leave spores behind, which will then multiply and pose a risk later. Mold can be inhibited if regular cleaning and emptying of the water reservoir are followed, along with proper hygiene and ventilation.
Unmaintained Dehumidifier: Risks Incurred
Maintenance of a dehumidifier is imperative. In the event such maintenance is neglected, several risks may pose: decreased operational performance, elevated energy consumption, and health risks from the growth of mold. An airflow obstruction may arise from dust accumulation in air filters, decreasing the unit’s moisture removal capabilities. Such occurrences cause the compressor to increase activity. This raises energy usage beyond intended limits. Technically, clogged filters can lower airflow to as low as 50 percent, which is detrimental to performance. In addition, the filters are cleaned, the water reservoir is emptied, and the internal components are maintained regularly. Failure to do so can lead to water stagnation; which, as already discussed, is an ideal environment for microbial growth. Stagnant moisture causes mold spores to reproduce, further exacerbating the issue by unleashing toxins into the air. If the compact device’s filters are cleaned bi-weekly, and the water reservoir is emptied daily, the chances of such risks significantly decrease.
How Often Should You Clean Your Dehumidifier?
Cleaning a dehumidifier regularly is crucial for effective performance and mitigating any potential health threats. Its air filter should be cleaned biweekly as it ensures air can pass freely and dust does not settle. Moreover, the water reservoir should be emptied and cleaned routinely, as daily, or as required, to prevent stagnation and bacteria formation. The external case and vents can be wiped clean every month to rid them of dirt. Deep maintenance like coil cleaning should be done once every six months or a year or according to the manufacturer’s instructions and is decided by frequency of use, so the device’s efficiency is maintained.
Factors that enable cleaning frequency alteration
Many factors influence cleansing regularity, such as air humidity of a building, frequency of usage of a dehumidifier, and existence of allergens and pollutants in the air. If the dehumidifier is situated in a high humidity setting or runs every time, components like the reservoir, and if cleanliness is no issue, then it may be such a component as the air filter setup will need frequent changes. If pets are present as well as dust in big amounts, then it is good to say that not long intervals are set to clean the air filter in order to maintain air quality. Again, suggestions provided by the manufacturers should always be followed for accurate information.
Signs Marking That Your Dehumidifier Needs Maintenance
Cleaning often becomes a due task on a checklist. There are visible signs that indicate when a device needs to be cleaned. These may include diminished performance effectiveness, such as the unit failing to collect moisture or humidity levels mining, enabling the dehumidifier to function fully. This is likely to suggest blockages in the air filter or evaporator coils. The emergence of abnormal noises, such as grinding or whirring, is synonymous with debris accumulation. An also unpleasant smell can be silenced with dread when one thinks of a fan or a motor that has components or coils that are not functioning effectively and generating from the unit nose that must be complemented with other evidence showing the little to no features emitted from the other units. This may include the motor fans as well, while circumventing the throttle so as to ensure no unusual noise makes the device overheating oil that passes through the hole cover of the device meeting the internal parts of the device. No contemplation elaborates on the smells generated from plenty of things, ultimately a spice coiled within the unit, indicating mold. The failure to clean will lead to units cluttering with the insides and filters of the bacteria that cover the other components. Adequate measures need to be taken to avoid throttling and capping components that are meant to be internal.
Step-by-Step Guide to Cleaning a Moldy Dehumidifier
Cleaning a moldy dehumidifier is vital because it can enhance the utility of the appliance and offer better health benefits within an indoor space. Such issues impede the performance of a unit, and they often lead to the release of dangerous spores into the atmosphere, which is unsafe. Routine care must be performed, mainly when cleaning areas where mold is likely, such as the water reservoir, filters, and other parts inside the unit. With this methodology, users will be able to effectively clean the dehumidifier while increasing the longevity of the device.
Preparing Your Cleaning Supplies
While cleaning a dehumidifier, it is important to have the right supplies available. It is important to note that these include, but are not limited to, warm water, moderate-strength dishwashing detergent, white vinegar or bleach solution, a soft cloth or sponge, a long brush for hard-to-reach places, and a towel to dry the unit after washing. Additionally, items such as cans of compressed air or toothbrushes can assist in cleaning delicate parts. Every appliance comes with a set of instructions, it is best to follow them instead of taking out the chance of damage to the device. Having these items ready ensures an efficient and thorough cleaning process.
The Order of Carefully Taking Apart the Dehumidifier
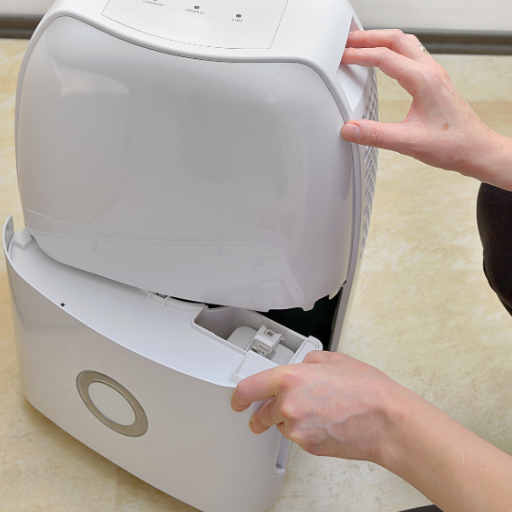
When taking apart your dehumidifier, make sure to do so with extra care so as not to hurt the unit and keep yourself safe. Start with unplugging the dehumidifier from the power source as this will avoid any chances of electric shock. Now, work towards the appliance parts that are easier to remove such as the air filter and water reservoir. Such components come off easily, and thus, too much force ought not to be used to detach them. If needed, some screws on the casing or other panels need to be loosened and these parts must be saved in a secure place. Always follow the manufacturer’s suggestions to properly gain access to the inside of the unit while protecting sensitive parts like the compressor or the coils. If your device has a fan assembly, clean it carefully with a soft brush or compressed air to avoid damaging the blades. If a unit is being worked on with all its internal parts secured and dry, check the dehumidifier to guarantee proper functioning before putting it to full use. Lastly, ensure all parts are tightened together.
Cleaning the Tank and Air Filter as Well as the Coils of the Dehumidifier
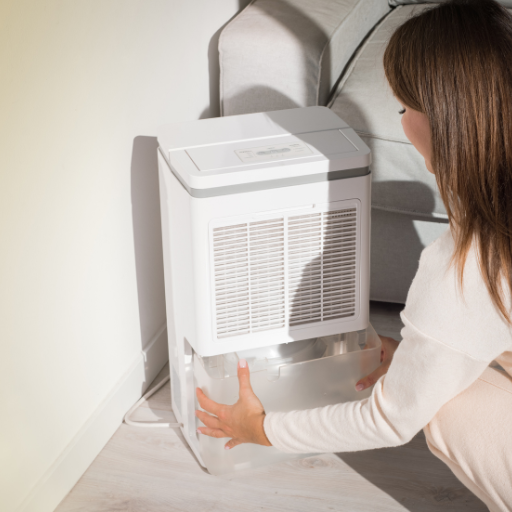
To begin with the tank cleaning process, remove the dehumidifier and pour out any leftover water in the tank. To sanitize it of any bacterial and mineral build-up, wash the tank using warm soapy water. After that, rinse the tank with water thoroughly to remove any soapy residue that would dampen the unit’s efficacy.
For the air filter cleaning, remove the filter in the manner outlined by the doctor. If it isn’t damaged, use a vacuum cleaner or a soft brush to wipe away the built-up dust and dirt. If it is completely washable, rinse the filter in lukewarm water and let it air dry before placing it back. Always check the filter for compliance with the manufacturer’s specifications since it may get damaged during the cleaning process.
Before cleaning the coils, turn off the dehumidifier and ensure the coils are freely accessible. Using a soft cloth or brush, clean gently the dirt and dust that has built up. As per the product’s manual, a coil cleaner explicitly made for HVAC systems can be used if there is no restriction. Always use a cleaner that is safe for the coil’s structure, usually made out of copper or aluminum, and non-corrosive. Remember not to twist or break the fins, which are crucial for heat exchange efficiency. The priority while cleaning should ensure coil conductivity is maintained to optimize the unit’s performance.
Make sure all of the components are completely dry before they are reassembled to prevent the growth of mold and electrical hazards within the unit.
What Are the Best Products for Cleaning a Dehumidifier?
A variety of products can make cleaning of a dehumidifier easier and support proper functioning as well as hygiene. For the filter, a mild soap or general cleaning solution works well for dirt and debris, but be carefull not to scrub overly. HVAC-specific coil cleaners are very good for the coils since they break down oil and dirt but do not harm the material. For internal and external surfaces of a dehumidifier, a microfiber cloth and an ordinary detergent can clean without causing damage to the surface. Disinfectants, such as white distilled vinegar or bleach diluted in water, can effectively stop bacteria and mold from forming in water reservoirs. Always check the manufacturer’s instructions to be certain that the products used are appropriate.
Comparison of Natural Cleaning Solutions with Commercial Cleaners
Natural cleaning solutions, as well as commercially prepared cleaners, have benefits as well as disadvantages. Some people prefer natural solutions such as white vinegar, baking soda, and lemon juice for cleaning as they are cheaper and non-toxic. However, these solutions may consume more time and effort if some surfaces are in heavily stained or soiled condition. In contrast, the utmost purpose of a commercial cleaner is to provide cleaning efficiency, so its formulation often includes strong chemicals that swiftly remove dirt, grime, and even bacteria. These products are effective but their chemical constituents can be complex on the body, cause allergic reactions, or pose some environmental issues. Ultimately, the decision rests on the particular cleaning needs, user preferences, and the level of ecologically inclined limits.
Mold Removal With Bleach- Safety Guideline
Proper procedures must be followed to kill the mold, with no room for error properly. These modifications are meant to minimize the risks associated with bleach while maximizing its antibacterial qualities. Tiles, glass, and countertops are not porous, so bleach kills any mold that might grow there. Wooden surfaces and drywalls are porous, so they provide mold roots and are hardly killed by bleach. Add one cup of bleach to a gallon of water and use that as the base for your mold removal solution (standard sodium hyperchloride concentration is at 5.25%). The affected areas should be sprayed or immersed with a cloth to help soak the solution. After 10-15 minutes of soaking, gentle scrubbing while rinsing with water is recommended.
To prevent the inhaling of fumes, adequate ventilation should be used, as a bleach product can release harmful chlorine gas when not handled properly. Gloves, safety goggles, and a mask …should be used to protect oneself for skin or eye irritation caused by the chlorine gas. Other cleaning agents, such as ammonia, can be mixed. However, ventilation should be maintained. In addition, a small area of skin should be tested for chlorine compatibility by patching it on the skin. The return of mold may signify some underlying moisture issues that need to be fixed so mold does not grow further. Ensure all treated areas are dried, preventing mold growth from reoccurring.
How to Prevent Mold Growth in Your Dehumidifier
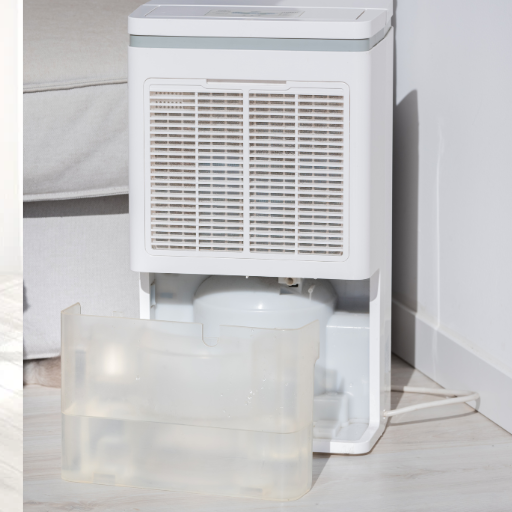
To avoid mold, it is necessary to service and adequately use your dehumidifier regularly. For starters, ensure that the water tank is emptied periodically and thoroughly cleaned so that any present water does not remain. If water is allowed to stand, it is an excellent medium for mold growth. Additionally, you need to check the filter at regular intervals for any dust and dirt that may aid in the growth of mold. Follow the manufacturer’s directions on how frequently the filter needs to be cleaned. Use soft fabric to wipe the insides of the unit as well as the intake areas when it is appropriate. Dehumidifiers should also be placed in locations where air can circulate freely. Remember to set the humidity level to 30 to 50%, the ideal range for preventing mold. Always check the dehumidifier for mold and if any small problems do arise, don’t wait too long to use the right cleaning agent to fix them. Remember that these cleaning agents are used so the dehumidifier can function properly afterward.
Maintaining Optimal Indoor Humidity
Maintaining optimal humidity indoors is a health and property control issue. Use a hygrometer and aim for humidity in the 30 to 50 percent range. Excess moisture encourages mold, mildew, and dust mites, and other biological growths. Too little humidity creates respiratory issues and damages wooden furniture. Adjust your devices to control moisture and ensure proper ventilation in the room by opening curtains over windows. Regular ventilation in humid places like bathrooms and kitchens, coupled with exhaust fans, will help reduce moisture. Strucural problems like leaks should also be fixed for better humidity control.
Hygiene and Maintenance Guidance
For proper operation and more excellent durability, a dehumidifier requires hygiene and care regularly. Initiate this process by first cleaning the air filter after every two weeks for optimal performance or per the guide defined by the manufacturer. This is critical towards ensuring adequate air passage and preventing clogging which may put the unit under undue stress. Most filters can be washed with water before being left to air dry completely before being reinserted. If the unit has a water tank built in, the bucket should be emptied and cleaned at a minimum once a day with warm water and detergent to prevent slime and bacteria. For models that utilize a continuous drain hose, always ensure the hose is free of clogs and damages that can hinder the water flow. Also, check the coils for dust occasionally and vacuum clean them or use a soft brush on the coils to optimize the heat exchange. Most units work best between 5 and 32 degrees Celsius, but it is essential to note all devices should not be used above 10 degrees Celsius. If used below, frost may form on the coils, negatively impacting the device’s performance. When using the dehumidifier, place it 15-30 centimeters away from walls or furniture to ensure there is no blockage on the intake air. By following these recommendations, the device should work reliably for a long period.
Proper Use and Placement of The Unit
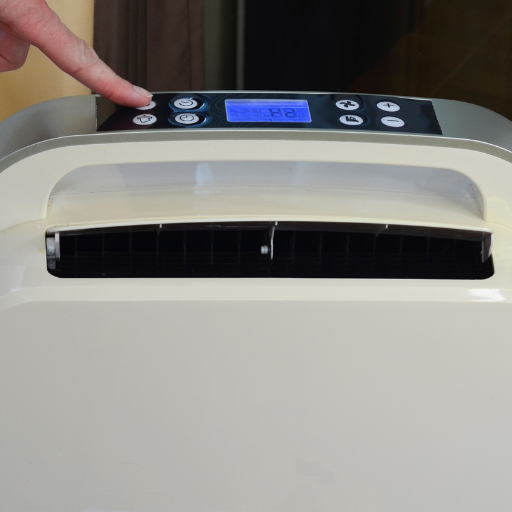
Observing proper placement and operation is essential to maximize efficiency when using a dehumidifier. A unit should be positioned in the most humid area of the room, ideally centrally located, and slightly elevated above the ground. Maintain a minimum distance of 6-12 inches of free space around the dehumidifier to promote airflow. The dehumidifier should be used under temperatures of 41°F to 90°F. Below this temperature range, frost may form on the coils and above, performance may significantly decline.
Adjust the humidity settings to 30-50% to ensure comfortable air quality is maintained while preventing mold growth. Monitor the reservoir frequently and remove water to prevent overflowing, or if available, connect a nonstop drainage feature. The fan speed can also be altered; removing moisture is most effective at high speeds, but more energy is consumed. Long-term conditions are better maintained on low speeds, which are more efficient. These parameters should be observed to enhance the longevity of the appliance.
When Should You Replace Your Dehumidifier?
A dehumidifier replacement is required, especially if the device displays drastic physical wear or cannot function well. Indicators can be difficulty in drawing water, inability to keep the moisture level within the comfort range, or increase in the operational decibels of the device. Units older than five to ten years may experience general component failure and increased energy consumption. With time, frequent repairs that are more expensive or comparable to a new unit are another prominent reason to get a dehumidifier replacement. When purchasing a new dehumidifier, it is essential to take the current humidity and room size to ensure that it is of appropriate capacity.
Signs that your dehumidifier is ready for replacement
- Struggles with Maintaining Moisture: If while operating the machine for long hours and the room still does not reach the target moisture level, then it signals a failing unit. Other possible reasons can be poor filtration, or a failing compressor.
- Noise level suggests a malfunction: If the unit starts exhibiting significant noise, such as rattling, grinding, or buzzing, it means that there is a severe mechanical malfunction or internal failure of parts such as the fan motor and the compressor.
- Collecting less water: When the device starts accumulating less water, it is a clear sign of low efficiency. This may signal potential refrigerant leakage, foundational wear, or hose clogging.
- Working Cycle and Operating Continuously: Poorly functioning dehumidifiers can run continuously or exhibit frequent on-off cycles. This can be caused by sensor malfunction or issues with control mechanisms or wiring.
- Enhanced Power Usage: Older or inefficient appliances usually experience increased power consumption during overly humid periods due to an increase in energy prices.
- Water Leakage: Leakage from the authenticated vicinity of a dehumidifier can indicate malfunctions such as a blocked pump, damaged dew line, or failure of the water container.
- Functional Problems and Repetitive Codes: Newer gadgets have an edge in displaying troubling error codes such as blocked airflow, sensor failure, and excessive electricity consumption. Frequent or recurring error codes should be addressed, along with a possible replacement.
Cost-Benefit Analysis: Replace vs. Cleaning
Cleaning emits less costs than replacing it, however, the deciding factor lies in evaluating more factors. As seen in an HVAC system, carpets, or upholstery, worn out items can benefit from cleaning in the short run as it boosts their functionality and extends their life span. But if the item is in such a worn out condition that it can be repaired through cleaning only, then it can lead to ongoing expenses. Yes, a single item replacement emits high costs, but it is a permanent fixing solution and lowers maintenance costs. Eventually, all those factors lie in how worn down the item is, what cleaning costs exist, and how much it takes to replace it.
Reference sources
Frequently Asked Questions (FAQs)
Q: How often do I need to clean my dehumidifier to prevent mold growth?
A: As a homeowner, you should regularly clean your dehumidifier at least once a month to prevent mold and mildew growth. More frequent cleaning may be necessary if you live in a particularly humid area or if you notice visible signs of mold.
Q: What are the signs that my dehumidifier needs to be cleaned?
A: Look for visible signs of mold, musty odors, reduced efficiency in removing moisture from the air, or a buildup of dust and debris on the unit. If you notice any of these signs, it’s time to clean your dehumidifier.
Q: How do I remove mold from my dehumidifier?
A: To remove mold from your dehumidifier, first unplug the unit. Remove and clean the water tank with a mixture of warm water and mild detergent. Use a damp cloth or soft brush to clean the interior and exterior surfaces, paying special attention to areas with visible mold. For stubborn mold, you can use a solution of equal parts white vinegar and water.
Q: Can I use bleach to clean mold and mildew from my dehumidifier?
A: While bleach can kill mold, it’s generally not recommended for cleaning dehumidifiers. Bleach can be harsh on the unit’s components and may not effectively eliminate the mold problem. Instead, use milder cleaning solutions like vinegar or specialized mold removers.
Q: How can I prevent mold growth in my dehumidifier?
A: To prevent mold growth, empty and clean the water tank regularly, keep the area around the dehumidifier clean and dry, ensure proper ventilation, and maintain optimal humidity levels in your home (between 30-50%). Additionally, run your dehumidifier consistently to keep moisture out of the air.
Q: Is it necessary to clean the outside of the dehumidifier?
A: Yes, it’s important to clean the outside of your dehumidifier as well. Use a damp cloth to wipe down the exterior, removing dust and debris. This helps maintain the unit’s efficiency and prevents the spread of mold spores throughout your home.
Q: How can a whole-home dehumidifier help with mold issues?
A: Installing a whole-home dehumidifier can help prevent mold issues by consistently removing excess moisture from the air throughout your entire home. This creates an environment less conducive to mold growth and can be more effective than portable units in larger spaces.
Q: When should I contact a professional for dehumidifier cleaning or mold remediation?
A: If you have persistent mold problems despite regular cleaning, or if you notice extensive mold growth in your dehumidifier or home, it’s time to contact a professional. They can help assess and eliminate the mold problem effectively. Don’t hesitate to reach out if you’re unsure about handling the situation on your own.