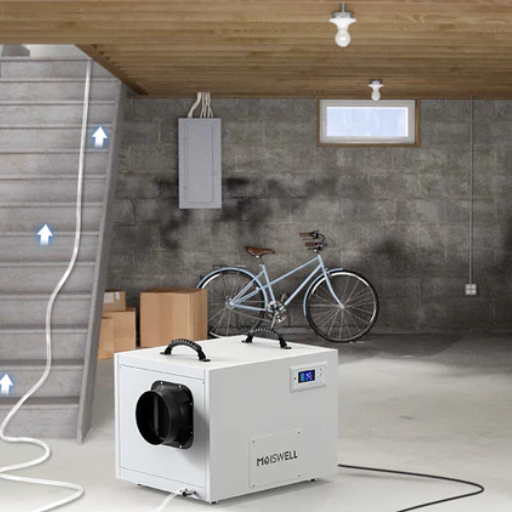
A crawl space dehumidifier might not be the first thing that comes to mind when you think about home maintenance, but it plays a vital role in protecting your property and ensuring a healthy living environment. Whether you’re dealing with excess moisture, musty odors, or potential mold growth, investing in the right dehumidifier can make all the difference. But how much does it actually cost to purchase and maintain one? This article will break down the key factors that influence crawl space dehumidifier costs, helping you make an informed decision. From upfront expenses to long-term savings, we’ll explore everything you need to know to determine the best value for your budget and needs.
What Factors Affect the Crawl Space Dehumidifier Cost?
Several key factors affect the cost of a crawl space dehumidifier:
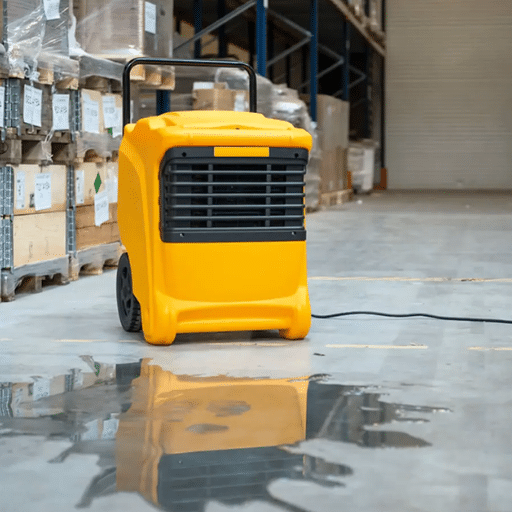
- Unit Size and Capacity: Larger units with higher moisture removal capacities are generally more expensive but are essential for larger or excessively damp crawl spaces.
- Energy Efficiency: High-efficiency models may have a higher upfront cost but can save money on electricity bills over time.
- Brand and Quality: Trusted brands often come with a higher price tag due to their durability and reliable performance.
- Installation Costs: Professional installation may add to the overall expense, especially if modifications to the crawl space are required.
- Maintenance Requirements: Filters, cleaning, and other routine maintenance can contribute to long-term costs depending on the unit’s design.
Understanding these factors can help you choose a dehumidifier that provides the best balance of affordability and performance for your needs.
Dehumidifier Size and Efficiency
Selecting the right size and ensuring optimal efficiency in a dehumidifier is crucial for managing humidity effectively while minimizing energy usage. Dehumidifier capacity is typically measured in pints of moisture removed per day, and the size you need depends on the square footage of your space and the level of humidity.
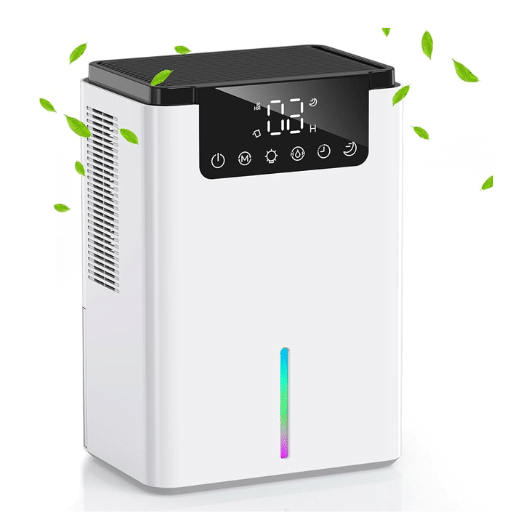
For smaller spaces, such as bathrooms or closets up to 300 square feet, a dehumidifier with a capacity of 20–30 pints is often sufficient. Medium-sized areas like bedrooms or living rooms, covering 500–700 square feet with moderate humidity, may require a unit rated at 40–50 pints. For large spaces over 1,000 square feet or those with excessive moisture, a high-capacity dehumidifier of 60–70 pints or more is advisable.
To improve energy efficiency, look for units certified with the ENERGY STAR label, indicating that the device uses at least 15% less energy than standard models. Modern dehumidifiers with advanced features such as humidistat, programmable timers, and auto-shutoff functions further enhance efficiency by reducing unnecessary operation. Additionally, research indicates that maintaining an indoor humidity level between 30–50% not only enhances air quality but also prevents conditions that promote mold and mildew growth.
By choosing the appropriate dehumidifier size and prioritizing energy-efficient models, you can achieve a healthier and more comfortable indoor environment while managing operational costs effectively.
Impact of Encapsulation on Costs
Encapsulation can significantly reduce long-term costs when implemented correctly, especially in spaces like crawlspaces or basements where moisture control is crucial. By sealing these areas with high-quality vapor barriers and insulation, energy efficiency can improve by up to 15-18%, according to recent industry analyses. This reduction in energy usage directly translates into savings on heating and cooling bills, as less energy is required to maintain stable indoor temperatures.
Additionally, encapsulation helps prevent structural damage caused by excess moisture, such as wood rot or foundation weakening. Repairs for these issues can range from several hundred to tens of thousands of dollars, depending on severity. By proactively encapsulating, property owners can avoid these costly repairs and extend the lifespan of their structures.
Another financial benefit comes from improving indoor air quality. Encapsulation reduces the likelihood of mold growth and pest infestations, which can lead to expensive remediation or pest control treatments. Consumers also report enhanced property value as encapsulation is viewed as a desirable feature for energy efficiency and home protection. When viewed holistically, the initial investment in encapsulation is often offset by the substantial savings and added value it brings over time.
Installation and Labor Expenses
The cost of installation and labor for encapsulation varies depending on several key factors, such as the size of the space, geographical location, materials used, and the complexity of the project. On average, homeowners can expect to spend between $3,000 and $10,000 for a standard encapsulation project, with larger or more intricate installations potentially exceeding this range.
Labor accounts for a significant portion of the expenses, as professional expertise is required to ensure proper sealing, insulation, and ventilation. This includes tasks such as cleaning and preparing the crawl space, installing vapor barriers, applying insulation, and ensuring proper drainage systems are in place. The hourly labor cost typically ranges from $50 to $100 per hour, depending on the region and the contractor’s experience.
Material costs can also vary widely. For instance, polyethylene vapor barriers, a common material for encapsulation, may cost approximately $0.50 to $0.75 per square foot. Additional features like dehumidifiers, which help control moisture levels, can range from $800 to $2,000.
While the initial investment may seem significant, many homeowners find that the benefits outweigh the upfront costs. Proper encapsulation often leads to lower energy bills, reduced maintenance expenses, and increased property values, making it a wise long-term decision for safeguarding a home’s foundation and structural integrity.
How to Choose the Best Crawl Space Dehumidifier for Your Home?
When choosing the best crawl space dehumidifier for your home, consider the following key factors:
- Capacity: Determine the size of your crawl space and choose a dehumidifier capable of handling the area effectively. Measure in square or cubic feet to ensure proper coverage.
- Energy Efficiency: Look for models with an Energy Star certification to lower energy consumption and reduce utility costs.
- Durability: Opt for units built with high-quality materials designed to withstand the demanding conditions of crawl spaces, such as high humidity and fluctuating temperatures.
- Drainage Options: Ensure the dehumidifier has a reliable drainage system, like a built-in pump or continuous drain connection, for hassle-free operation.
- Maintenance Needs: Choose a model that offers easy access for cleaning and filter replacement to ensure long-term performance.
- Noise Level: If noise is a concern, check for a unit with quieter operation, especially if the crawl space is near a living area.
Understanding the Type of Dehumidifier Needed
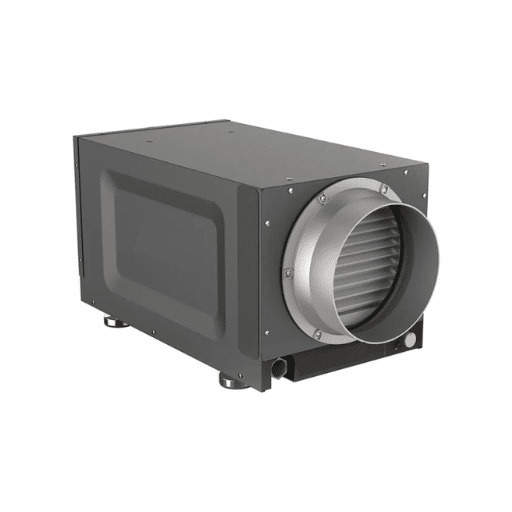
When choosing the right type of dehumidifier for a crawl space, it’s essential to understand the various options available and how they address specific needs. Dehumidifiers typically fall into two main categories: refrigerant and desiccant models. Refrigerant dehumidifiers, also known as compressor-based units, are the most common choice for crawl spaces due to their energy efficiency and ability to perform well in moderate to high humidity levels. They work by cooling air to condense moisture, making them ideal for spaces with consistent temperatures above 60°F (15.6°C). On the other hand, desiccant dehumidifiers use a drying material to absorb moisture from the air, providing optimal performance in colder environments, especially in places where temperatures drop below 50°F (10°C).
According to recent data, refrigerant dehumidifiers are often recommended for larger spaces or those with high humidity, as they can remove significant amounts of moisture (up to 70 pints per day on average, depending on model and conditions). However, desiccant models are praised for their durability in harsh, low-temperature settings and typically operate quietly, making them suitable for crawl spaces attached to or beneath living areas.
For environmentally-conscious homeowners, some dehumidifiers now come equipped with energy-efficient certifications, such as ENERGY STAR, ensuring reduced energy consumption while maintaining high performance. Additionally, advanced models offer built-in hygrometers to continuously monitor humidity levels and automatic defrost features for seamless operation during colder months. By understanding these types and features, you can make a more informed decision to protect your crawl space from damp conditions effectively.
Evaluating Energy Efficiency and Energy Star Ratings
When considering dehumidifiers for your crawl space, energy efficiency plays a key role in both reducing long-term costs and supporting environmental sustainability. Energy Star-certified dehumidifiers are specifically designed to consume less energy compared to standard models, helping homeowners save on electricity bills while effectively maintaining optimal humidity levels. According to recent updates, Energy Star-certified dehumidifiers use nearly 15% less energy, on average, than their non-certified counterparts.
For instance, based on the capacity of the dehumidifier, a 50-pint Energy Star model may save approximately 330-440 kWh annually when compared to more traditional units. This reduction in energy consumption can lead to savings of about $40-$50 per year on average. Over the lifespan of the unit, this energy efficiency translates into considerable financial benefits while decreasing the carbon footprint of your household.
Additionally, these models often combine innovative features such as improved refrigerants and optimized airflow systems, reducing operational costs without sacrificing performance. When choosing a dehumidifier, carefully examining its energy consumption data, typically expressed in kilowatt-hours (kWh), and ensuring its inclusion of an Energy Star label can help you make a greener and more cost-effective investment. Prioritizing energy-efficient options ensures you balance long-term savings with responsible environmental stewardship.
Comparing Pint Capacity for Different Models
When evaluating dehumidifiers, pint capacity is one of the most crucial factors to consider, as it directly relates to the amount of moisture a unit can extract from the air within a 24-hour period. Models with lower pint capacities, such as those rated for 20 to 30 pints, are typically suitable for smaller spaces like bedrooms, offices, or closets with mild to moderate humidity levels. For medium-sized areas, including living rooms or medium basements, dehumidifiers with a capacity ranging from 40 to 50 pints are more appropriate.
On the other hand, for large, damp spaces like basements or spaces prone to high humidity, models with a capacity of 60 pints or more are often recommended. For instance, modern 70-pint dehumidifiers excel in addressing excessive moisture in areas exceeding 1,500 square feet without compromising efficiency. Many high-capacity models now include smart features like adjustable humidistat, continuous drainage options, and built-in pump systems for added convenience.
To choose the best pint capacity for your needs, it’s essential to account for the size of the space and the severity of the humidity problem. Additionally, keep in mind that high-efficiency models with a variable pint capacity can adapt to different environments, providing a flexible and effective solution for managing air quality in varied conditions.
Is Encapsulation Necessary for Effective Moisture Control?
Yes, encapsulation is often necessary for effective moisture control, especially in areas like crawl spaces or basements where excess moisture can lead to mold, mildew, and structural damage. By sealing off these spaces with a vapor barrier, encapsulation helps to prevent moisture intrusion, regulate humidity levels, and protect the home’s foundation. This process is particularly beneficial in regions with high humidity or frequent rainfall, ensuring long-term protection and improved air quality throughout the home.
Benefits of Crawl Space Encapsulation
- Moisture Control and Prevention of Mold Growth
Encapsulation significantly reduces the levels of moisture in crawl spaces, a key factor in preventing mold and mildew growth. Studies show that mold thrives in environments where humidity exceeds 60%, and crawl space encapsulation can lower humidity to below 50%, creating an unfavorable environment for mold to develop.
- Improved Indoor Air Quality
Around 50% of the air in a home originates from the crawl space. By sealing off moisture and contaminants, encapsulation ensures cleaner and healthier indoor air. This can lead to reduced allergic reactions and respiratory issues for inhabitants.
- Enhanced Structural Integrity
Excessive moisture can weaken wooden beams and flooring over time, causing structural damage. Encapsulation protects the foundation and supports by maintaining the optimal environment, extending the lifespan of your home’s structure.
- Energy Efficiency and Lower Utility Bills
Crawl space encapsulation enhances insulation, reducing energy loss through floors. According to the U.S. Department of Energy, homes can save up to 20% on heating and cooling costs by addressing airflow and insulation issues through methods like encapsulation.
- Pest Prevention
A sealed crawl space acts as a deterrent to pests like termites, rodents, and insects, which are attracted to moist conditions. Encapsulation eliminates entry points and reduces the conditions that make the space appealing for habitation.
- Temperature Regulation
Encapsulation helps maintain consistent temperatures between floors by reducing the impact of external weather conditions. This creates a more comfortable living environment throughout the home.
- Increase in Home Value
Homes with crawl space encapsulation are often seen as more modern, well-maintained, and energy-efficient. This feature can increase property value and appeal to potential buyers, making it a worthwhile investment.
- Long-Term Savings
While the upfront cost of encapsulation can vary, it prevents costly repairs associated with water damage, mold remediation, and pest infestations over time, ensuring homeowners save money in the long run.
Each of these benefits underscores the practicality and value of crawl space encapsulation, especially for homeowners in regions where moisture and humidity pose significant challenges.
Cost Implications of Encapsulation
The cost of crawl space encapsulation can range between $5,000 and $15,000, depending on factors such as the size of the area, materials used, and complexity of the installation process. For a smaller crawl space, homeowners may pay closer to the lower end of this range, while larger or more intricate projects, such as those requiring extensive repairs or additional waterproofing services, could increase the overall cost significantly.
Key components contributing to the price include vapor barriers, insulation materials, sealing techniques, and potential upgrades like dehumidifiers, which are essential for maintaining long-term moisture control. High-quality vapor barriers, for instance, can cost around $0.50 to $0.70 per square foot independently, but when combined with professional installation, costs may reach $3 to $7 per square foot.
Beyond upfront investment, ongoing maintenance costs should also be factored in. Servicing dehumidifiers, repairing seals, or conducting annual inspections can add between $100 and $300 annually to ensure optimal performance and longevity of the encapsulated space. However, the upfront expense and minimal maintenance are justified by the long-term financial benefits—studies indicate that encapsulation can improve energy efficiency by reducing heating and cooling costs by up to 20%, resulting in noticeable savings on utility bills.
By considering these details, homeowners can better assess the potential return on investment of crawl space encapsulation, understanding that the initial costs often pale in comparison to avoided property damage, improved energy usage, and enhanced home value.
Alternative Solutions for Moisture Control
When it comes to managing moisture effectively, several alternatives to crawl space encapsulation are available, each tailored to address specific challenges while improving overall home conditions.
- Dehumidifiers
High-capacity dehumidifiers specifically designed for crawl spaces offer a robust solution for moisture control. Modern models can extract up to 70-90 pints of water daily, significantly reducing humidity levels. Maintaining humidity below 60% can help prevent mold growth and protect structural integrity. Dehumidifiers are particularly ideal in homes where crawl space encapsulation isn’t feasible.
- Improved Drainage Systems
Ensuring proper drainage around the foundation is another essential approach. Installing French drains or sump pumps can efficiently divert water away from the home’s foundation, safeguarding against flooding and long-term water accumulation. Studies indicate that a well-installed sump pump can move hundreds of gallons of water per hour, effectively reducing the risk of excess moisture.
- Vapor Barriers
While vapor barriers are a component of encapsulation, they can also be used as a standalone solution. A durable polyethylene sheet placed over the ground surface can block groundwater evaporation into the air. For maximum effectiveness, at least a 6-mil thickness is recommended, with thicker options offering better durability and performance.
- Foundation Waterproofing
Exterior waterproofing solutions, such as sealing foundation walls with waterproof coatings or membranes, provide an extra layer of protection. These coatings can prevent moisture from infiltrating basement or crawl space walls. Complementing this with appropriate landscaping, such as sloping soil away from the home, adds further reinforcement.
- Proper Ventilation
Adequate ventilation is key to maintaining dry air circulation in crawl spaces and basements. Introducing smart vent systems, which adjust airflow based on humidity and temperature, can enhance the effectiveness of ventilation. This is particularly useful in regions experiencing high seasonal humidity levels.
By combining these strategies and tailoring them to the specific environmental and structural conditions of a property, homeowners can significantly reduce moisture issues while minimizing long-term costs and potential damage. Careful evaluation of each method, along with professional advice, ensures an optimal and sustainable solution for moisture control.
How to Install a Crawl Space Dehumidifier?
- Choose the Right Dehumidifier
Select a dehumidifier specifically designed for crawl spaces, ensuring it matches the size and humidity requirements of your space. Refer to the manufacturer’s specifications for guidance.
- Prepare the Crawl Space
Clear any debris, seal vents or openings, and ensure the area is properly insulated. A clean, moisture-controlled environment ensures the dehumidifier operates efficiently.
- Determine Placement
Position the dehumidifier on a level surface in a central location within the crawl space. Ensure there is ample space around the unit for airflow and maintenance.
- Install Drainage
Connect the dehumidifier’s drainage system to a nearby pump or direct it to a slope that leads water outside the home. This prevents water accumulation under your property.
- Power the Dehumidifier
Plug the unit into a dedicated electrical outlet. Verify the power source can handle the dehumidifier’s requirements to ensure safe and continuous operation.
- Test and Monitor
Turn on the dehumidifier and set the desired humidity level. Monitor its performance for the first few days to ensure it operates effectively and drains properly.
Steps for Installing a Crawl Space Dehumidifier
Installing a crawl space dehumidifier is a crucial step in maintaining your home’s structural integrity and air quality. When done correctly, it can prevent mold growth, wood rot, and pest infestations. Follow these detailed steps to ensure an effective installation:
- Evaluate the Crawl Space Conditions
Start by inspecting your crawl space for signs of excessive moisture, leaks, or standing water. It’s important to address these issues before installing the dehumidifier. Seal any visible cracks or areas of water infiltration, and consider installing a vapor barrier to reduce ground moisture. Research shows that a sealed crawl space can lower indoor humidity levels by up to 20%, boosting overall energy efficiency.
- Choose the Correct Dehumidifier
Select a unit that’s designed specifically for crawl spaces and can handle the cubic footage of the area. For instance, a 70-pint dehumidifier may work for a space up to 1,200 square feet, while larger areas might require a unit with higher capacity. Modern high-capacity systems also boast energy efficiency ratings that can save up to 15% on electricity costs annually compared to older models.
- Prepare the Installation Area
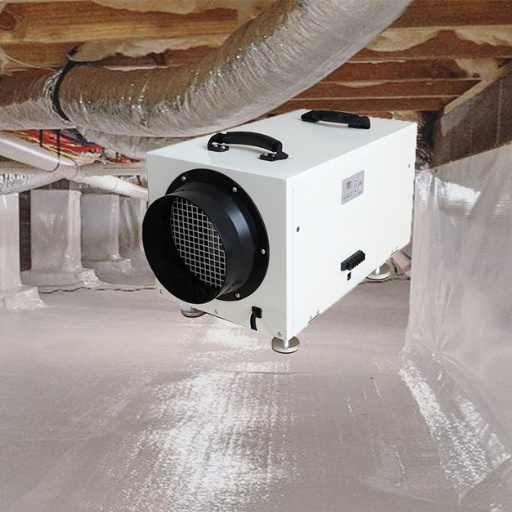
Clear the crawl space of debris and ensure there is an adequate power source and sufficient headroom for the unit. Many experts recommend placing the dehumidifier on a platform to keep it elevated from the ground, providing protection from potential flooding and ensuring better airflow.
- Ensure Proper Drainage
Set up a drainage system for the dehumidifier to dispose of the collected water. Most units come with a hose that can connect to a floor drain, exterior outlet, or even a condensate pump for more complex setups. Regular maintenance of the drainage system is essential as clogged hoses or drains can lead to water backup.
- Install and Secure the Unit
Position the dehumidifier centrally for optimal performance, ensuring it’s placed close to the drainage point. Use straps or brackets, if necessary, to secure the unit in place and prevent it from shifting. A well-positioned unit can reduce humidity levels to the recommended range of 30%-50%, as suggested by industry standards.
- Test the Dehumidifier
Plug in and power up the dehumidifier, then set it to the desired humidity level. Most homeowners aim for 45%, which strikes the balance between comfort and moisture control. Check the unit’s airflow and drainage system, and allow it to run for several hours to ensure proper functionality.
- Monitor Performance and Maintenance
Regularly check the unit’s performance over the following weeks to ensure it’s maintaining the desired humidity levels. Clean or replace air filters every 1-3 months as needed and inspect for signs of wear and tear to prolong the unit’s lifespan. Statistics indicate that well-maintained dehumidifiers can last up to 10 years, providing long-term value.
Common Challenges in Dehumidifier Installation
Installing a dehumidifier can provide significant benefits, but several challenges may arise during the process. One common issue is improper unit sizing. A dehumidifier that is too small for the space may struggle to maintain the desired humidity levels, while an oversized unit might cycle on and off too frequently, leading to energy inefficiency and reduced lifespan. For instance, a room measuring 1,000 square feet in a moderately damp condition would require a unit with a capacity of about 20-30 pints per day.
Another challenge is ensuring proper drainage. Many dehumidifiers rely on gravity to drain water, which necessitates a downward sloping drain line or an accessible floor drain. Improperly installed drainage systems may cause water buildup or leaks that can damage surrounding structures. Using a unit with a built-in pump can help alleviate this issue by actively removing water.
Electrical access can also pose a difficulty, especially in crawl spaces or basements where outlets may be limited. Ensuring that the outlet is grounded and can handle the energy demands of the dehumidifier is crucial to prevent electrical overloads. Additionally, poor placement of the dehumidifier is a frequent obstacle. Units placed too close to walls or furniture may restrict airflow, reducing their efficiency. It’s generally advised to keep the dehumidifier at least 12 inches away from walls or large objects for optimal performance.
Lastly, maintenance is an ongoing challenge. Statistics show that nearly 40% of dehumidifier owners encounter performance issues due to neglected filter cleaning or improper upkeep. Regularly inspecting and cleaning the unit, as well as replacing filters when necessary, can significantly enhance performance and longevity. By recognizing and addressing these common challenges, homeowners can ensure a smooth dehumidifier installation process and maximize the benefits of their investment.
When to Hire a Professional for Crawl Space Dehumidifier Installation
Installing a crawl space dehumidifier can be a complex task, especially if the space presents unique challenges or environmental concerns. Hiring a professional is recommended in several scenarios to ensure optimal performance and avoid costly mistakes.
- Complex Crawl Space Conditions
If your crawl space is particularly prone to high humidity, mold, or structural issues, a professional can assess the area and recommend the most effective dehumidification system. According to industry experts, nearly 60% of improperly installed systems fail to control moisture levels adequately, leading to further damage and reduced air quality. A professional’s expertise ensures proper placement and installation tailored to your specific needs.
- Electrical and Plumbing Requirements
Many crawl space dehumidifiers require dedicated electrical connections and, in some cases, drainage systems to remove water effectively. Improper electrical setups can pose safety hazards, with electrical malfunctions contributing to around 10% of home fire incidents annually. Professional technicians are familiar with electrical codes and can safely integrate your dehumidifier without risk.
- Preventing Warranty Voids
Most manufacturers offer warranties on dehumidifiers, but improper installation by an unqualified individual can void these warranties. Professional installation not only prevents this but also ensures the system is set up for long-term success, preserving your investment.
- Time and Hassle Reduction
DIY installation can be time-consuming and frustrating, particularly for homeowners with limited experience. Professionals have access to tools, training, and experience that streamline the process, saving valuable time and ensuring peace of mind.
- Post-Installation Testing and Calibration
Professionals also provide testing and calibration services after installation, ensuring the dehumidifier performs efficiently. This step is crucial since an uncalibrated system may waste energy or fail to maintain desired humidity levels.
Why is a Dehumidifier for Crawl Space Important?

Excess moisture in a crawl space can lead to serious issues, including mold growth, structural damage, and poor indoor air quality. A dehumidifier controls the humidity levels by removing excess moisture, preventing these problems and protecting your home. Additionally, it helps reduce the risk of pest infestations, as many insects and rodents are attracted to damp environments. Maintaining proper humidity in the crawl space also improves energy efficiency, as it prevents moisture from affecting your home’s insulation and HVAC system.
Impact on Indoor Air Quality
Crawl space humidity plays a significant role in shaping your home’s overall indoor air quality. When moisture levels are high, mold and mildew can thrive, releasing harmful spores into the air that may trigger respiratory issues, allergies, or asthma. According to experts, up to 50% of the air circulating in a home can originate from the crawl space, meaning any toxins present below can easily infiltrate your living areas. Excess humidity can also encourage the growth of dust mites, a leading cause of indoor allergens, further impacting the health of those in the household.
Proper humidity control through the use of dehumidifiers significantly mitigates these issues. For example, studies suggest that maintaining indoor humidity levels between 30% and 50% not only reduces airborne contaminants but also creates an environment less conducive to biological growth. This balance fosters cleaner, healthier air. Improving air quality is crucial, as the Environmental Protection Agency (EPA) notes that poor indoor air quality ranks among the top environmental risks to public health. By regulating moisture levels in your crawl space, you ensure a safer, more comfortable atmosphere for everyone in your home.
Preventing Mold Growth and Water Damage
To prevent mold growth and water damage in my home, I focus on maintaining optimal moisture levels and addressing any water intrusion immediately. I ensure proper ventilation, use a dehumidifier if needed, and routinely inspect areas like the crawl space for signs of leaks or dampness. By acting proactively, I create a healthier environment and protect my home from potential damage.
Improving Overall Home Comfort
To improve overall home comfort, focus on regulating indoor temperature, enhancing air quality, and optimizing lighting. Use a programmable thermostat to maintain consistent temperatures year-round, ensuring energy efficiency and comfort. Incorporate air purifiers to reduce allergens and improve indoor air quality. Maximize natural light during the day and use warm, adjustable lighting in the evening to create a cozy atmosphere. Additionally, ensure that furniture is arranged to promote both space and functionality, making your home inviting and relaxing for everyone.
Reference Sources
-
Crawl Spaces in the Home – Discusses costs and installation issues related to crawl spaces and dehumidifiers.
-
Energy-Efficient Management of Mechanical Ventilation and Relative Humidity in Hot-Humid Climates – Explores scenarios for dehumidifiers in crawl spaces and their cost implications.
-
Moisture Problems in the Home – Covers the effectiveness and costs of dehumidifiers for moisture control in crawl spaces.
-
A Field Study Comparison of the Energy and Moisture Performance Characteristics of Ventilated Versus Sealed Crawl Spaces in the South – Examines the use of dehumidifiers in crawl spaces and their role in moisture management.
-
Sealed Crawl Spaces with Integrated Whole-House Ventilation in a Cold Climate – Discusses the use of dehumidifiers in sealed crawl spaces and associated costs.
Frequently Asked Questions (FAQs)
Q: How much does a crawl space dehumidifier typically cost?
A: The cost of a crawlspace dehumidifier can vary widely depending on the size and capacity needed. On average, a dehumidifier typically costs between $800 and $1,200, but this can increase if you opt for more advanced models or commercial dehumidifiers.
Q: What are the main cost factors when choosing a dehumidifier for a crawl space?
A: Cost factors include the size of the crawlspace, the level of humidity, and whether you choose a basic or whole-house dehumidifier. Additional costs may arise from installation, energy costs, and potential crawl space repair needs.
Q: How do I determine the right dehumidifier for my crawlspace?
A: Choosing the right dehumidifier depends on the size of the crawl space, the extent of moisture issues, and your specific needs. Consulting with an HVAC professional can help ensure you select the best dehumidifier for your situation.
Q: Is it necessary to install a dehumidifier in a crawl space without encapsulation?
A: While it’s not absolutely necessary, installing a dehumidifier in a crawl space without encapsulation can help manage excess moisture and improve air quality, potentially saving money in the long run on repairs and energy costs.
Q: What is the dehumidifier installation cost for a crawl space?
A: Dehumidifier installation cost can range from $300 to $500, depending on the complexity of the installation and any additional crawl space repair that may be needed. It’s advisable to get quotes from multiple professionals to find the best price.
Q: Can installing a dehumidifier help resolve crawl space moisture issues?
A: Yes, a crawlspace dehumidifier can effectively remove moisture and reduce relative humidity levels, helping to prevent mold growth and structural damage.
Q: How does a whole-house dehumidifier compare to a crawl space-specific unit?
A: A whole-house dehumidifier can control humidity throughout your entire home, whereas a crawlspace-specific unit targets moisture in the crawl space. The choice depends on whether you need localized or entire-home humidity control.
Q: What are the operating costs of running a dehumidifier in a crawl space?
A: Operating costs vary based on the dehumidifier’s energy efficiency, usage time, and local energy rates. Generally, they can add $10 to $30 per month to your energy bill, but energy-efficient models can help reduce this cost.
Q: How can a dehumidifier help dry your crawl space?
A: A dehumidifier works by drawing in humid air and removing excess moisture, lowering the relative humidity of the crawl space. This process helps to dry your crawl space and maintain a healthy environment.