Installing a crawl space dehumidifier can be a game-changer for maintaining a healthy and energy-efficient home, but navigating the costs associated with this upgrade can feel overwhelming. From equipment prices to professional installation fees, many factors influence the overall investment required for this essential addition. This blog post breaks down the true cost of crawl space dehumidifier installation, equipping you with the knowledge to make informed decisions. Whether you’re tackling issues like mold, humidity, or structural integrity, understanding the financial commitment involved is key.
What Factors Influence the Cost of a Crawl Space Dehumidifier?
Several key factors influence the cost of a crawl space dehumidifier:
- Unit Capacity and Features: Higher-capacity dehumidifiers designed to handle larger spaces or severe humidity issues typically cost more. Additional features, such as built-in pumps, digital controls, or energy-efficient designs, also increase the price.
- Installation Requirements: The cost of installation varies depending on the complexity of your crawl space setup. Factors like accessibility, existing drainage systems, and the need for electrical work can significantly impact the expense.
- Brand and Quality: Reputable brands with proven performance and durability often come with a higher price tag. However, these models may offer better efficiency and longer lifespans, making them a worthwhile investment.
- Climate and Moisture Levels: If you live in a humid region or your crawl space has persistent moisture problems, you might need a more robust and specialized dehumidifier, which can cost more upfront.
- Maintenance and Accessories: Consider the ongoing costs of replacement filters, servicing, and any additional components like drainage hoses or waterproofing measures required to optimize the system’s performance.
Understanding these factors can help you budget effectively and choose the best solution for your home’s needs.
How Does the Type of Dehumidifier Affect Price?
The type of dehumidifier you choose plays a significant role in determining its price, as different models are designed to meet varying needs and performance levels. Here is a breakdown of common dehumidifier types and their average costs:
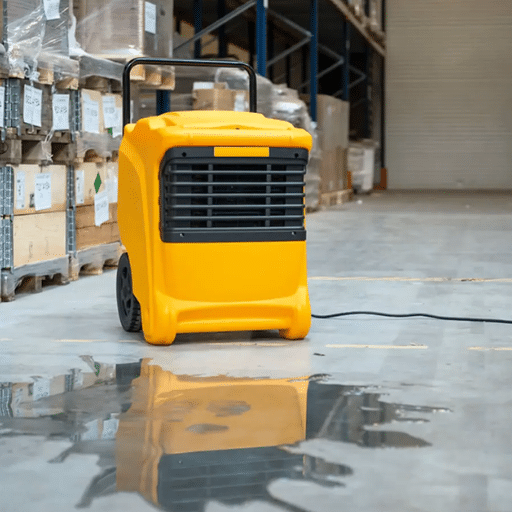
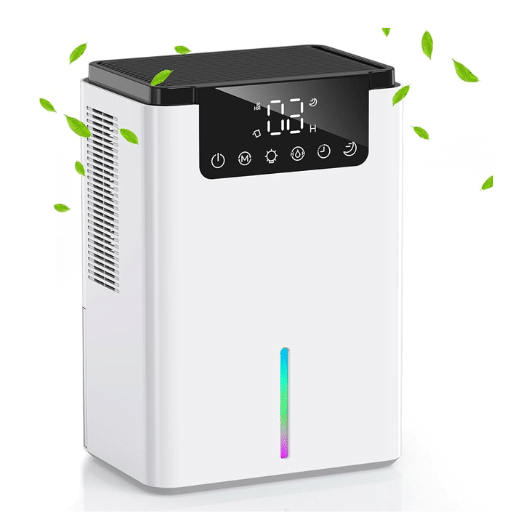
- Small Portable Dehumidifiers: These compact units are ideal for smaller spaces such as bathrooms or closets. They typically cost between $40 and $100. While affordable, they often have a lower capacity, usually handling 25-30 pints of moisture per day, making them suitable for less demanding environments.
- Medium-Capacity Dehumidifiers: Ranging from $150 to $250, these models are designed for medium-sized spaces like bedrooms or basements. They usually manage between 30 and 50 pints of moisture daily and often come with convenient features like adjustable humidistats and continuous drain options.
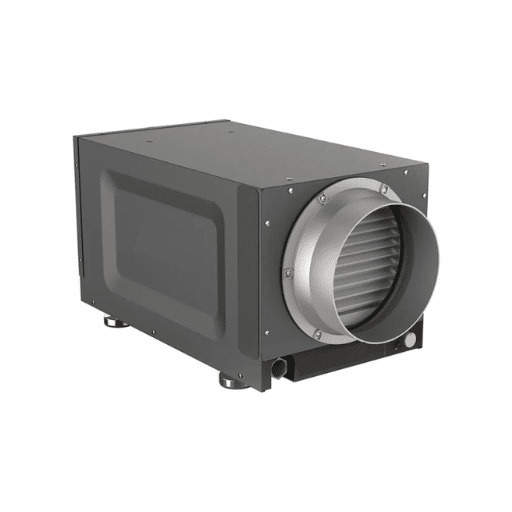
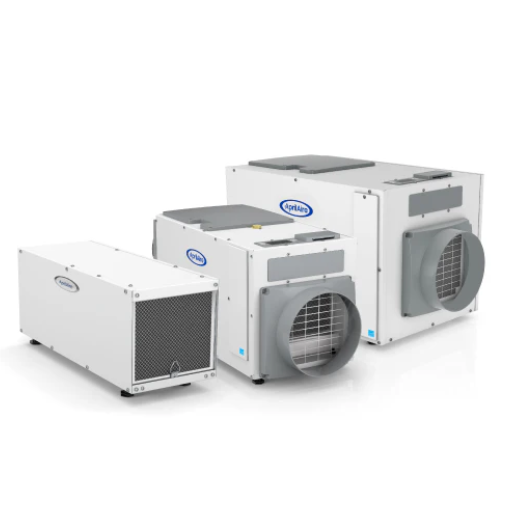
- High-Capacity or Whole-House Dehumidifiers: Built for large spaces or entire homes, these units offer the highest moisture removal rates, typically exceeding 70 pints per day. Their price reflects their robust performance, often between $500 and $1,500. Whole-house options offer the added benefit of being integrated into HVAC systems for seamless operation.
- Desiccant Dehumidifiers: Using a chemical adsorption process, these dehumidifiers excel in low-temperature conditions, making them a popular choice for garages, crawlspaces, or colder climates. Prices typically range from $200 to $500, depending on capacity and additional features.
- Energy-Efficient Models: Although initially more expensive, starting at around $200 and reaching up to $1,000 for advanced models, these dehumidifiers save money in the long run due to reduced energy consumption. They often carry ENERGY STAR certifications, guaranteeing optimal performance with lower utility costs.
The cost of a dehumidifier is influenced not just by its type but also by extra features, energy efficiency, and brand reputation. Carefully consider your home’s specific needs and compare these factors to find a balance between upfront investment and long-term value.
What Role Does Installation Play in Overall Costs?
Installation is a crucial component when evaluating the total cost of a dehumidifier, as it can significantly impact both initial budgeting and long-term efficiency. For portable models, the installation costs are minimal or nonexistent, as these units are generally plug-and-play. However, for whole-house or built-in systems, professional installation is often required, and costs can range between $500 and $2,000 depending on the system’s complexity, location, and labor rates in your area.
Proper installation of a whole-house dehumidifier ensures optimal performance, preventing issues such as air leaks or improper drainage, which can lead to increased operating costs or potential repairs. Additionally, the placement of the dehumidifier plays a key role in its effectiveness. For instance, improper positioning could result in uneven humidity levels, forcing the device to work harder and consume more energy. Professional installers can provide expertise in determining the ideal setup for maximum efficiency.
Investing in professional installation might seem costly upfront, but it can enhance system longevity while improving energy efficiency and moisture control, translating to lower utility bills over time. Make sure to seek quotes and feedback from licensed professionals to find a balance between quality and cost.
Are Energy Star Models Worth the Investment?
Energy Star models are known for their exceptional energy efficiency, which translates into significant cost savings and environmental benefits. According to the U.S. Environmental Protection Agency (EPA), Energy Star-certified appliances use 10-50% less energy than standard models, depending on the type of appliance. For instance, Energy Star refrigerators consume about 15% less energy, while certified dishwashers use an average of 12% less energy and 30% less water.
The initial cost of purchasing an Energy Star model might be higher compared to a standard model, but the long-term savings on utility bills often outweigh the upfront expense. For example, an Energy Star-certified water heater can save an average household around $300 annually on energy costs. Over the lifespan of the appliance, these savings can add up significantly, making it a financially wise choice.
Additionally, by reducing energy consumption, these models contribute to a lower carbon footprint. For perspective, replacing an old, inefficient appliance with an Energy Star model can prevent approximately 800 pounds of greenhouse gas emissions annually. Many Energy Star products also offer advanced features, such as smart technology integration, further enhancing user convenience and energy management.
Ultimately, investing in Energy Star models not only supports a greener environment but also delivers tangible financial benefits in the long term. Evaluating factors like energy savings, durability, and available rebates can help determine the best fit for your home and budget.
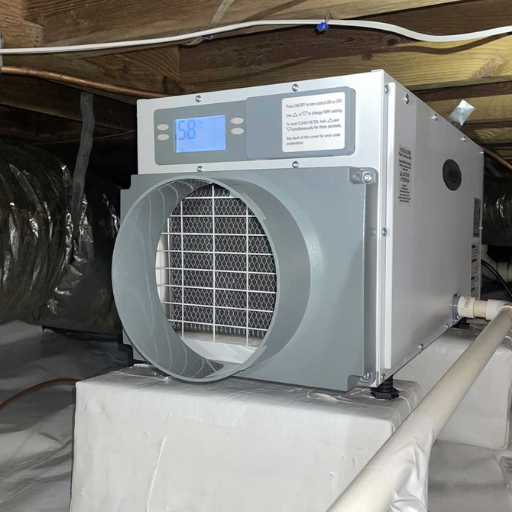
How to Install a Crawl Space Dehumidifier Effectively?
- Choose the Right Location
Select a flat, level area in the crawl space with adequate airflow. Ensure the location is easily accessible for maintenance and away from any standing water.
- Prepare the Area
Clear debris and inspect the space for any signs of leaks or drainage issues. Address these problems before proceeding to avoid interfering with the dehumidifier’s performance.
- Position the Dehumidifier
Place the dehumidifier in the chosen spot, ensuring it’s centered to maximize air circulation. Follow the manufacturer’s guidelines to maintain the recommended clearance around the device.
- Install the Drainage System
Connect the drainage hose securely to the dehumidifier and run it to a sump pump, floor drain, or out of the crawl space as specified by the manufacturer. This ensures proper removal of collected water.
- Power the Dehumidifier
Plug the dehumidifier into a properly grounded outlet. Ensure the electrical circuit can handle the unit’s power requirements and use a GFCI outlet for safety.
- Set Humidity Levels
Adjust the humidity settings based on recommendations, typically around 50%, to maintain a dry and efficient crawl space environment.
- Test the Unit
Turn on the dehumidifier and monitor its operation for proper drainage and airflow. Check for any unusual noises or issues, and confirm it’s maintaining the desired humidity level.
Maintaining your crawl space dehumidifier regularly by cleaning filters and checking for blockages will ensure it continues operating effectively.
What Are the Steps to Install a Dehumidifier?
Installing a dehumidifier in your crawl space is a straightforward process when approached methodically. Here’s a comprehensive step-by-step guide to ensure an efficient setup:
- Evaluate the Space
Measure the size of your crawl space and assess the level of humidity present. Use a hygrometer to check the current humidity levels—ideally, you want to maintain a range of 30% to 50% for optimal air quality. Additionally, inspect for existing moisture problems, such as leaks or standing water, which must be resolved before installation.
- Choose the Right Dehumidifier
Select a dehumidifier designed specifically for crawl spaces. These units are typically compact yet powerful enough to handle lower clearances and challenging conditions. Pay attention to the capacity of the unit, specified in pints per day (PPD), and ensure it matches the needs of your space size and moisture levels. For example, a 70 PPD unit is suitable for spaces up to 2,500 square feet in moderately damp conditions.
- Prepare the Crawl Space
Clean the area thoroughly by removing debris, dirt, or mold. If needed, add a vapor barrier across the floor to minimize ground moisture. Proper sealing and insulating the crawl space can significantly enhance the dehumidifier’s performance, reducing strain on the unit.
- Determine Placement
Position the dehumidifier centrally in the crawl space if possible for even airflow and moisture reduction. Ensure it is elevated off the ground using a stand or blocks to protect it from potential water accumulation. Keep at least 12 inches of clearance around the unit for proper circulation and maintenance access.
- Install Drainage
Attach a drainage hose to the unit to direct the condensed water to a proper outlet, such as a sump pump, drainage system, or outside through a downhill slope. Verify that the hose is secure and free from obstructions to prevent clogs or backflow.
- Secure Electrical Connections
Confirm the power requirements of your dehumidifier and choose an outlet that meets those needs (usually a 15-amp circuit). For added safety, use a Ground Fault Circuit Interrupter (GFCI) outlet to minimize electrical risks in damp environments.
- Test and Adjust the Unit
Turn on the dehumidifier and set it to the desired humidity level, typically around 50%. Monitor its initial operation by checking airflow, drainage functionality, and noise levels. Make any necessary adjustments to optimize performance.
- Schedule Regular Maintenance
To keep your dehumidifier running efficiently, clean its filters every few months or as recommended by the manufacturer. Also, periodically check the drainage hose for blockages and inspect for any signs of wear or malfunction.
How Can Drainage Systems Be Properly Set Up?
Properly setting up a drainage system is crucial to prevent water buildup and protect your home’s foundation. Start by assessing the slope of the ground around your home; a minimum slope of 1 inch per foot for at least 6 feet away from the foundation is typically recommended to direct water effectively. Use gutters and downspouts to channel roof runoff, ensuring downspouts extend at least 4-6 feet away from the structure. French drains or perforated pipe systems can be integrated to address areas prone to pooling water, efficiently redirecting it to a lower area or a safe discharge point.
Installing a sump pump within a basement or crawl space is another effective solution for managing water that accumulates below-ground. Modern sump pumps often include battery backup systems to remain operational during power outages, delivering added reliability. For larger properties or areas with heavy rainfall, it’s essential to calculate expected runoff using precipitation data and soil absorption rates. This helps determine the capacity and size of the drainage system required to handle peak flows.
By combining these strategies, supported by accurate site assessments and proper planning, you can create a drainage system that minimizes water damage and ensures long-term structural integrity.
Should You Consider Professional Installation?
While it is possible to design and install a drainage system yourself, enlisting professional help can offer numerous advantages, especially for complex or large-scale projects. Professionals bring expertise in assessing site-specific factors, such as soil composition, slope gradients, and local climate patterns, ensuring that the system is tailored to handle even the most challenging conditions effectively.
According to recent industry data, poor drainage is a leading cause of foundation damage, with repair costs averaging between $5,000 and $15,000, depending on the severity of the issue. Properly installed drainage systems can mitigate these risks by directing water away from critical areas, potentially saving homeowners significant repair expenses over the long term.
Professional installers also have access to advanced tools and materials that ensure the durability and efficiency of drainage systems. For example, they can recommend high-quality perforated pipes, select appropriate gravel sizes for optimal filtration, or design French drains with suitable slopes to prevent clogs. Furthermore, professional installation often includes warranties or maintenance services, offering peace of mind for homeowners.
If your property is prone to heavy rainfall, flash flooding, or is located on uneven terrain, consulting with a drainage expert can be a wise investment. Their ability to create a custom solution tailored to your specific requirements ensures that your property is protected against water-related damage for years to come.
Is Encapsulation Necessary for a Crawl Space?
Encapsulation is often a necessary step for protecting and maintaining a crawl space. It helps to prevent moisture buildup, which can lead to mold growth, wood rot, and structural damage. Encapsulation involves sealing the crawl space with a durable vapor barrier, creating a controlled environment that reduces the risk of water damage and improves energy efficiency. Properties located in damp or humid regions can particularly benefit from this process. By keeping moisture out, encapsulation safeguards your home’s foundation and enhances indoor air quality, making it a practical investment for long-term protection.
What Are the Benefits of Crawl Space Encapsulation?
Crawl space encapsulation provides numerous advantages that enhance the safety, durability, and efficiency of your home. By addressing underlying moisture issues, this process offers both immediate and long-term benefits. Here is a detailed list of the key advantages:
- Moisture Control
Encapsulation effectively prevents moisture from seeping into your crawl space, reducing the risk of mold, mildew, and wood rot. Studies indicate that homes in humid climates can see up to a 60% decrease in crawl space humidity after encapsulation.
- Improved Indoor Air Quality
Since air from the crawl space often rises into the living areas, sealing it off minimizes the transfer of allergens, pollutants, and musty odors into your home, creating a healthier indoor environment.
- Energy Efficiency
By creating a controlled environment, encapsulation reduces energy loss. It can cut heating and cooling costs by up to 20%, making your home more energy-efficient and environmentally friendly.
- Structural Protection
Excess moisture can compromise your home’s structural integrity over time. Encapsulation safeguards the foundation and prevents costly repairs by addressing this issue proactively.
- Pest Prevention
Sealing the crawl space creates a barrier that deters pests like rodents and insects from entering this area, protecting your home from potential infestations.
- Enhanced Home Value
Homes with encapsulated crawl spaces are perceived as better maintained and can command higher resale values due to their improved structural integrity and energy efficiency.
- Year-Round Comfort
Encapsulation helps maintain more consistent temperatures in your home, which can make living spaces above the crawl space feel more comfortable throughout the year.
- Storage Optimization
A clean, dry crawl space can serve as a safe additional storage area, giving homeowners more usable space.
By addressing moisture and air quality challenges, crawl space encapsulation is a practical solution that ensures your home remains safe, energy-efficient, and comfortable for years to come.
How Does Encapsulation Affect Humidity Levels?
Crawl space encapsulation is an effective method to significantly reduce humidity levels within your home. By sealing off the crawl space with vapor barriers and other materials, moisture from the ground and external air is prevented from entering the area. Studies show that encapsulation can lower humidity levels in crawl spaces to below 60%, which is the threshold for preventing mold growth and reducing pest activity.
One key factor in humidity control is the installation of a dedicated dehumidifier within the encapsulated crawl space. This device works to actively manage any residual moisture, ensuring the space remains dry and stable. Proper encapsulation not only protects the structural integrity of your home by reducing excess moisture but also helps improve air quality throughout the house. Additionally, homes with lower indoor humidity levels tend to retain more consistent temperatures, enhancing energy efficiency and lowering utility costs. By addressing humidity at its source, encapsulation is a dynamic solution that promotes a healthier living environment.
What Are the Best Practices for Maintaining a Crawl Space Dehumidifier?
To maintain a crawl space dehumidifier effectively, follow these best practices:
- Clean the Filter Regularly: Check and clean the dehumidifier’s air filter every one to two months to ensure optimal airflow and performance. Replace it if it shows signs of wear or damage.
- Inspect for Blockages: Ensure that the drain hose or water reservoir is clear of blockages to prevent water overflow or improper drainage.
- Keep It Free of Debris: Dust and debris can accumulate on the dehumidifier’s coils and components. Gently wipe them down to keep the unit functioning efficiently.
- Monitor Humidity Levels: Use a hygrometer to track humidity in the crawl space, ensuring the dehumidifier is set to maintain ideal levels (usually 30–50%). Adjust settings if needed.
- Perform Routine Maintenance: Periodically check for any unusual noises, leaks, or malfunctions. Arrange for professional servicing if the unit requires repairs.
- Ensure Proper Placement: Keep the dehumidifier on a stable, level surface with adequate clearance around it for ventilation.
How Often Should You Check Moisture Levels?
I recommend checking the moisture levels in your crawl space at least once a month. Regular monitoring helps you identify any changes early, allowing you to address potential issues like rising humidity or water intrusion before they lead to more significant problems. If you’ve recently installed a dehumidifier or made structural changes, you might want to check more frequently until conditions stabilize.
What Maintenance Steps Help Prevent Mold Growth?
- Control Humidity Levels
Use a high-quality dehumidifier to maintain indoor humidity levels below 60%. Studies show that mold thrives in environments with humidity levels above 60%, so keeping it below this threshold significantly reduces the risk of growth.
- Seal Cracks and Openings
Inspect your crawl space for any cracks, gaps, or openings that allow moisture to seep in. Use caulking or heavy-duty sealants to close these potential entry points. Proper sealing can decrease moisture infiltration by up to 50%.
- Install a Vapor Barrier
Lining the floor and walls of your crawl space with a durable vapor barrier prevents moisture from the ground from entering the area. Choose a polyethylene barrier with a thickness of at least 6 mils for effective protection.
- Ensure Proper Ventilation
Good airflow is vital for preventing stagnant air, which can foster mold. Ensure your crawl space vents are unobstructed and consider installing mechanical ventilation if necessary.
- Fix Plumbing Leaks Promptly
Check for signs of leaking pipes or drainage issues in or around your crawl space. Repairing these issues quickly minimizes excess moisture and prevents conditions favorable for mold.
- Regularly Clean and Inspect the Area
Debris in your crawl space can trap moisture, creating an ideal environment for mold. Conduct regular cleaning to remove organic materials, and inspect for any signs of water damage or mold development.
- Grade the Landscape Around Your Home
Properly sloping the ground around your home helps direct rainwater away from the foundation. A grade of at least 5% slope (6 inches of drop for every 10 feet) is recommended to prevent water pooling near your crawl space.
- Install a Sump Pump if Necessary
If your crawl space is prone to flooding or chronic moisture buildup, a sump pump can be an efficient solution to keep water levels under control. Test the pump periodically to ensure it functions correctly.
- Use Mold-Resistant Insulation
Replace standard insulation with mold-resistant alternatives like closed-cell spray foam. This material not only prevents moisture buildup but also reduces thermal bridging, improving efficiency.
- Monitor for Signs of Mold
Stay vigilant for signs such as musty odors, discoloration on surfaces, or visible mold patches. Early detection allows you to address the issue before it becomes widespread.
When to Replace or Upgrade Your Dehumidifier?
A dehumidifier plays a crucial role in maintaining optimal indoor air quality and protecting your home from excess moisture. However, like any appliance, it has a finite lifespan and may require replacement or an upgrade. Here’s how to determine if it’s time for a change.
- Your Current Unit is Over 5-10 Years Old
Most dehumidifiers are designed to last between 5 to 10 years, depending on the brand, model, and maintenance routine. If your unit is within or beyond this range, it may no longer operate at peak efficiency. Newer models are often equipped with advanced technology that provides better energy efficiency and performance.
- Rising Energy Bills
Older dehumidifiers tend to consume more power as their components wear out. If you notice a steady increase in your energy bills despite similar usage, this could indicate your unit is working harder than it should. Upgrading to an Energy Star-rated model can save up to 15% in energy consumption, reducing costs over time.
- Reduced Performance
If your dehumidifier struggles to maintain humidity levels or takes much longer to remove moisture, it might not have the capacity to handle its job anymore. For reference, modern residential dehumidifiers should ideally remove 20-50 pints of moisture per day, depending on the room size and humidity level.
- Frequent Repairs
Recurrent breakdowns or costly repairs are clear signs that it’s time to invest in a replacement. Spending heavily on repairs for an aging unit may not be as cost-effective as purchasing a reliable, updated model.
- Introduction of Smart Features
Modern dehumidifiers offer innovative features, such as Wi-Fi connectivity, programmable timers, and automatic humidity sensors, significantly enhancing convenience and efficiency. If your older unit lacks these functionalities, an upgrade can simplify the process of maintaining your home’s air quality.
- Unpleasant Odors or Noise
Older dehumidifiers that emit unpleasant smells or excessive noise may have internal issues, such as clogged filters, mold growth, or worn-out components. Such problems not only impact performance but can also compromise indoor air quality.
By recognizing these indicators, you can make an informed decision about replacing or upgrading your dehumidifier. Investing in a new model ensures better moisture control, lowers energy consumption, and aligns with modern technology standards to enhance your indoor environment.
What Are the Alternatives to a Whole-House Dehumidifier?
If a whole-house dehumidifier is not ideal for your needs, several alternatives can effectively manage moisture levels:
- Portable Dehumidifiers – These are versatile, standalone units designed for single rooms or smaller areas. They are easy to move and relatively lower in cost compared to whole-house models.
- Exhaust Fans – Installing exhaust fans in areas prone to moisture, such as bathrooms and kitchens, helps reduce humidity and prevent condensation.
- Air Conditioners – Many air conditioning systems naturally remove some humidity while cooling your home, making them a dual-purpose option for moderate climates.
- Moisture Absorbers – Small-scale solutions like silica gel packs or moisture-absorbing crystals work well for confined spaces such as closets or storage areas.
- Improved Ventilation – Simple measures such as opening windows or using ventilation systems can help circulate air and keep humidity levels in check.
Each option caters to specific needs and spaces, making it easy to choose the right solution for your environment.
Are Basement Dehumidifiers More Cost-Effective?
Basement dehumidifiers are often considered a cost-effective solution for managing excess moisture, but their efficiency depends on various factors such as energy consumption, capacity, and operating conditions. Modern dehumidifiers are equipped with energy-efficient technologies, such as programmable humidistats and auto-shutoff features, which reduce overall electricity usage. For instance, a standard 50-pint Energy Star-certified dehumidifier consumes approximately 500-600 watts per hour, costing around $0.06 to $0.10 per hour, depending on local electricity rates. This makes it a practical choice for long-term usage when combating persistent humidity in basements.
Additionally, these devices can protect your home from costly damage caused by mold, mildew, and structural deterioration that high humidity often triggers. By maintaining optimal humidity levels (generally between 30% and 50%), dehumidifiers help preserve furniture, electronics, and stored items in damp environments. While the upfront cost of purchasing a high-quality dehumidifier ranges from $150 to $300, the potential savings on repair and maintenance expenses can significantly outweigh this initial investment. Considering their durability, many of these units last years with proper maintenance, enhancing their cost-effectiveness over time.
However, the efficiency of basement dehumidifiers also relies on factors like basement size and insulation. A poorly insulated or excessively large basement may require higher-capacity units, driving up energy expenses. Pairing a dehumidifier with other moisture control methods, such as improved ventilation or sealing cracks, can optimize its performance and provide further cost savings. Overall, basement dehumidifiers are an economical option for maintaining a healthy and moisture-free environment when used strategically.
How Does a Whole-House System Compare?
A whole-house dehumidifier provides comprehensive humidity control across an entire home, making it a more expansive solution compared to a single-area unit like a basement dehumidifier. These systems are directly integrated into the HVAC system, enabling them to manage humidity levels consistently in all rooms at the same time. Whole-house units typically handle larger moisture loads, with many models capable of removing up to 90-130 pints of water per day, depending on the system’s specifications and home size.
One clear advantage of a whole-house system is efficiency and convenience. Unlike portable or single-room units, these systems automatically adjust to your home’s specific humidity requirements while operating quietly in the background. Additionally, they support air quality by reducing dampness, which helps prevent allergens like mold and dust mites from thriving.
While the upfront cost for a whole-house dehumidifier is higher—generally ranging between $1,000 and $3,000, including installation—many homeowners find that the long-term energy savings and benefits to overall comfort justify the investment. Furthermore, these systems can extend the lifespan of your HVAC system by reducing the strain caused by excessive humidity. Comprehensive studies have shown that maintaining ideal indoor humidity levels (typically between 30-50%) significantly impacts energy efficiency and promotes healthier living conditions.
When comparing a whole-house system to a portable or basement unit, homeowners should consider factors such as home size, existing HVAC infrastructure, and indoor air quality needs. A whole-house system is particularly beneficial for areas with high year-round humidity or for those seeking a low-maintenance, all-in-one solution for their homes.
Reference Sources
-
University of Minnesota Extension – Moisture in Basements: Causes and Solutions – Provides insights into moisture problems, solutions, and the role of dehumidifiers in managing basement and crawl space humidity.
-
Federal Highway Administration (FHWA) – Vehicle Types – While not directly about dehumidifiers, this source offers a structured approach to technical classifications, which can be useful for understanding equipment categorization.
-
Midwest Technical Institute – CDL Class A and CDL Class B Defined – Though focused on CDL classifications, it provides a framework for understanding technical specifications and operational requirements.
Frequently Asked Questions (FAQs)
Q: What is the average crawl space dehumidifier cost?
A: The average crawl space dehumidifier cost can range from $1,000 to $2,500, depending on the model and features. High-end models with advanced dehumidification capabilities may cost more. It’s important to consider the crawl space size and specific moisture issues when selecting a dehumidifier for crawl space.
Q: What factors affect the dehumidifier installation cost?
A: Several factors can affect the dehumidifier installation cost, including the crawl space size, the complexity of your crawlspace, the type of dehumidifier chosen, and any additional crawl space repair work needed. Professional installation might also influence the overall cost.
Q: Why is dehumidification important in a crawl space?
A: Dehumidification is essential in a crawl space to maintain a healthy relative humidity level, prevent mold and mildew growth, and protect the structural integrity of your home. A dehumidifier in a crawl space can help manage moisture levels effectively.
Q: How do I choose the best crawl space dehumidifier?
A: To choose the best crawl space dehumidifier, consider factors such as the capacity (measured in pints), energy efficiency, noise level, and whether it includes features like a pump for condensate removal. The best crawl space dehumidifier should match your specific needs and the size of your crawl space.
Q: Can I install a dehumidifier myself, or do I need a professional?
A: While some homeowners may opt for DIY installation of a dehumidifier for crawl space, it is often recommended to hire a professional. This ensures correct installation, optimal performance, and reduces the risk of potential issues. Professional installation can also address any existing crawl space repair needs.
Q: How often should a dehumidifier in a crawl space be serviced?
A: A dehumidifier in a crawl space should be serviced at least once a year to ensure it operates efficiently. Regular maintenance includes cleaning filters, checking for any blockages in the condensate drainage, and verifying that the unit is functioning correctly.
Q: What is the impact of crawl space size on dehumidifier performance?
A: The size of your crawl space has a significant impact on dehumidifier performance. A larger crawl space will require a more powerful dehumidifier with a higher capacity to effectively manage moisture levels and maintain proper relative humidity.
Q: Are there energy-efficient options for crawl space dehumidifiers?
A: Yes, there are energy-efficient options for crawl space dehumidifiers available. These models are designed to consume less energy while providing effective dehumidification. Look for units with Energy Star ratings to ensure energy-efficient performance.
Q: What should I do if my dehumidifier won’t operate properly?
A: If your dehumidifier won’t operate properly, check for common issues such as power supply problems, blocked condensate drains, or a full water collection tank. If these are not the cause, it may be necessary to contact a professional for repair or servicing.