Crawl spaces, although they are often neglected, are very important for the home in terms of health and stability. Excess moisture, however, is one of the things that these places are most prone to, which in turn can cause a number of problems like mold growth, damage to the structure, and poor air quality indoors. The installation of a dehumidifier is considered one of the most potent remedies for humidity issues in your crawl space, thus safeguarding your property and the health of your family.
This ultimate guide has been prepared in a very detailed manner to give you a step-by-step process through the essential stages and considerations related to crawl space dehumidifier installation. Whether you’re a DIY homeowner or a professional seeking best practices, this guide will ensure you’re well-prepared to tackle the challenge with full assurance.
Ready to Transform Your Crawl Space?
With the comprehensive knowledge provided in this ultimate guide, you’re now well-equipped to tackle crawl space humidity issues with confidence. From understanding the importance of moisture control to selecting the right dehumidifier and implementing proper installation techniques, you have all the tools needed to protect your home’s structural integrity and create a healthier living environment.
💡 Remember: Regular maintenance, proper encapsulation, and professional help when needed will ensure your crawl space dehumidifier system operates at peak efficiency for years to come. Invest in your home’s health today for long-term peace of mind and substantial cost savings.
🎯 Key Takeaways
- Humidity Control is Critical: Maintain 30-50% relative humidity to prevent mold growth and structural damage
- Choose the Right Equipment: Select dehumidifiers based on crawl space size (70-90 pints/day for areas up to 2,500 sq. ft.)
- Proper Installation Matters: Follow step-by-step processes including vapor barriers, drainage systems, and electrical requirements
- Encapsulation Enhances Results: Combine dehumidification with encapsulation for 15-25% energy cost reduction
- Regular Maintenance Extends Life: Clean filters every 14 days, inspect coils quarterly, and check drainage monthly
- Know When to Call Professionals: Complex electrical issues, refrigerant leaks, and persistent problems require expert help
; margin-bottom: 25px; font-size: 2.2em;”>Understanding Crawl Space and Humidity
By nature, crawl spaces are points where humidity gathers easily. This is mainly due to factors like poor ventilation, being very close to the ground, and frequently being subject to moisture. The environment created by rising humidity levels is highly conducive to the development of mold, wood decay, and pest activity, all of which lead to the weakening of the house’s structure.
What is a Crawl Space?
A crawl space is a low area placed under a house or a building, usually located between the earth and the first story of the building. It serves as a space to place the whole structure higher above the ground and to provide a space for essential utilities.
Key Functions:
- Elevation: Raises structure above ground level
- Utility Access: Houses plumbing, electricity, HVAC ducts
- Air Circulation: Promotes airflow under the house
- Maintenance Space: Allows technicians to perform repairs
📏 Height Range: Typically varies from 1 to 4 feet – enough for service access but not standing room
Importance of Humidity Control
Humidity control is an essential factor in the preservation of structural integrity, indoor air quality, and energy efficiency of a building. High levels of moisture in crawl spaces can hasten the growth of mold and mildew, which in turn can affect occupants by emitting allergens and toxins into the air.
🔍 Recent Trends: Google search data reveals a notable increase in homeowners searching for “how to prevent mold in crawl spaces” and “moisture prevention techniques,” indicating growing awareness of humidity-related problems and the need for effective solutions.
Advanced Humidity Control Strategies:
- Energy-efficient dehumidifiers with smart monitoring systems
- Regular inspections and maintenance schedules
- High-quality insulation and sealing techniques
- Comprehensive moisture barrier installation
Common Issues in Crawl Spaces

💧 Excess Moisture Accumulation
Crawl spaces lacking proper ventilation or insufficient sealing can have relative humidity more than 70%, creating perfect conditions for mold and wood decay to thrive.
🦠 Mold and Mildew Growth
Research shows that almost 50% of homes with unsealed crawl spaces report mold presence, which can spread to other areas and impact indoor air quality.
🐛 Pest Infestations
The dark and damp nature of crawl spaces attracts pests like termites and rodents. Termite damage alone costs U.S. homeowners about $5 billion annually.
🏚️ Structural Deterioration
Water intrusion and rising dampness contribute to weakening of foundation walls and support beams, with rotting wood and corroding metal compromising structural integrity.
❄️ Insufficient Insulation
Poorly insulated crawl spaces cause heat loss and increased energy consumption. Homes can see energy bills increase by up to 20% without proper insulation.
Benefits of Using a Dehumidifier in Your Crawl Space
Using a dehumidifier in your crawl space provides numerous advantages that not only improve your home’s efficiency but also its lifespan. It controls humidity to prevent mold and wood rot, keeps the air clean, reduces allergens and musty smells, and lowers energy usage by making heating and cooling more effective.
🛡️ Preventing Mold Growth
Optimal Humidity Levels
The U.S. Environmental Protection Agency (EPA) states that the best suited indoor relative humidity level for preventing mold growth is between 30% and 50%. Mold thrives in environments where humidity exceeds 60%.
Quick Action Prevention
The Centers for Disease Control and Prevention (CDC) reports that if water damage is dealt with within 24 to 48 hours, the probability of mold growth is greatly reduced.
Essential Ventilation
Proper ventilation using exhaust fans, air exchangers, and proper insulation with vapor barriers prevents moisture intrusion and condensation.
🏠 Protecting Your Home’s Structure
The most tangible way of securing your home’s structure is by addressing common weaknesses like moisture intrusion and long-term wear.
| Preventive Measure | Benefit |
|---|---|
| Foundation Inspection | Regular checks for cracks or settlement signs prevent extensive damage |
| Gutter Maintenance | Proper drainage minimizes ground erosion and basement flooding |
| Wood Treatment | Sealants and preservatives prevent rot and termite damage |
| Vent Protection | Screens or mesh keep pests out while maintaining airflow |
🌬️ Improving Indoor Air Quality
Growing Concern: Google search trends show increasing interest in indoor air quality, with “best air purifiers 2023” and “HEPA filter benefits” searches rising 30% in the last year.
Effective Air Quality Solutions:
- True HEPA Filters: Capture up to 99.97% of particles as small as 0.3 microns, including pollen, dust mites, and bacteria
- Humidity Control: Dehumidifiers and proper ventilation prevent mold and mildew growth
- Indoor Plants: Spider plants, peace lilies, and snake plants help detoxify the environment
- Integrated Systems: Combination of filtration, humidity control, and green design creates healthier spaces
Crawl Space Dehumidifier Installation Process
📋 Step-by-Step Installation Overview
Step 1: Assessment of Crawl Space Conditions
Prior to installation, conduct a thorough inspection of the crawl space. Measure current humidity levels with a hygrometer – the ideal target is 30%-50% relative humidity according to EPA guidelines. Address all moisture problems and mold issues before installing the dehumidifier.
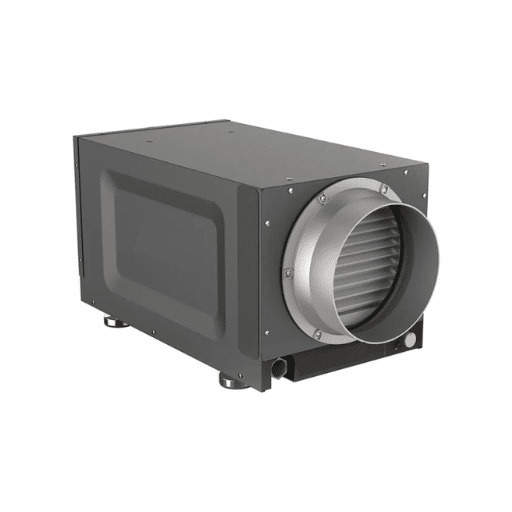
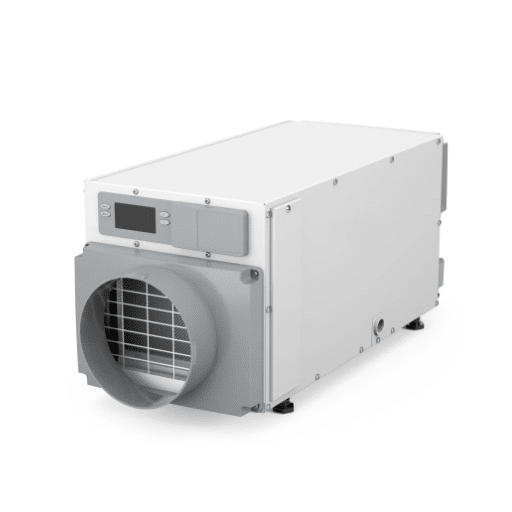
Step 2: Selection of the Appropriate Dehumidifier
Consider the size and volume of the area when choosing a dehumidifier made for crawl spaces. For areas up to 2,500 sq. ft. floor space, modular dehumidifiers with 70-90 pints per day capability are suitable. Advanced models feature energy-efficient built-in hygrometers.
Step 3: Preparation of the Installation Area
Seal the crawl space properly to maximize dehumidifier efficiency. Install a vapor barrier with minimum 6-mil polyethylene thickness, covering both ground and walls to prevent moisture from soil and outside air.
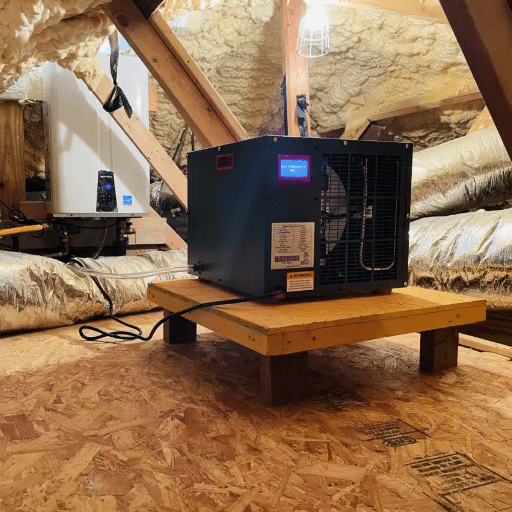
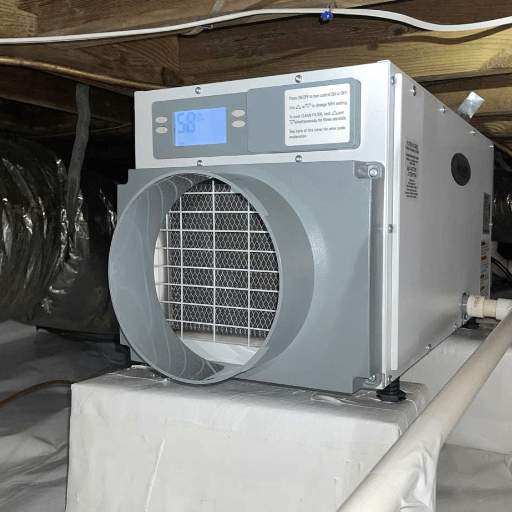
Step 4: Placement of the Dehumidifier
Position the dehumidifier in a central, elevated spot for optimal airflow. Use a level platform or concrete blocks to lift the unit at least 4-6 inches above ground to protect from water pooling. Ensure adequate space around the unit for unobstructed airflow.
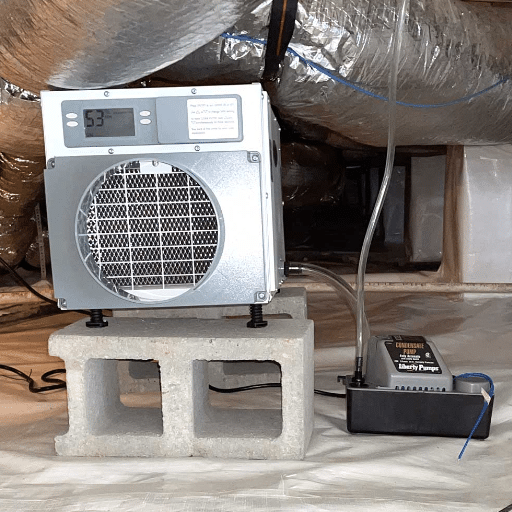
Step 5: Drainage System Setup
Connect an external drainage system for continuous water removal. Use a flexible drain hose routed to a floor drain, sump pump, or outside discharge point. For areas without gravity drainage, consider models with integrated pumps.
Step 6: Electrical Requirements
Dehumidifiers typically require a standard 120V outlet. If necessary, hire a qualified electrician to install a dedicated circuit to avoid overloading. Avoid using extension cords as they can be hazardous.
Step 7: System Testing and Monitoring
Power up the unit and run for 24 hours to allow humidity levels to stabilize. Monitor performance through built-in humidity controls or Wi-Fi-enabled models with app-based tracking. Check drainage regularly and clean air filters every 1-3 months.
Choosing the Right Dehumidifier
Choosing the right dehumidifier requires consideration of various factors that are decisive for performance and efficiency: room size, relative humidity levels, energy consumption, and specific application.
| Capacity | Coverage Area | Best For |
|---|---|---|
| Small (≤30 pints/day) | Up to 1,500 sq. ft. | Mild moisture issues in smaller spaces |
| Medium (30-50 pints/day) | Around 2,500 sq. ft. | Moderate humidity in medium-sized crawl spaces |
| Large (50+ pints/day) | Over 3,000 sq. ft. | Basements, garages, or severe moisture problems |
🔑 Key Features to Consider
- ENERGY STAR Certification: Ensures lower power consumption and reduced operating costs
- Programmable Timers: Allows automatic scheduling for optimal efficiency
- Continuous Drainage Option: Eliminates need for manual water tank emptying
- Built-in Digital Displays: Provides accurate control and monitoring
- Desiccant Technology: Best for extremely humid areas or industrial use, performs well even with temperature fluctuations
Preparing Your Crawl Space
A properly prepared crawl space is imperative for your house’s strength and a healthier living environment. Homeowners today frequently search for help regarding moisture control, insulation, pest prevention, and energy efficiency.
✅ Initial Inspection
Check for excessive moisture, standing water, leaks, and any signs of damage before beginning preparation work.
🛡️ Vapor Barrier Installation
Essential for protecting against incoming moisture, preventing mold and mildew formation that affects air quality and structural materials.
❄️ Proper Insulation
Use rigid foam board or spray foam to cool the house and improve energy efficiency, especially in extreme temperature areas.
🔒 Seal Air Openings
Seal gaps around vents, pipes, and access doors to keep pests away and reduce outside air infiltration.
💨 Dehumidifier Placement
In highly humid areas, use a powerful dehumidifier specifically built for crawl spaces to reduce moisture levels and minimize long-term risks.
Step-by-Step Installation Guide
1️⃣ Inspection and Preparation
Initially, the crawl space must be inspected thoroughly to find possible damage, mold, and pests. Complete all repairs before starting installation. Clear the area of debris and clean thoroughly to make vapor barrier or insulation installation easier. Check soil leveling to guarantee even application throughout.
2️⃣ Moisture Barrier Installation
Use a high-quality polyethylene vapor barrier specifically meant for crawl spaces. Roll out the material and carefully cover the entire ground surface. Overlap seam edges by at least 6 inches and seal with waterproof tape. Bring the barrier up several inches over foundation walls for complete moisture protection. Secure edges with masonry fasteners or adhesive.
3️⃣ Insulation Placement
If crawl space wall insulation is needed for thermal efficiency, use foam board insulation as it’s moisture resistant and durable. Fix insulation rigidly to walls with construction adhesive and mechanical fasteners, ensuring no openings remain.
4️⃣ Dehumidifier Installation
Place the crawl space dehumidifier in a spot providing greatest coverage. Install drainage hose so collected water diverts to an outdoor area or sump pump. Monitor and maintain regularly for optimal performance. High humidity levels in crawl spaces are one of the most prevalent homeowner issues based on recent search trends.
5️⃣ Vent Sealing (If Applicable)
In houses located in humid areas, sealing crawl space vents significantly decreases air infiltration. Install pre-cut vent covers or apply foam sealant to block airflow. This step controls moisture more effectively and brings energy savings by maintaining stable internal environment.
6️⃣ Final Inspection and Testing
Conduct thorough inspection after installation to verify all elements are properly installed and functioning. Check dehumidifier performance and confirm no moisture passes through vapor barrier or insulation. Address any problems immediately to protect the crawl space.
Encapsulation: A Comprehensive Approach
Encapsulation is a professional and very effective way to keep crawl spaces safe from outside environmental factors like moisture, mold and pests. Recent search data and industry trends report that more homeowners are choosing crawl space encapsulation because of its positive effects on indoor air quality, energy efficiency, and overall property health.
What is Crawl Space Encapsulation?
Crawl space encapsulation is a state-of-the-art home improvement technique that protects the property’s crawl space from outside influences like moisture, humidity, and pests, providing a clean and controlled environment under the house.
Process Components:
- Placing vapor barrier made of polyethylene or durable material on floor and walls
- Sealing vents to make the area airtight
- Installing drainage systems for water intrusion control
- Adding dehumidifiers to manage humidity levels effectively
Key Benefits:
- Improved Air Quality: Keeps mold spores and allergens from entering living areas
- Energy Efficiency: Helps maintain warmth in winter and coolness in summer
- Structural Protection: Prevents wood rot and dampness-related problems
- Long-term Savings: Reduces maintenance costs and protects real estate investment
Benefits of Encapsulation with a Dehumidifier
Crawl space encapsulation combined with a high-performance dehumidifier is twice as effective at maintaining suitable air quality and humidity levels. A damp crawl space causes many costly consequences including mold, pest problems, and decay affecting the house’s foundation.
| Feature | Specification/Benefit |
|---|---|
| Humidity Control | Keeps humidity below 60% (EPA maximum for mold prevention) |
| Moisture Removal | Modern units remove 50-70 pints per day depending on model |
| Indoor Air Impact | Up to 40% of home’s indoor air comes from crawl space |
| Energy Savings | 15-25% reduction in average monthly energy costs |
💡 Bottom Line: Encapsulating your crawl space with a dehumidifier creates a more vibrant and sustainable atmosphere. By incorporating latest innovations and maintaining constant moisture control, this method safeguards your home’s structural integrity while elevating comfort and peace of mind.
How to Encapsulate Your Crawl Space
Step 1: Inspect and Prepare the Crawl Space
Inspect thoroughly to find mold, pests, standing water, or damage. Prioritize necessary repairs like sealing foundation cracks and clearing vacant lots. Maintain area free of water to discourage future moisture occurrence. Preparation is vital for effective encapsulation.
Step 2: Seal Vents and Openings
Seal all vents, air spaces and gaps for plumbing or wiring using foam insulation, caulk or tough vent covers. According to the Department of Energy, proper sealing can prevent up to 15% of air infiltration, significantly improving energy efficiency.
Step 3: Install a Vapor Barrier
Install superior quality vapor barrier, generally composed of polyethylene plastic sheeting measuring minimum 10-20 mils thickness, over floor and walls of crawl space. Overlap seams by at least 6-12 inches and tape with moisture-proof tape. Properly installed vapor barrier can reduce moisture by 27%-40%, preventing mold and wood decay.
Step 4: Insulate the Crawl Space Walls
Use rigid foam board or spray foam insulation for crawl space walls while keeping floor open for proper drainage. This process assists in maintaining good temperature and can lead to energy savings of up to 18%, translating to lower utility bills.
Step 5: Install a Dehumidifier
Install energy-efficient dehumidifier in crawl space to keep humidity levels constant. These dehumidifiers work specifically in cool, snug places, maintaining relative humidity at 30-50% range recommended by EPA. This prevents mold growth and improves air quality.
Maintenance and Troubleshooting
Proper maintenance and timely troubleshooting are essential to prolonging the lifespan of an energy-efficient dehumidifier and maintaining its performance in a crawl space. Regular attention to key components ensures optimal operation and prevents costly repairs.
🔧 Regular Maintenance Tips
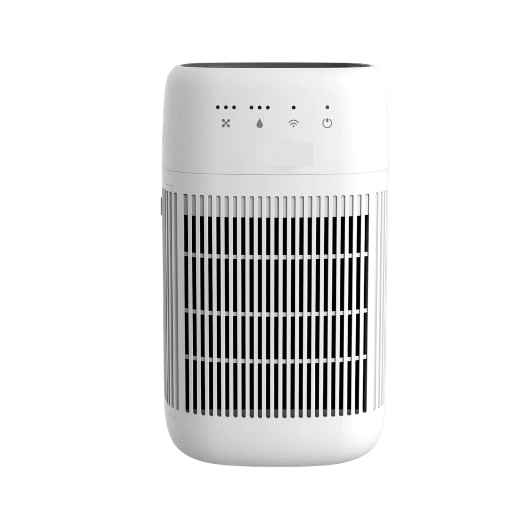
🌬️ Clean or Replace Air Filters Regularly
Dirty air filters result in less efficient dehumidifiers, allowing uncontrolled humidity while increasing energy consumption.
Action: Clean reusable filters every 14 days or replace disposable ones per manufacturer’s instructions. Research shows clean filters can raise unit efficiency by up to 20%.
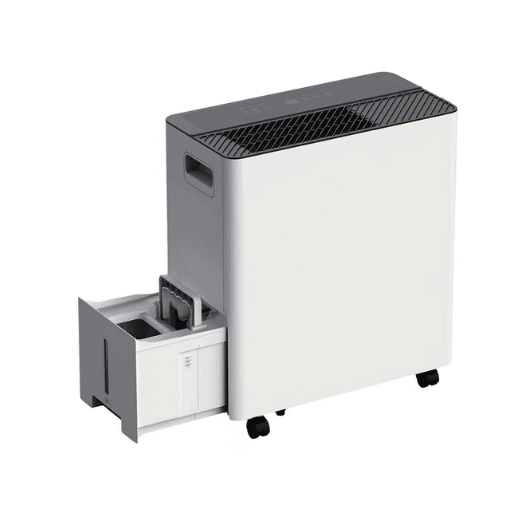
💧 Empty and Clean the Water Collection Tank
Full or dirty water tanks can interfere with dehumidifier operation.
Action: Empty tank when full and wash frequently to stop mold and bacteria growth. Weekly cleaning provides best hygiene and prevents bad odors.
❄️ Inspect and Clean the Coils
Dust and dirt on dehumidifier coils can restrict airflow and lower unit efficiency.
Action: Gently use soft brush or vacuum cleaner to clean coils once every three months. Skipping this step may drop performance efficiency by 10-15% according to HVAC industry studies.
📍 Ensure Proper Placement for Airflow
For effective operation, dehumidifier placement is critical.
Action: Place unit at least 6-12 inches away from walls and furniture to prevent blocked airflow. Poor placement can drop effectiveness up to 30% because unit cannot efficiently draw in and process air.
🚰 Check the Drain Hose for Blockages
Units with continuous drainage function must have regular hose checks.
Action: Regularly check for clogs or kinks. Blocked drain hose can cause water backing up into system, resulting in overflow and internal damage. Monthly checks reduce this risk and increase unit longevity.
⚠️ Common Problems and Solutions
| Problem | Solution |
|---|---|
| Dirty Air Filter | Dust and debris buildup restricts airflow. Clean or replace filter every 1-2 months during heavy usage to maintain optimal airflow. |
| Refrigerant Leak | Low refrigerant level from leaks prevents proper cooling. Hire expert technician to detect and fix leak, then charge refrigerant to manufacturer’s specifications. |
| Thermostat Malfunction | Improper settings or device failure causes non-ideal cooling. Check thermostat settings, replace batteries if needed, or call technician if device is faulty. |
| Blocked Condenser Coils | Outside condenser coils get dirty or collect debris, hindering heat transfer. Regularly clean condenser unit and remove surrounding debris to maintain proper functioning. |
| Improper Unit Size | Too-small air conditioner won’t effectively cool area. Match unit’s cooling capacity to room size or upgrade to larger unit. Use BTU guideline for correct selection. |
👨🔧 When to Call a Professional
While many issues can be resolved through regular maintenance and troubleshooting, some cases require professional help.
Call a Professional If:
- Circuit breaker trips continuously (signals possible electrical problem)
- Constant refrigerant leaks occur
- Unit makes strange sounds despite maintenance
- Air conditioner doesn’t cool after thorough maintenance
- Complex issues requiring expert diagnosis and repair
🔍 Common Searches: Users often search “AC not cooling but running” or “AC making loud noise” – these problems usually need expert diagnosis to prevent worsening or eliminate safety dangers.
References
-
OSTI (Office of Scientific and Technical Information): Comparative Study of Vented vs. Unvented Crawlspaces
A comparative analysis of vented and unvented crawl spaces, including the role of dehumidifiers. -
ScienceDirect: Experimental investigation of a crawl space located in a sub-arctic climate
This paper investigates crawl space conditions and the effectiveness of dehumidifiers in sub-arctic climates. -
AIVC (Air Infiltration and Ventilation Centre): Temperatures and relative humidities in heated and ventilated crawl spaces
Frequently Asked Questions (FAQ)
What are the advantages of having a crawl space dehumidifier?
The installation of a dehumidifier in the crawl space not only solves the problem of humidity but also enhances the overall quality of indoor air in your dwelling. The humidity reduction in the crawl space area takes care of the awful smell and mold formation; thus, your home is free from such issues and structural damage caused by the latter is also avoided. A reliable crawl space dehumidifier can be your guide for dry-crawl space during the hottest and dampest summer months, no doubt about it.
How can I tell that my crawl space is in need of a dehumidifier?
If your crawl space is showing signs of high humidity, such as musty smells, or if you can actually see mold, then these are definitely signs that a dehumidifier is a must-have. Similarly, poor ventilation and condensation in the crawl space mean that a dehumidifier would help control the moisture level and thus create a healthier area.
What specifications are necessary for getting a good quality crawl space dehumidifier?
A quality crawl space dehumidifier should be equipped with certain features such as a humidistat for automatic operation, a condensate pump for easy drainage, and a compact design to fit in limited spaces. Besides, a high-quality unit should also have a good dehumidification rate to keep your crawl space dry effectively.
Is it possible to do the installation of a crawl space dehumidifier myself?
Yes, the installation of a crawl space dehumidifier is a DIY project for those who have at least some plumbing and electrical skills. However, if you want to have a professional give it a go or if you are not sure about ductwork or the whole installation process, then a contractor may be the best solution to make sure everything is done right.
In what way does a dehumidifier tackle the humidity issue in crawl space?
What a dehumidifier does is to absorb moisture that exists in the atmosphere thus reducing humidity in your crawl space. One of the important benefits of this process is the cessation of mold and mildew propagation, which not only prevents your home from being damaged but also keeps the crawlspace neat and dry. Furthermore, maintaining the humidity levels at the right point makes it very pleasant in the area above.
What is the average expense associated with the installation of a crawl space dehumidifier?
The crawl space dehumidifier installation cost is not fixed and will depend on the unit’s quality, size, and other features. Generally, you will have to set aside something between $1,000 and $3,000 for the installation which also includes the cost of labor and the dehumidifier. To compare prices and preview different options shopping at local home-improvement stores like Home Depot is really a good idea.
What should I do if the dehumidifier refuses to switch on?
First, if your dehumidifier is not functioning, verify the power supply, and if so, ensure that it is properly plugged in. Check the humidistat settings and make sure they are set correctly for the operation. Moreover, try to fix any blockages that could be restricting the unit or the drainage bucket from functioning properly.
Is it a wise measure to encapsulate my crawl space together with a dehumidifier?
Certainly, it will be worth it encapsulating your crawl space which will in return make the dehumidifier work even better. By installing a vapor barrier around the crawl space, you are cutting down on the water vapor that would otherwise be coming into the space, thus making it possible for the dehumidifier to do its job more effectively. This strategy leads to a more sanitary atmosphere and also reduces the chances of mold proliferation.