Having a perfect indoor climate is not only about temperature control—humidity is one of the main factors to determine your home’s comfort and air quality. If you are having problems with too much moisture, musty smells, or even mold, a dehumidifier for the whole house might be the answer to your problem. This comprehensive guide will show you how to install an HVAC dehumidifier in detail, along with providing useful tips and insights to make the installation successful. No matter if you are a DIY person or just want to know how your HVAC system can create a better home environment, this article will give you the necessary information to begin. Let us take the first steps towards a healthier, more pleasant living space!
Understanding Dehumidifiers

Dehumidifiers are appliances made to lower and control the amount of moisture in the air. The functioning of these devices includes the intake of air that has moisture in it, the extraction of water from it, and then the release of drier air back into the area. This process stops the occurrence of problems such as mold growth, bad smells, and even damage to furniture as a result of high humidity. Dehumidifiers can be found in places like basements and bathrooms, which are areas where dampness regularly occurs, and the devices are considered good for indoor air quality and overall comfort.
What is a Dehumidifier?
A dehumidifier is an electrical appliance designed to control and maintain indoor humidity levels at an ideal range. Data and insights indicate that high humidity, usually over 50%, can lead to the spread of mold, mildew, dust mites, and bacteria, which in turn can have a negative impact on health and property.
Working Principles
🔄 Refrigeration Method
Uses cooling coils to condense moisture from the air, similar to how an air conditioner operates.
💨 Absorption Method
Utilizes absorbent materials to capture and remove moisture from the surrounding air.
Modern Features: Today’s dehumidifiers come with humidity sensors, auto shut-off systems, and energy-efficient designs that make them not only effective but also easy to use. They are highly recommended for a cozy living atmosphere, especially in places with high humidity or during the rainy season.
How a Dehumidifier Works
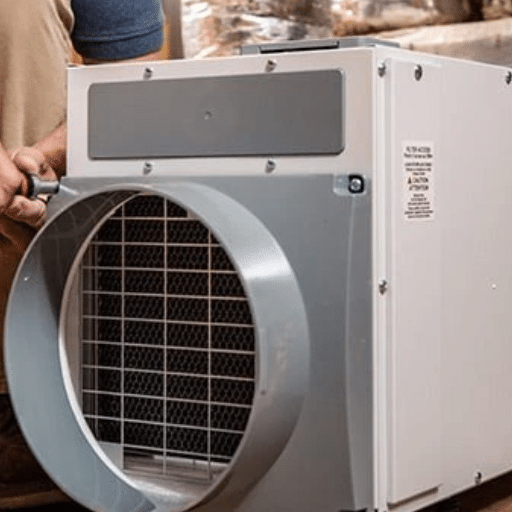
A dehumidifier functions by taking out moisture from the air, thereby providing an environment that is drier and more comfortable. The process involves essential components and steps that are critical to its functioning.
5 Essential Operation Factors
Air Intake and Filtration
The intake vent of the dehumidifier is the source of air that comes in, often equipped with a filter to capture dust and other particles. This cleaning process guarantees that only clean air moves through the system.
Cooling Coil/Condensation Process
Inside the dehumidifier, air goes past the cooling coils. These coils cool the air down and bring about the condensation of water vapor, thereby changing it into liquid water.
Water Collection
Depending on the construction, condensed water either drips into a collection tank or is disposed of through a hose connection. This operation effectively removes moisture from the air.
Reheating and Dry Air Circulation
The dehumidified air passes through heating coils before being released back into the room. This process makes sure that the air produced is warm and pleasant.
Humidity Monitoring and Control
Many contemporary dehumidifiers come with built-in sensors that track humidity levels. Users can set their preferred humidity level, and the appliance will automatically adjust its operation to maintain that level.
✅ Result: The combination of these processes results in a dehumidifier that efficiently produces a favorable indoor environment while controlling issues like mold growth, odors, and dampness.
Benefits of Whole-House Dehumidifiers
Whole-house dehumidifiers offer comprehensive moisture control throughout your entire home, providing numerous advantages for health, comfort, and property protection.
Improved Air Quality
Whole-house dehumidifiers reduce humidity, which is a major factor in the growth of mold, mildew, and dust mites. Studies show that keeping indoor humidity levels between 30%-50% can lead to a considerable reduction in allergens and better indoor air quality.
Enhanced Comfort
These systems eliminate the presence of moisture and stale air, creating a very comfortable living environment. Humidity control prevents the sticky and clammy sensations commonly associated with high humidity levels.
Energy Efficiency
Humidity control allows the air conditioning system to work less, as dry air feels cooler. Consequently, this might result in a 15% reduction in air conditioning costs.
Preservation of Home and Belongings
Wooden furniture, flooring, and even the house’s structural elements can be damaged by moisture. A whole-house dehumidifier saves your home and valuables by preventing warping, rotting, and rusting.
Healthier Living Environment
Lowering humidity reduces the risk of respiratory problems resulting from inhalation of mold spores and bacteria. Whole-house dehumidifiers are very useful for people suffering from asthma or allergies.
Preparing for Installation
Proper preparation is crucial for successful whole-house dehumidifier installation. Following these steps will ensure a smooth and efficient installation process.
Pre-Installation Checklist
Assess Your Home’s Needs
Perform a thorough check of the size, layout, and current humidity levels in your home to decide on the dehumidifier’s ideal capacity and requirements.
Choose the Right Location
Look for a perfect place to install the device—basement or central HVAC system location—that has both airflow and easy access for maintenance.
Check Electrical Requirements
Take a closer look at your home’s electrical arrangement and ensure compatibility with the power requirements. A dedicated circuit may be needed for safe operation.
Inspect Existing HVAC System
Your present HVAC system should be in good working order. Check the ductwork for leaks or obstructions that could affect performance.
Plan for Professional Installation
Have a licensed HVAC technician perform the installation to ensure the system is installed effectively and conforms to all safety standards.
Choosing the Right Dehumidifier
To choose the best dehumidifier that meets your requirements, it is necessary to consider several factors thoroughly. Below are the major factors to consider and examples of five highly-rated dehumidifier models based on their performance, energy efficiency, and suitability for different areas.
Factors to Consider
- 📏 Capacity (Pint/Day Rating): Measure the dimension of the area that needs to be dehumidified, then select a unit with the same or slightly higher capacity. Bigger areas require higher pint/day ratings.
- ⚡ Energy Efficiency: Search for models with Energy Star certification for saving on electricity bills while making a positive environmental impact.
- 🎛️ Features: State-of-the-art dehumidifiers might be equipped with integrated pumps, automatic shut-off, adjustable humidistats, and remote monitoring via Wi-Fi.
- 🔇 Noise Level: For bedrooms or living rooms, consider less noisy alternatives for comfort.
- 🔧 Maintenance Requirements: Easy-to-clean filters and drain systems can make ongoing use more convenient.
Top 5 Dehumidifier Models
| Model | Capacity | Key Features | Best For |
|---|---|---|---|
| Frigidaire FFAP5033W1 | 50 pints/day | Built-in pump, adjustable humidistat, continuous drain option | Medium to large spaces, basements or living rooms |
| hOmeLabs HME020031N | 50 pints/day | Auto-defrost, customizable humidity settings, quiet operation | Energy-efficient performance in mid-sized rooms |
| Vremi 22 Pint | 22 pints/day | Turbo mode, washable filter, compact design | Small to medium spaces like bedrooms or offices |
| Tosot 50 Pint with Internal Pump | 50 pints/day | Internal pump for easy drainage, sleek design | Basements or areas with high humidity |
| GE APER50LZ | 50 pints/day | Smart Dry technology, built-in Wi-Fi, Energy Star certification | Modern homes requiring smart functionality |
💡 Pro Tip: With thorough assessment of your requirements and comparison of these models, you will surely get a dehumidifier that will provide comfort and efficiency to your space at its best.
Assessing Your HVAC System
A proper evaluation of the HVAC system in your house is a must to ensure comfort and energy-efficiency. Here are five key areas to check when reviewing your system:
⚡ Energy Efficiency
Find out the SEER (Seasonal Energy Efficiency Ratio) rating of your HVAC system. Higher SEER ratings indicate more energy-efficient systems. Modern systems typically have a rating of at least 14.
Look for Energy Star certifications indicating an efficient unit.
🌬️ Air Quality
Inspect air filters for dust and debris and replace them regularly to ensure clean airflow.
Consider adding air purifiers or upgrading to HEPA filters for enhanced air quality, especially in homes with allergies or pets.
⏰ System’s Age
An HVAC system’s lifespan is usually around 10-15 years. If your system is that old or older, consider installing a new one that will be more functional and energy-efficient.
🌡️ Thermostat Functionality
Inspect the thermostat to see if it regulates temperature accurately.
Consider upgrading to a programmable or smart thermostat for better control and efficiency.
🔧 Regular Maintenance
Make sure the system is regularly maintained by professionals through cleaning of coils, checking refrigerants, and inspecting ducts to keep the system running and performing well for a long time.
✅ Benefit: By giving attention to these aspects, homeowners can enhance their HVAC system’s efficiency, reduce energy bills, and enjoy a constantly comfortable atmosphere all year.
Estimating Dehumidifier Cost
When estimating the price range for a dehumidifier, one must consider the unit’s characteristics, size, features, brand reputation, and power consumption. Below is a comprehensive breakdown of the main factors with average prices:
Cost Breakdown by Category
💧 Unit Capacity (Pint Rating)
- Small-capacity units (20-30 pints): $50-$150 for small spaces
- Medium-capacity units (40-50 pints): $150-$250 for moderate areas
- Large-capacity units (70+ pints): $250-$400 for basements or large rooms
⚡ Energy Efficiency
Energy Star-certified dehumidifiers are usually more expensive initially, around $200-$500, but they greatly decrease energy usage over time, thus lessening utility bill costs.
🎛️ Additional Features
The price of dehumidifiers with latest features like auto-humidistat, continuous drainage, and digital displays ranges from $200-$600.
🏷️ Brand and Warranty
Top-of-the-line brands with long warranties usually begin at $300 and can go over $1,000, providing more reliability and improved customer service.
👨🔧 Installation Costs
The cost for built-in or whole-house dehumidifier systems is between $800-$2,000, which includes fees for professional labor.
💰 Budget Planning: By carefully considering these factors, homeowners can effectively choose a dehumidifier that is both suitable for their needs and budget.
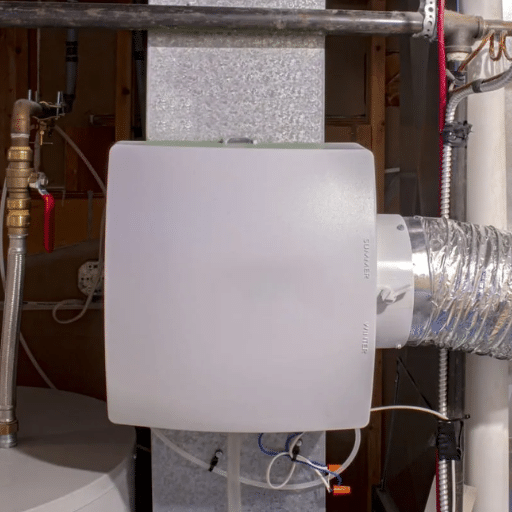
The Installation Process
Several crucial steps are involved in the installation of a dehumidifier to make sure it works properly and efficiently. The whole process gets a detailed breakdown below:
Installation Steps Overview
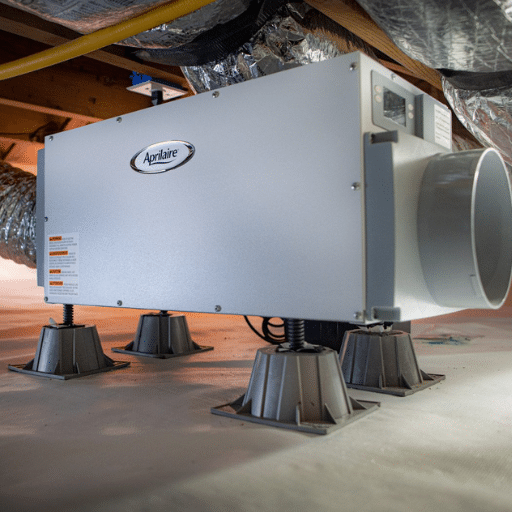
Installation Location Selection
The best site must have great airflow and be in the middle of the house for maximum effectiveness. Living rooms, basements, or attics are usual locations for portable units. Whole-house systems are typically installed where the HVAC system is located.
Area Preparation
Remove anything that may block the installation area. For built-in systems, ensure HVAC ducts are easily accessible and clean. A site in good condition requires 30-60 minutes for preparation.
Electrical Installation
Wiring and circuits must be perfect for the unit to work correctly. For portable devices, plug into a grounded outlet. Whole-house installation may require a dedicated circuit, typically done by an electrician at a cost of $100-$300.
Water Drainage System Connection
Attach the dehumidifier to the water drainage system to eliminate overflow risk. A hose is generally used, or the unit can be installed straight into a sump pump or drainage outlet. Consider gravity-based and pump-assisted systems.
Testing and Adjustment
After installation, run the dehumidifier to check if it’s functioning. Set humidity level and fan speed according to your personal preference or environmental needs. This ensures the system performs at its best right from the start.
✅ Success: Homeowners can guarantee that dehumidifier installation will be done correctly and meet their performance requirements for a long time by adhering to these important steps.
Gathering Necessary Tools and Materials
Before starting the installation of a dehumidifier, it is highly recommended to first collect all the tools and materials required. Having the correct tools at hand will lead to an uninterrupted installation and the least possible disruptions.
5 Essential Tools and Materials
Dehumidifier Unit
The most important part of the installation. Pick a model that matches room dimensions and expected humidity levels.
Screwdriver Set
Basic requirement for attaching brackets, removing panels, and making modifications during the installation process.
Drill and Bits
Important for drilling support holes if the dehumidifier is going to be mounted on a wall or secured in place.
Measuring Tape
Helps in placing the dehumidifier accurately for optimal machine performance.
Flexible Drain Hose
Comes in handy to drain water into a nearby drain or sump pit, especially for setups requiring continuous drainage.
Step-by-Step Installation Guide
Follow this comprehensive step-by-step guide to ensure proper installation of your dehumidifier for optimal performance and efficiency.
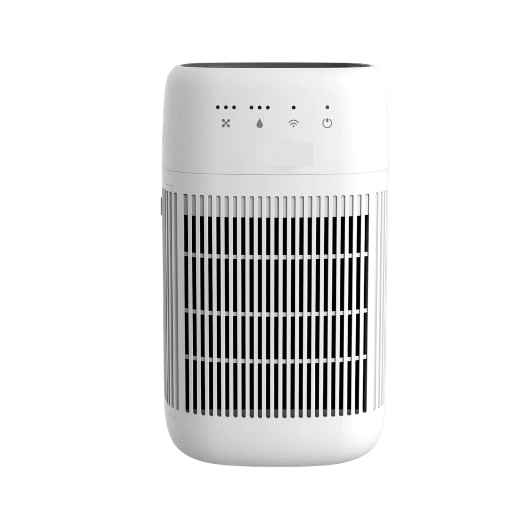
Choose the Installation Location
Find a good spot for the dehumidifier where it can work best, such as a flat and stable surface with good airflow. Do not place it next to walls, furniture, or anything that could interfere with air circulation. If possible, place it in the most humid room of the house.
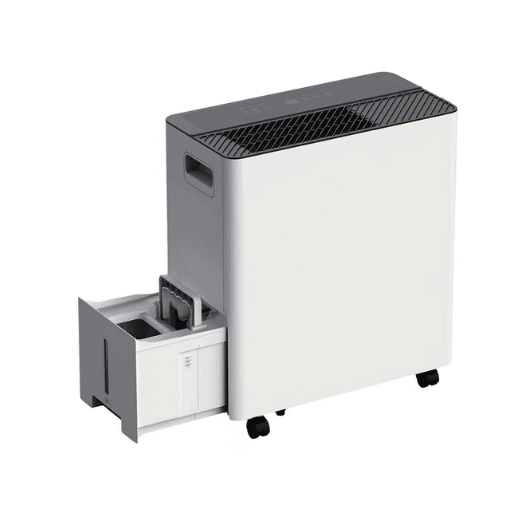
Prepare the Dehumidifier
Take the unit out of the box and get rid of any protective materials like tape or packaging. Check the dehumidifier for any possible shipping damages and make sure everything the manufacturer’s list says is included is there.
Set Up the Drainage Option
Decide whether to use the built-in water tank or choose a continuous drainage system. For continuous drainage, attach the flexible drain hose, making sure it is properly connected and leading to a drain or sump pit that is nearby.
Plug in the Dehumidifier
Put the unit near an electric outlet and connect it. Make sure that the socket provides the same voltage as the dehumidifier’s requirement per the manual. Do not use extension cords because they might not be able to handle the power requirement of the device.
Test the Unit
Switch on the dehumidifier and set the humidity level according to what is recommended for your space. Keep an eye on the initial operation to make sure that the fan and compressor are working properly; also, check if there is correct water collection or drainage. Modify the settings for best performance if needed.
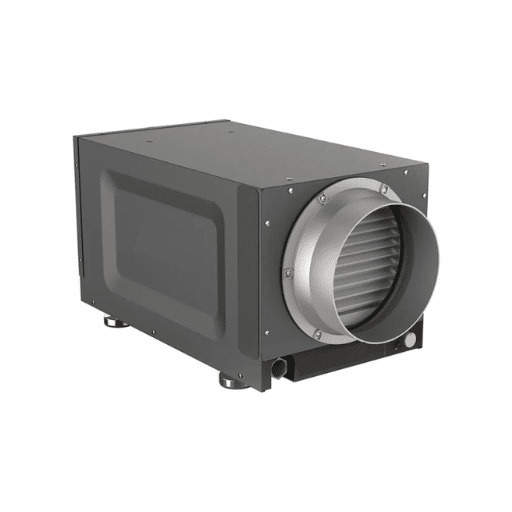
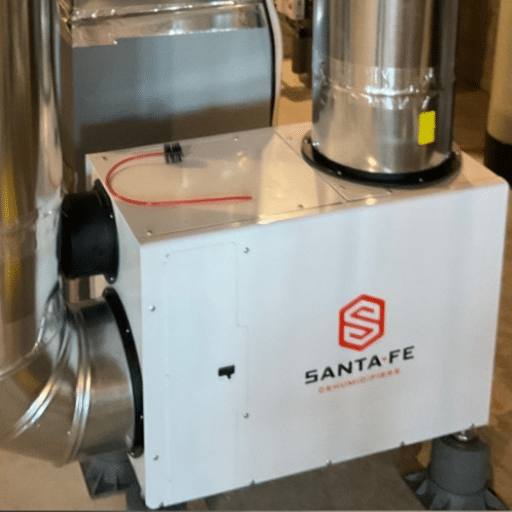
Connecting to the Supply Plenum
When plumbed to the supply plenum, a dehumidifier must be perfectly integrated for seamless and efficient operation. The following points contain the details and main aspects of such a connection:
Connection Guidelines
-
📍 Determine the Location
The connection must be made in a spot that is appropriate and easily accessible in the supply plenum. It should not be in the way of the airflow in the ducting.
-
Install a Dedicated Duct
By means of a flexible or non-flexible duct, the outlet of the dehumidifier should be connected to the supply plenum. In order to keep the airflow and performance at the right level, the duct diameter should be the same as the unit’s specifications.
Seal Connections Properly
With metal tape or clamps, all duct connections should be secured to the maximum lately air leaks. This way, the air that has been conditioned by the dehumidifier will reach its destination without any obstacles.
Check Backdraft Dampers
If necessary, a backdraft damper should be fitted to stop the air from the dehumidifier coming back. This also helps in maintaining the system’s overall efficiency.
Monitor Airflow Balance
After the installation, make sure to check the airflow balance. An unequal distribution of airflow might not only hinder the HVAC system’s performance but also lessen the dehumidifier’s effectiveness.
Adopting these measures will lead to the dehumidifier being optimally integrated into the supply plenum, thereby ensuring better indoor air quality and effective moisture control.
Maintenance and Troubleshooting

Maintenance and Troubleshooting The life and performance of the dehumidifier are greatly influenced by proper maintenance and troubleshooting procedures. Here are the five steps that will keep you on track for maintenance and dealing with everyday issues:
Regular Filter Maintenance
The filter of the dehumidifier is likely to be filled with dust and other particles, and as a result, the filter will not work efficiently. You should clean or replace the filter once every one to three months depending on how much the dehumidifier has been used and also on the manufacturer’s recommendations.
Drainage System for Condensate Should Be Checked
Always check the line carrying the condensate to the drain and the drain pan for clogs or buildup. Clogged drainage can result in water overflowing which leads to damage and mold growth. So, unclog the drainage system for uninterrupted drainage.
Electrical Connections to Be Inspected
The condition of the electrical components, like wires and terminals, should be inspected to ensure that they are secure and there is no corrosion. Loose or faulty connections might lead to the system being non-functional or creating unsafe conditions.
Humidity Levels to Be Monitored
A hygrometer should be used to monitor the humidity level of the indoor atmosphere. If the humidity levels are permanently higher or lower than the set points, this may signal either a fault in the dehumidifier or its settings.
Strange Noises to Be Listened for
The presence of rattling, buzzing, or humming sounds could be a sign of technical problems relating to the machine or motor. So it’s best to investigate and deal with such noises immediately to avoid further damage to the system.
Adopting a routine maintenance schedule and conducting even minor troubleshooting will facilitate the efficiency of your dehumidifier, thus guaranteeing constant performance and better indoor air quality.
Regular Maintenance Tips
Clean the Air Filter Regularly
Make a point to clean the air filter every fortnight or according to the manufacturer’s suggestion. A filter that is choked by dirt can cause less efficiency and put more load on the system.
Check and Empty the Water Tank
The water tank should be regularly checked and emptied when full. If you want continuous drainage, also check that the hose is well attached and working properly.
Inspect Coils for Dirt and Frost
Evaporator and condenser coils should be cleaned at intervals so that dirt does not collect on them. If the coils become frosted, first check the room temperature and then the device for problems that might affect its operation.
Verify the Humidity Levels
Switch your dehumidifier’s humidity control settings to check for accuracy. Use a hygrometer to measure and adjust your indoor humidity level to between 30% and 50%, which is the recommended range.
Examine Electrical Connections and Cords
Look at the power cord and plug to see if there are any signs of aging or damage. Safety may be compromised and the unit’s performance reduced due to bad electrical connections. Therefore, replace any parts that are worn out or damaged when necessary.
Common Issues and Solutions
Dehumidifier Not Turning On
Possible cause: Power supply problems, like a power cord that’s disconnected or a fuse blown.
Solution: Check the power cord to see if it’s loose, make sure the outlet works by plugging something in, and if it doesn’t then replace the fuse or reset the breaker.
Unit Fails to Collect Water
Possible cause: Either a dirty air filter or a broken compressor is preventing the unit from working properly.
Solution: Change the air filter or clean it if it’s not too dirty. If the compressor is defective, then you must call an expert to either repair or replace it.
Strange Noises During Operation
Possible cause: Components are loose or there is something stuck in the fan blades.
Solution: Take a closer look at the unit and tighten all the screws or parts that seem loose. Also, remove any obstruction that prevents the fan from rotating smoothly.
Ice Formation on Coils
Possible cause: Air conditioning the entire room to a very low temperature or lack of airflow around the unit.
Solution: If the temperatures are below 41°F (5°C), turn off the dehumidifier and wait until the temperatures are suitable again. Besides, cleaning of the air vents will help in maintaining airflow. Never operate the dehumidifier in cold surroundings.
Musty Odor from the Unit
Possible cause: Accumulation of mold and mildew in the water collection area or filter that hasn’t been replaced.
Solution: Regularly ensure the water tank is cleaned and sanitized, together with the air filter, which may either be replaced or cleaned. This will greatly help in the prevention of bad odors.
When to Call a Professional
In the event that you find yourself facing any of the aforementioned troubles, it is advisable that you get in touch with a professional technician who can properly evaluate and fix your dehumidifier:
Unit Stopped Working
Details: In a case where the dehumidifier is plugged in and the power is on, yet the machine does not start, this might be a sign of problems with the internal wiring or the control board.
Why Call a Professional: Finding out if it is a problem with the electricity supply or component failure requires tools and skill that are not usually available to the average person.
Compressor Failure
Details: The compressor is the one that sucks the moisture from the surrounding air. If the compressor is not working but the unit is still running, that would mean either the refrigerant is leaking or the compressor has a mechanical failure.
Why Call a Professional: Whenever refrigerants are involved or a compressor is being replaced, only certified technicians should be allowed to do that kind of work.
Water Dripping
Details: If the water keeps dripping from the dehumidifier no matter that the tank and drain connections are checked and found to be okay, there can be cracks in the internal parts or the drainage pathways may be blocked.
Why Call a Professional: The process of performing internal leaks detection and leak fixing is usually through disassembly and therefore requires technical know-how.
Fan Not Operating
Details: If the fan is not rotating or is making strange sounds, it is possible that the motor or the entire fan assembly has either malfunctioned or been blocked.
Why Call a Professional: The process of replacing the fan components or motors is very sensitive and requires professional handling to avoid further damage.
Error Codes on Control Panel
Details: The majority of the latest dehumidifiers indicate error codes when there is a malfunction, like sensor failures or system errors.
Why Call a Professional: A technician will be able to access diagnostic tools specific to the manufacturer and therefore can read the error codes accurately in order to rectify the problem.
Frequently Asked Questions
Frequently Asked Questions How frequently should my dehumidifier be cleaned?
Cleaning your dehumidifier at least once every two weeks is highly advised. Dust, mold, and debris are cleaned out through regular cleaning, which also leads to the proper operation of the device and better air quality.
What is the perfect humidity of a house?
The perfect indoor humidity level is 30% to 50%. Anything above this range can lead to the proliferation of mold and dust mites, while lower humidity levels can result in dryness and discomfort.
Why isn’t the dehumidifier getting any water?
This problem could be at least partly due to such reasons as an unclean air filter, a faulty compressor, or humidity levels in the room being lower than the threshold of the dehumidifier. Perhaps, professional inspection might be required.
Is it safe to operate the dehumidifier all night?
Indeed, operating the dehumidifier all night is perfectly safe for many of the new models produced. However, you still need to make sure that the water collection bucket or drainage system is large enough and that the unit is regularly maintained.
What is the average lifespan of a dehumidifier?
The average lifespan of a dehumidifier if properly maintained, is between 5 and 10 years. Cleaning and servicing regularly will help the machine last longer.
How Long Does Installation Take?
The installation time of a dehumidifier mainly relies on the unit’s nature and where it will be placed. No installation is necessary for portable dehumidifiers, and the setup time can be as short as a few minutes,s which includes placement and plugging the machine into the outlet. On the other hand, full-house systems need professional installation, which will usually take about 2 to 4 hours. This time comprises the connection of the system to the HVAC unit, ensuring proper drainage, and testing for functionality. Moreover, the complexity of the layout and the availability of the existing infrastructure can also lead to variation in the total time needed.
Can I Install a Whole-House Dehumidifier Myself?
DIY installation of a whole-house dehumidifier is doable but discouraged unless one is familiar with HVAC systems and electrical work. The integration of the dehumidifier into the existing HVAC system is a complicated process that includes ductwork connectivity, drainage normalization, and electrical wiring safety measures. Incorrect installation may result in inefficiencies, breakdowns, or even endangerment. By hiring a professional, proper functioning and adherence to the local building codes will be guaranteed. Per the most recent information, getting a certified technician is still the best and most secure way of having your system perform well and, consequently, its lifespan being maximized.
What to Do if My HVAC System is Incompatible?
In the event of an incompatible HVAC system, the very first step I would take would be to get a professional technician’s opinion on the matter through their assessment. The expert will ascertain if there is a possibility of making changes to the current HVAC system and thus keep it or if the only option left is to take it out completely. I will, at the same time, think of moving to a system that is suitable for my house in every way, with the added advantage of being energy-efficient and also complying with the recent standards. Consequently, no time will be wasted in taking necessary actions in order not to experience issues such as substandard performance or increased energy bills.
References
- HVAC Dehumidification Systems for Thermal Comfort: A Critical Review
This review analyzes the principles and applications of dehumidification in HVAC systems, focusing on thermal comfort.
Link to source - On-Site Measurement and Simulation Investigation on Dehumidification in Hong Kong
This study compares condensation and desiccant dehumidification methods, highlighting installation improvements.
Link to source - Application of Heat Pipe Heat Exchangers in HVAC Systems
This research explores the use of heat pipe heat exchangers to enhance dehumidification in tropical HVAC systems.
Link to source
Frequently Asked Questions (FAQ)
What is a whole-house dehumidifier installation?
A whole-house dehumidifier installation involves integrating a dehumidifier into your existing HVAC system to effectively control humidity levels throughout your home. This process ensures that dehumidified air circulates via ductwork, improving indoor air quality and reducing excess moisture.
How does a dehumidifier work in an HVAC system?
A dehumidifier works by removing moisture from the air as it passes through the HVAC system. The unit draws in humid air, cools it to condense the moisture, and then returns dehumidified air into the home through the return air duct, enhancing overall comfort and energy efficiency.
What are the benefits of installing a whole-home dehumidifier?
Installing a whole-home dehumidifier can significantly improve indoor air quality, reduce mold and mildew growth, and maintain optimal humidity levels. Additionally, it can lower energy costs by easing the workload on your air conditioning unit, leading to improved energy efficiency.
How do I choose the right dehumidifier for my home?
Choosing the right dehumidifier involves assessing the capacity of the air conditioner and the specific humidity levels in your home. Consider factors such as the size of your space, existing HVAC system, and the dehumidifier’s capacity for moisture removal to ensure effective humidity control.
What is the typical cost of HVAC dehumidifier installation?
The cost of HVAC dehumidifier installation can vary based on the unit’s capacity, the complexity of the installation process, and any necessary modifications to existing ductwork. Homeowners should consider both the initial installation cost and potential savings on energy bills.
Do I need a professional HVAC technician for installation?
While a DIY installation might seem feasible, hiring a professional HVAC technician is recommended to ensure the dehumidifier is properly integrated into your existing system. Technicians can assess your current ductwork, support the dehumidifier’s weight, and optimize its performance.
How does humidity affect my HVAC system’s performance?
High humidity levels can strain your HVAC system, making it work harder to cool your home, which increases energy costs. A well-installed dehumidifier can alleviate this issue by removing excess moisture from the air, thus enhancing the cooling system’s efficiency and lifespan.
Can I use a standalone dehumidifier instead of a whole-house unit?
While standalone dehumidifiers can help control humidity in specific areas, they may not provide the same level of moisture removal as a whole-house unit. For comprehensive moisture control throughout your home, a whole-home dehumidifier integrated with your HVAC system is typically more effective.
- HVAC Dehumidification Systems for Thermal Comfort: A Critical Review