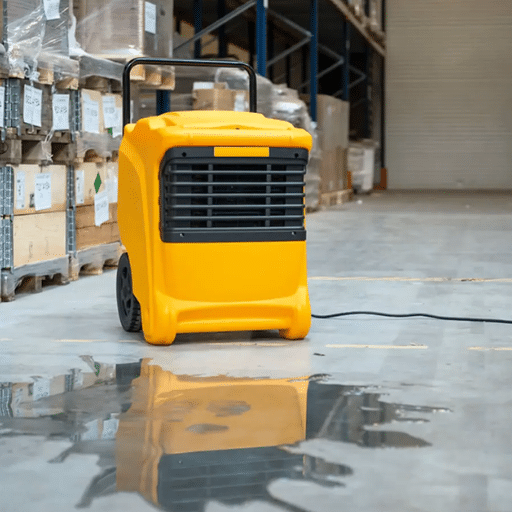
Dehumidifiers maintain comfort and good indoor air quality, particularly in humid regions. Today, dehumidifiers could sometimes present operational problems hindering their function, leaving one with a disgruntled, “What went wrong?” feeling. Here’s where the guide to facing those problems comes in handy. Maybe the dehumidifier isn’t turning on; perhaps it’s not collecting water, or it just seems to be working inefficiently. We will learn all the major problems and their respective troubleshooting procedures. After reading this article, you should be pretty knowledgeable about diagnosing and repairing your dehumidifier without the need for hiring a professional.
Understanding Your Dehumidifier

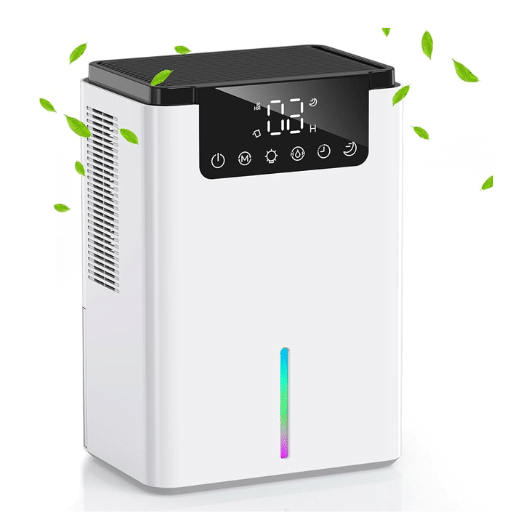
The dehumidifier is a machine used to reduce the excess moisture in the air so that the atmosphere becomes pleasant and healthy to stay in. The room-damp air is drawn into the machine, passed through a cooling process, or chilled-cooled condenser, where moisture is taken out, and hence, dry air is sneezed out again into the room. This way, the dehumidifier helps keep mold growing within check, odor-wet, and the films, wallpapers, and wooden cupboards from being damaged by the excessive humidity above. Most dehumidifiers are easy to operate, and require simple set-up and maintenance, like disposing of water from the water collecting tank or ensuring the filter is clean.
How a Dehumidifier Operates
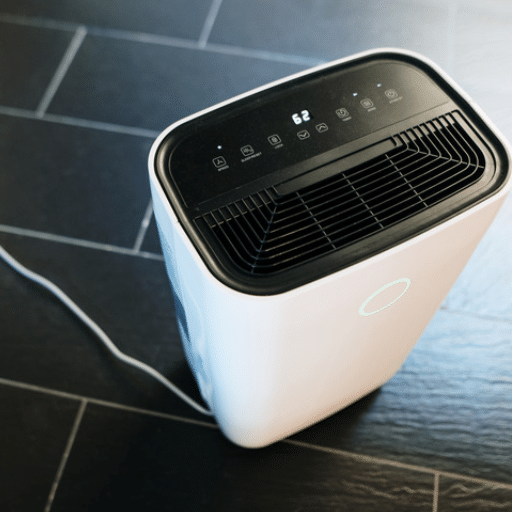
A dehumidifier works by keeping the indoor air dry by means of modern technology. First, air is drawn in from the intake grille by a small fan. The air now travels across the refrigerated coils, whereby the temperature is lowered, hence moisture from the air condenses to drops of water. This water is either collected inside a removable tank or forced through a hose leading to a drain. The drier air is then reheated slightly and discharged back into the room to maintain an enjoyable and consistent atmosphere.
Now, advanced technology, such as smart sensors, allows dehumidifiers to auto-adjust based on room humidity level, making for greatest performance and energy efficiency. This, in turn, makes the considered devices very practical and easy for an average home owner to apply, in order to maintain a comfortable home environment.
Importance of Setting the Right Humidity Level
Ensuring access to the best air humidity is being crucial for health, comfort, and the upkeep of other possessions. Usually, indoor humidity is supposed to be maintained between 30 and 50 percent; anything outside this range brings upon multiple problems. Here are five major reasons why getting the humidity right is very important:
🦠 Prevents Mold and Mildew Growth
High humidity levels hammered in the perfect condition for mold and mildew to grow, worsening indoor air quality, causing health mitigation helmets, and exacerbating respiratory conditions and allergies.
🪑 Protects Wooden Furniture and Structures
At high humidity, water gets absorbed into the wood and might very much swell it out, lay it bear, and gradually rot it, while low humidity makes it dry out and crack. Therefore, maintaining proper humidity protects furniture, floors, and wooden fixtures.
😊 Enhances Personal Comfort
Humidity is too high to let it feel sticky. Meanwhile, the very low humidity will dry out the skin, irritate it, and make breathing uncomfortable. Balanced humidity will provide a more pleasant environment.
🦟 Reduces Dust Mites and Allergens
Dust mites flourish in a high-humidity environment. Controlling humidity can reduce their common numbers, thereby improving indoor air quality and allergy symptoms.
⚡ Maintains Energy Efficiency
If humidity levels are well maintained, then they will support your heating and cooling units. In an example, a dehumidified atmosphere feels cooler, hence requiring less air-conditioning, which can offer you useful energy savings.
Setting the right humidity level is an easy and effective way toward making sure that your place of residence remains comfortable and healthy, prolonging the life of your belongings, and maintaining energy efficiency.
Common Components of a Dehumidifier
Dehumidifiers have several key components working together to remove extra humidity from the air and maintain optimum humidity in your room. Below are five essential parts and their functions:
Together, these get the whole system going to ensure that your dehumidifier can work efficiently and provide you with comfortable and dry surroundings.
Common Reasons a Dehumidifier is Not Collecting Water

If your dehumidifier looks like it should work but isn’t collecting water, several possibilities might stand in the way. Let’s work through five causes and details that will help you figure it out and possibly fix the issue:
1
Too Cold Room Temperature
Generally, dehumidifiers operate optimally in areas with temperatures above 65°F (18°C). If the room is too cold, the moist air may never quite reach the coils; hence the water collection is minimal.
2
Dirty or Clogged Air Filter
If your air filter gets clogged by dust, it would be harder for the air to flow through the unit. This prevents the dehumidifier from pulling in enough air to remove moisture. Regular cleaning or replacement of the air filter is recommended as routine maintenance.
3
Malfunctioning Humidistat
If the humidistat is faulty, the unit might be unable to read the actual humidity levels and hence would not give a command to the dehumidifier for starting the process of dehumidification. This may result in no water being collected by the unit.
4
Full or Improperly Positioned Water Tank
When the water tank is full or placed incorrectly inside the unit, the dehumidifier will cease to perform efficiently. Most such devices contain a sensor that stops dehumidification when the tank is full or improperly aligned. Ensure that the tank remains in place and is emptied regularly.
5
Compressor Failure or Refrigerant Leak
The compressor is essential during the dehumidification stage; functioning as the power source for the cooling coils inside the unit that condense moisture. An incompetent compressor or refrigerant leakage can render the dehumidifier incapable of efficiently collecting water, and thus it may need professional servicing.
Once these common issues are taken care of, the dehumidifier will most likely regain functionality, thereby keeping the indoor environment comfortable.
Improper Humidity Levels
Comforts, health, and home preservation depend on proper indoor humidity levels. If humidity levels fall out of the acceptable range of 30-50%, there will be several consequences. Please find below five inconveniences created by the inappropriate level of humidity inside a house:
Dry Air and Skin Irritation
Low humidity dry out the air and with that, the skin can lose moisture, become irritated, and also face respiratory problems.
Mold and Mildew Growth and Allergies
High humidity favors the generation of molds and mildew, thereby aggravating allergies and health issues.
Warping of Wood and Damage to Furniture
High humidity causes wooden furniture levels, flooring, or home structure to warp, swell, or crack.
Static Discharges
Low humidity leads to frequent static discharges that may harm electronics and give little jolts which are downright annoying.
Window Condensation and Damage
Increased humidity levels encourage window condensation that may lead to water damage and deterioration of window frames with time.
By monitoring and controlling humidity, a person can keep these problems from occurring and create comfort and durability in the living environment.
Clogged or Dirty Air Filter
Gritty with Contaminants Affecting Efficiency and Performance: The blocking or clogging of the air filter leads to many issues for the HVAC system. Below are five major problems that are caused when air filters are neglected:
➡️ Airflow Reduction
It blocks the air passage; the system has to work hard to get air of the desired temperature, and by inhibiting air flow, the system consumes more power and raises energy bills.
💨 Poor Indoor Air
When an air filter is dirt-laden, dust particles, allergens, and pollutants are not properly captured and are allowed to float down through the residence to jeopardize respiratory health.
🌡️ System Overheating or Freezing
Restricted air circulation may bring about overheating in heating setups or freezing in cooling setups, thus engendering costly repair bills or permanent damage.
❄️ Inoperative Heating or Cooling
When the air filter is dirty, the system has difficulty distributing warm or cool air evenly, causing temperature fluctuations.
⏳ Shortened Lifespan
Increased load results in an accelerated wear and tear, which ultimately diminishes the total life duration of HVAC.
Thus, changing or cleaning air filters on a regular basis is the easy means to prevent such problems from attaining optimum HVAC system functionality.
Full Water Tank Issues
When the water tank is full, it creates conditions in which varied issues surface, which may hamper the coping and functionality of the system it supports. Five common problems with a water tank full are enumerated below:
💧 Overflow Water Damage
When an overfilled tank gets spilled, such water spills may cause structural damage to the area, induce mold on walls, or cause an electrical hazard.
📉 Efficiency Loss in Systems
Several systems require the water tanks to be at least half full. Having either too full or too empty can cause interference with the efficiency of the operations, such as water heating or cooling.
⚠️ Pressure Build
Additional pressure can build in cases where extra water is present in the tank, potentially damaging pipes, valves, or even other components attached to the system.
💰 Increment in Price Relation to Maintenance
Consistent overfilling may require some additional maintenance or, ultimately, some replacement of parts, which adds up to the operational cost.
Because of this a proper monitoring of water levels should be established with some maintenance preventive measures in place to circumvent such problems and safeguard the life and operational efficiency of your water tank system.
Troubleshooting Steps for a Non-Working Dehumidifier
With the above troubleshooting steps, several problems can be identified and solved, which may prevent a costly repair or purchase altogether. Follow these systematic approaches to diagnose and fix your dehumidifier:
1
Power Supply Check
Make sure the dehumidifier is plugged in and getting power. Test the outlet with some other appliance to verify if it is working. If the unit still is not turning on, then you would have to check the blown fuse or tripped circuit breaker.
2
Inspect the Water Tank
Most dehumidifiers are equipped with a safety mechanism that will not permit the machine to do its work if the water tank is full or not properly positioned. Empty the tank and make sure it fits back securely. Check for any dirt or debris that may hinder the water level float.
3
Air Filter Cleaning
A clogged air filter restricts airflow and inhibits dehumidifier efficiency. Remove the air filter and clean it according to the manufacturer’s instructions. Replace if the filter is damaged or badly soiled.
4
Check for Appropriate Room Conditions
Dehumidifiers will work best only within specific temperature ranges and humidity levels. One must use a hygrometer to check the temperature and humidity of the room. If the room is cold (say, below 41°F/5°C), the dehumidifier may frost up and cease working.
5
If Frosting on Coils Is Noticeable
Once frost is present on the coils of the dehumidifier, frost builds up that impedes its operation. After noticing the frost, immediately turn the unit off and let it defrost. Also, check if the room temperature is suitable as required by the manufacturer, and if not, either increase the ventilation or the room temperature to avoid freezing in the future.
Checking the Power Outlet and Electrical Connections
When your dehumidifier abruptly stops working, the first thing to inspect is whether the power socket and the electrical cables are at fault. Checking a constant and steady supply of power is important for the operation of the electrical appliance. There are five detailed steps to follow for this investigation:
- 1
Test the Power Outlet
Try plugging in another device—the lamp or phone charger—to confirm that power is actually running through the outlet. If such device does not run on power, then maybe the problem is in the outlet.
- 2
Inspect the Power Cord
Look carefully and check for any visible signs of damage to the power cord of the dehumidifier such as cuts in the cable, fraying, or exposed wires. A damaged cord may prevent power from reaching the device and may present a hazard for the user.
- 3
Look for Tripped Circuit Breaker or Blown Fuse
First check to see if the circuit breaker corresponding to the outlet has tripped, or if a fuse is blown. If the breaker is tripped, reset the breaker. If a fuse is blown, replace the fuse.
- 4
Ensure Proper Plug Connection
Make sure that the plug is properly inserted into the outlet. A loose connection can allow intermittent power to flow through or can just turn off the power.
- 5
Testing Another Outlet
If the original outlet is thought to be faulty, then plug in the dehumidifier in any other outlet—ideally one on a separate circuit—to discount any electrical supply problems.
By going carefully through these checks, one may identify and eliminate problems relating to power while also restoring the dehumidifier without the help of an expert.
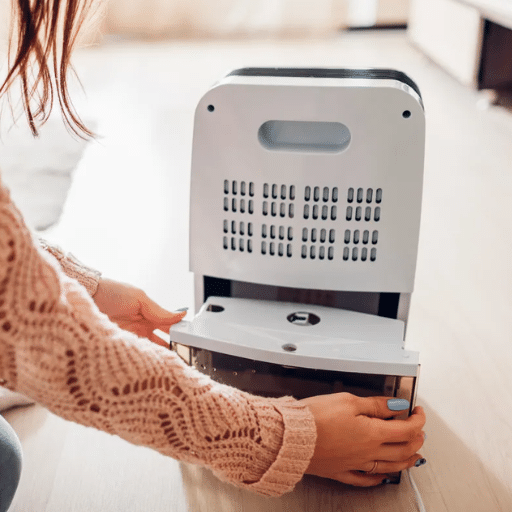
Inspecting the Water Tank and Float Switch
The water tank and float switch are two very essential components in a dehumidifier. From time to time, inspect them to make sure they are working efficiently. Any malfunction in these parts can cause the unit to shut down and fail in its assigned task. The points detailed below elaborate on the thorough inspection procedure for the water tank and float switch.
Check the Water Tank for Fullness
Check that the water tank is never full—this automatically stops the unit from functioning. The tank must be emptied fully and secured once again.
Look for Cracks or Leaks
Check the water tank for any cracks—holes or other damages that may prevent proper collection of water. Replace the tank if required to prevent any further complications.
Clean the Water Tank
Clean the tank from any dirt, mold, or residue which might have accumulated. This will aid in the efficiency of water collection by the tank and prevent the growth of bacteria-type organisms.
Inspect Float Switch Position
The float switch must be in the right position and not jammed. A faulty float switch might falsely inform the system that the tank is full, preventing the dehumidifier from running.
Test the Float Switch Mechanism
Gently jiggle the float switch to test for responsiveness. Ensure that it moves freely and that the sensor is appropriately sensor. If you find that the float may be damaged or unresponsive, it could need replacement.
This inspection will keep both the water tank and float switch in their best condition for the smooth and efficient operation of your dehumidifier.
Cleaning the Air Filter and Coils
Air filter and coil cleaning should be done regularly for your dehumidifier to be efficient and for air quality to remain good. You can proceed and follow these steps:
⚠️
Turn Off and Unplug the Unit
Before performing any maintenance procedure, ensure the dehumidifier is unplugged for safety.
1
Remove the Air Filter
Locate the air filter in the dehumidifier; they are generally found near the air intake. Carefully slide or unclip the air filter.
2
Clean the Air-Filter
Wash the air-filter under warm discharge of water; this dislodges a good amount of dust and dirt. You can only vacuum clean it when its dirt is light with the vacuum cleaner having a brush attachment. Dry it completely before reinstating it into the air intake.
3
Inspect and Clean the Coils
Locate the coils of both evaporator and condenser inside the unit. Use a soft brush and coil cleaning solution to carefully remove dust and dirt buildup since buildup could hamper performance and cause freezing.
4
Reassemble and Test the Unit
Reinstall the air filter and properly re-secure any covers once everything is clean and dry. Plug in the unit, turn on the power, and check if it is functioning properly.
Keeping the air filter and coils clean over time will keep the dehumidifier in good working condition for much longer, preventing efficiency loss and enhancing indoor air quality. It is recommended to carry out this maintenance process every 2 to 3 weeks, though depending on the frequency of use.
When to Call a Professional for Repairs

Good maintenance can help to keep the dehumidifier functioning properly, but there are times when a technician is necessary. Here are some of the symptoms indicating that it’s time to call a professional:
💧
Persistent Water Leaks
💧
Persistent Water Leaks
If the dehumidifier leaks water even after you have ensured that the tank is correctly set and emptied on a regular basis, then there would be a bigger internal problem such as having damaged seals or clogged internal components.
🔊
Unusual Noises
Grinding, rattling, or loud buzzing while running may be an indication of a faulty fan, motor, or other internal parts that need attention from the technician.
❌
Failure to Collect Moisture
If the dehumidifier runs but doesn’t collect moisture from air, then it may be a refrigerant leak, faulty coil, or broken compressor, all of which would need to be fixed by a professional.
⚠️
Error Codes or Shut Downs
Frequent error messages or shutdowns clearly indicate some type of electrical or mechanical fault. A technician will be able to diagnose and repair the issue accurately.
❄️
Constant Freezing of the Coils
If the coils keep freezing even when the room temperature is within the working range of the dehumidifier, the trouble is likely with the thermostat, refrigerant level, or airflow, all of which require the intervention of a technician.
Getting these things fixed by a professional right now can avoid further damage, keep the dehumidifier running well, and prolong its life.
Identifying Refrigerant Leaks
Refrigerant leaking in a dehumidifier would mean poor operational performance, high power consumption, and damages to the units. Timely recognition must be made to ensure a quick remedy is administered. Below are five refrigerant-leak issues in dehumidifiers to look out for:
📉 Reduced Efficiency
A leak of refrigerant can make a dehumidifier inefficient either causing it to take longer than usual to bring down humidity levels or, conversely, to not maintain optimal values at all. In such a case, the system has to work unusually hard to make up for the loss and, therefore, operates inefficiently.
🔊 Hissing or Bubbling Sounds
Persistent hissing or bubbling sounds from the dehumidifier can be a sign of a refrigerant leak. Generally, the noise is made as the refrigerant escapes from the coils or pipes under pressure.
❄️ Frosting or Icing of Coils
When the refrigerant quantity is insufficient, the coils tend to fill with frost or ice. This happens because the refrigerant can no longer absorb heat from the air efficiently.
💰 Higher Energy Bills
The leak in the refrigerant system will force the dehumidifier to run for longer periods to attain desired results, and that leads to increased energy consumption and a rise in utility bills.
🧪 Chemical Odor
Should such a leakage occur, it immediately sets off the psyche: If a chemical odor emanates, then the refrigerant must be escaping from the unit. The odor should never be ignored, as being exposed to large amounts of certain refrigerants could be harmful.
These early symptoms will serve to help timely repairs avert additional damage to the internal components of the dehumidifier. Always consult a qualified technician to initiate a sound diagnosis and effectively resolve any refrigerant leaks.
Electrical Issues Beyond Basic Troubleshooting
Electrical issues in a dehumidifier are hard to diagnose and repair unless done by an expert; therefore, the five listed common electrical issues occur beyond basic troubleshooting:
All the above problems require the intervention of a licensed technician, so the job is done safely and correctly.
Deciding Between Repair and Replacement of Your Appliance
When functioning improperly, an appliance can make for a difficult choice: to be repaired or replaced? Here are five factors and applicable details one may want to consider to make an informed decision:
📅 Age of Appliance
Most appliances have an expected lifespan. For instance, the typical life of a refrigerator tends to range from 10 to 15 years, whereas a dehumidifier can live for somewhere between 8 and 10 years. If anything is just about to reach its life expectancy, replacement would probably be a little more cost-effective than repairing it.
💰 Cost of Repair and Cost of Replacement
Basically, all you have to do is estimate what the cost of a repair will be and then compare that to what you would pay for a new unit. A common rule of thumb is the 50% rule: if the cost of repairing something is half or more than the cost of buying a new one, then replacement should be the way to go.
⚡ Energy Efficiency
Older appliances tend to make use of more energy rather than the modern, energy-saving appliance models. A cost-benefit investigative scenario considers having a new appliance instead of the old one will save money on energy bills in the long run. This also remains good for the environment.
🔧 Frequency of Repair
If your dehumidifier requires frequent repairs, it may be more economical to invest in a new unit rather than continue paying for ongoing maintenance and repairs.
🆕 Observing the Year of Manufacture
More recently manufactured appliances are equipped with all the newly available features and latest standards parallel to the industry. Therefore newer means better in terms of every detailed aspect.
Analyzing these factors carefully can help you make an optimal decision while balancing costs, efficiency, and the longevity of your household appliances.
Tips for Maintaining Your Dehumidifier
Your dehumidifier, when maintained well, can work efficiently and for a much longer period while also ensuring safety during operation. Below are five helpful pointers in taking care of your dehumidifier:
Air Filter Needs Cleaning or Replacement
Most dehumidifiers do have an air filter that does what the name suggests: dust, dirt, allergens-etc. Try to clean the filter every two weeks, or if it’s too dirty to clean, replace the filter altogether. Good airflow is essential to keep the machine working best without being overburdened.
Empty and Clean the Water Tank
Empty the water tank regularly; leave it alone, and it will become a breeding ground for mold and bacteria. Wash the tank in warm soapy water once a week to keep it hygienic.
Check and Clean the Coils
Coils can gather dust and debris, thereby reducing the efficiency of your dehumidifier. Check and clean the coils every few months using either a soft brush or vacuum to prevent clogging and keep them functioning well.
Place the Unit Correctly
Place your dehumidifier at least 6–12 inches away from walls or furniture to allow sufficient airflow. This will enhance the efficiency of the unit and allow it to circulate air freely.
The Drainage System Should Be Checked
Hoses should be inspected periodically for clogs and kinks should be eliminated, keeping the drainage system clear, and water does not back up. This will ensure the operation of the unit without interruptions.
Following these suggestions will help keep your dehumidifier in good shape, promote indoor air quality, and avoid expensive repair bills from negligence.
Regular Cleaning and Maintenance Schedule
Great care in keeping your dehumidifier clean and in good condition will maximize its efficiency and extend its lifetime. Listed below are five important chores of a regular maintenance routine:
If you uphold this maintenance schedule, your dehumidifier will work at its peakly during operation and efficiency.
Setting Optimal Humidity Levels for Efficiency
It is important to maintain humidity between 30 and 50 percent to remain comfortable and healthy. I modify the set points by the season or depending on the condition of the room, trying to avoid dry air or very humid air.
Upgrading to a New Dehumidifier: When and Why
Upgrading your new dehumidifier is indeed wise when the old model begins to show signs of poor performance-maybe a hard time holding onto desired humidity levels, or too noisy or frequent breakdowns. Another reason for upgrading looks evident through seasonal search trends; for instance, energy bills all clear signals of an aging or inefficient appliance. New-generation dehumidifiers are hard-wired and equipped with new features such as smart humidity sensors, energy-saving modes, and silent running to confirm value for money. Also, the older your dehumidifier the older 8 10 years; new ones can give you not only better performance but also help you cut down on carbon footprints, thereby upgrading indoor air quality.
References
- ASHRAE (American Society of Heating, Refrigerating, and Air-Conditioning Engineers)
ASHRAE provides industry standards and guidelines for HVAC systems, including troubleshooting and maintenance of dehumidifiers.
Website: https://www.ashrae.org - Energy Star (U.S. Environmental Protection Agency)
Energy Star offers guidelines and troubleshooting tips for energy-efficient appliances, including dehumidifiers.
Website: https://www.energystar.gov - Appliance Parts Pros
This site provides detailed troubleshooting guides and repair tips for various appliances, including dehumidifiers.
Example: Fixing a Dehumidifier That’s Not Reaching the Desired Humidity Level
Frequently Asked Questions (FAQ)
What are the common reasons a dehumidifier is not collecting water?
There are several common reasons a dehumidifier might not be collecting water. It could be due to a full water tank, a clogged air filter, improper humidity settings, or even electrical issues. Additionally, if the humidity level in the environment is already low, the appliance may not run as frequently or collect as much moisture from the air.
How can I troubleshoot my dehumidifier that isn’t working?
To troubleshoot a dehumidifier that isn’t working, start by checking the power outlet and ensuring that the appliance is plugged in. Next, inspect the water tank to see if it’s full or improperly seated. Clean the air filter and check for any blockages in the airflow. Additionally, verify the humidity control settings to ensure they are set correctly.
Why is my new dehumidifier not collecting water?
If your new dehumidifier is not collecting water, it may be due to low humidity levels in your environment. New appliances may also take time to adjust and start functioning optimally. Ensure that the humidistat is set correctly, and check the user manual for any specific troubleshooting tips related to your model.
How do I fix a dehumidifier that is not working properly?
To fix a dehumidifier that is not working properly, start by checking the power supply and ensuring the plug is secure. Inspect the water tank for any leaks or blockages. Clean or replace the air filter, and examine the evaporator coils for frost buildup. If problems persist, consider contacting a technician for further appliance repair.
What should I do if my dehumidifier is leaking water?
If your dehumidifier is leaking water, first check the water tank to ensure it is properly positioned and not cracked. Inspect the hoses for any blockages or damages, and check the seals for any leaks. If you find any debris or buildup obstructing water flow, clean it immediately. If the issue continues, it may require professional repair.
How can I clean my dehumidifier for optimal performance?
To clean your dehumidifier for optimal performance, start by unplugging the appliance. Remove and wash the air filter with warm, soapy water, then let it dry before reinstalling. Clean the water tank with a mixture of vinegar and water to prevent mold buildup. Additionally, wipe down the exterior and ensure that the evaporator coils are free from dust and debris.
Is it normal for a dehumidifier to frost up?
It is not uncommon for a dehumidifier to frost up, especially in cooler environments. Frost can form on the evaporator coils if the humidity level is low or if the appliance is set to a very low temperature. If excessive frost accumulates, it may indicate a malfunction or that the appliance is not suited for your environment.
How often should I replace the air filter in my dehumidifier?
The air filter in your dehumidifier should typically be replaced every 3 to 6 months, depending on usage and the level of dust and debris in your environment. Regular cleaning of the filter can also extend its life and ensure efficient operation of the appliance. Always refer to the user manual for specific recommendations for your model.