Proper humidity control in your home is essential for maintaining comfort, preventing mold growth, and protecting your household’s structural integrity. A whole-house dehumidifier integrated into your HVAC system provides an efficient solution to regulate indoor moisture levels year-round. This guide will walk you through the entire installation process, from assessing your HVAC setup to ensuring the system operates effectively. We will cover essential tools, step-by-step instructions, safety considerations, and tips for optimal performance. Whether you’re a DIY enthusiast or preparing to hire a professional, this comprehensive overview will equip you with the knowledge needed for a successful installation.
What is a whole-house dehumidifier and why should I connect it to my ducting?

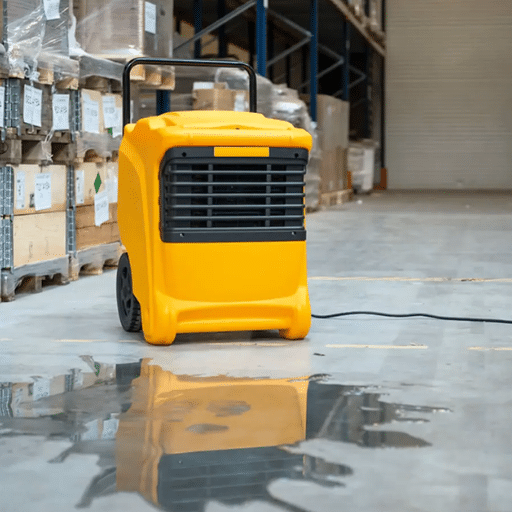
A whole-house dehumidifier is a system designed to control humidity levels throughout your entire home, creating a healthier and more comfortable living environment. Unlike portable units, which target specific spaces, whole-house dehumidifiers integrate seamlessly with your HVAC system to manage humidity across all rooms. Connecting the dehumidifier to your ducting allows it to work in conjunction with your centralized air system, ensuring even distribution of dehumidified air. This integration improves indoor air quality, reduces the risks of mold and mildew growth, and enhances the efficiency of your overall HVAC system.
Understanding how whole-home dehumidifiers control humidity throughout your house
Whole-home dehumidifiers operate by drawing in warm, moist air through your HVAC system’s return ducts. Once inside the dehumidifier, the air passes over a cold coil where moisture condenses into water, which is then drained away. The now dehumidified, cooler air is reheated slightly and distributed back through the house via your ductwork. This process ensures consistent humidity control, maintaining optimal indoor levels between 30-50%. By continuously monitoring and adjusting moisture levels, these systems prevent excessive dampness that can lead to issues like mold growth, allergens, or poor air quality. They work seamlessly with your existing HVAC system to provide uniform comfort and energy efficiency, requiring minimal intervention once installed.
Benefits of integrating dehumidifiers with existing HVAC systems
Improved Indoor Air Quality
By reducing excess humidity, dehumidifiers minimize the growth of mold, mildew, and allergens, leading to fresher, healthier air. This can significantly improve comfort for individuals prone to allergies or respiratory issues.
Enhanced Energy Efficiency
When humidity levels are controlled, your HVAC system doesn’t have to work as hard to cool your space. Lowering the moisture content in the air allows the system to maintain optimal temperatures with less energy consumption, reducing utility bills.
Extended HVAC System Lifespan
Excess humidity can place additional strain on HVAC components, leading to wear and tear over time. Integrating a dehumidifier helps your system run efficiently, decreasing the likelihood of costly repairs or premature replacement.
Consistent Comfort Throughout the Year
Dehumidifiers ensure a balanced and consistent humidity level, eliminating the stickiness caused by high moisture levels in summer and enhancing overall indoor comfort regardless of the season.
Prevention of Structural Damage
Excessive humidity can lead to damp environments that damage walls, wood, and other structural components. A dehumidifier protects your living space by preserving the integrity of your home’s materials.
Comparing standalone units vs. duct-connected dehumidification systems
When deciding between standalone units and duct-connected dehumidification systems, it is essential to consider factors such as installation, efficiency, and suitability for your space.
Standalone Units
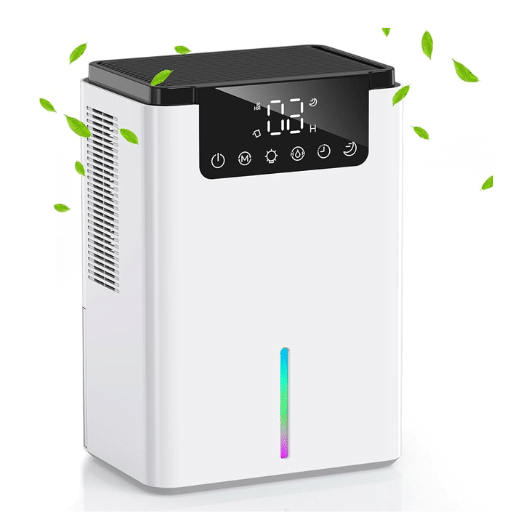
Standalone dehumidifiers are portable and simple to install, making them an excellent choice for smaller spaces or single rooms. These units are cost-effective upfront and ideal for targeting specific problem areas. However, they may require frequent maintenance, such as emptying water tanks, and have limited capacity, which can make them less suitable for managing humidity throughout an entire home.
Duct-Connected Systems
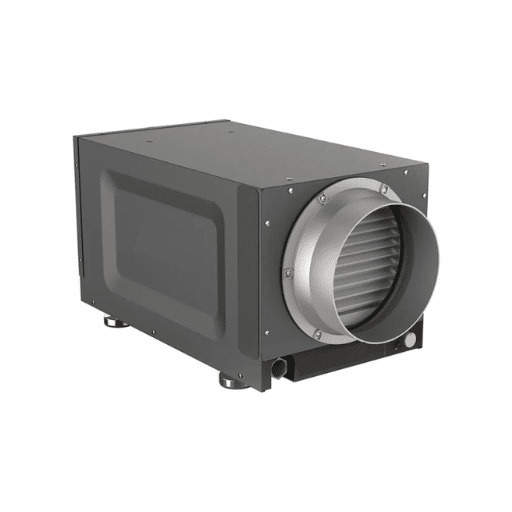
On the other hand, duct-connected dehumidification systems integrate directly into your HVAC system, allowing them to control humidity across the entire house. While these systems have a higher initial cost and require professional installation, they are more efficient for large spaces and can often operate more quietly. Duct-connected systems also eliminate the need for manual water disposal due to built-in drainage mechanisms.
Which One to Choose?
Standalone units are better suited for localized issues or temporary needs, while duct-connected systems are ideal for comprehensive, long-term humidity control in larger homes. Consider your budget, space size, and specific requirements before making a decision.
What are the different ways to incorporate a dehumidifier into ducting?

Dedicated Return Duct
Connect the dehumidifier to a dedicated return duct to draw in air from a specific part of the home, ensuring effective humidity control in targeted areas.
Supply Plenum Connection
Install the dehumidifier to discharge dry air directly into the HVAC system’s supply plenum, allowing dehumidified air to circulate throughout the entire home.
Bypass Configuration
Use a bypass duct to allow air to flow through the dehumidifier and back into the main HVAC system, reducing installation complexity.
Standalone Duct System
Set up the dehumidifier with its own separate intake and discharge ducting, independent of the central HVAC system, for focused operation in specific zones.
Each method offers distinct advantages depending on your home’s layout, the HVAC system’s design, and your humidity control needs.
Return-to-return vs. return-to-supply configurations
When integrating a dehumidifier into an HVAC system, the choice between return-to-return or return-to-supply configurations depends on your specific goals and system requirements:
Return-to-return Configuration
This setup connects the dehumidifier between the HVAC system’s return ducts. The air passes through the HVAC return duct, then into the dehumidifier, and finally re-enters the return duct. This approach is simpler to install and often more energy-efficient since it dehumidifies air already circulating within the system. However, it may limit the coverage to areas already connected to the existing return ducts.
Return-to-supply Configuration
Here, the dehumidifier draws air from the return duct, conditions it, and directs it into the supply duct, distributing dehumidified air throughout the home. This method ensures more balanced humidity control and better airflow distribution. However, it requires meticulous design to avoid airflow conflicts and may be more complex and expensive to implement.
Both configurations serve distinct purposes. A return-to-return setup is ideal for targeted humidity reduction, while return-to-supply offers comprehensive dehumidification throughout the house. Consult an HVAC professional to evaluate your home’s setup and determine the best option for your needs.
Dedicated dehumidification ducting options
When considering dedicated dehumidification ducting, there are three main options to explore:
Standalone Dehumidifiers with Dedicated Ducting
Standalone dehumidifiers can be installed with their own dedicated duct system. This setup draws in moist air directly and channels dehumidified air back into specific areas. It is a flexible option for targeted humidity control, ideal for rooms like basements or crawl spaces that are particularly prone to excess moisture. Installation, however, may require additional ductwork, increasing initial costs.
Integrated Dehumidifiers with HVAC Systems
These dehumidifiers connect directly to your existing HVAC system. Moist air is dehumidified as part of the HVAC airflow, providing seamless whole-home humidity management. While it ensures uniform comfort, professional installation is essential to ensure compatibility with your existing system and to prevent complications like airflow imbalances.
Zoned Dehumidification Systems
Zoned systems use multiple ducts to target specific areas independently. A dehumidifier connected to a zoned system can focus its efforts on high-humidity areas without affecting the rest of the home. This option is highly efficient for homes with diverse humidity needs, though it requires careful planning and advanced controls to manage multiple zones effectively.
Each option comes with benefits and considerations. Consult a professional to evaluate your home’s layout, HVAC system, and humidity levels to determine the most effective solution for your dehumidification needs.
Bypass systems and how they integrate with your air handler
Bypass systems are a popular choice for managing humidity and improving indoor air quality by working in conjunction with your HVAC air handler. These systems utilize a duct or bypass damper to redirect excess air from the supply side of the air handler back into the return side. This circulation allows the system to maintain steady airflow and enhance dehumidification efficiency without overloading the HVAC unit.
Integration is seamless, as the bypass system connects directly to the existing ductwork of your air handler, requiring minimal modifications. The air handler ensures proper movement and processing of air while the bypass unit supports additional moisture control by managing airflow balance and optimizing humidity extraction. This synergy between the systems makes bypass setups an efficient option for homes needing consistent humidity control without the need for entirely separate systems. Proper sizing and installation by a professional are essential for maximizing the performance and avoiding pressure imbalances in the system.
What tools and materials will I need to connect a dehumidifier to my duct system?
To incorporate a dehumidifier into your existing duct system configuration, you need the following tools and materials:
Ducts that are bendable are needed to form the required connections.
Duct tape or hose clamps to hold the duct connections.
Sufficient collars or rings to fix the dehumidifier and ducting.
Drain hose to dispose of excess water from the dehumidifier.
Foil tape will be used to cover gaps located in the duct system.
Screwdriver and drill for mounting parts and tightening connections.
Accurate measuring tape will be used for ensuring correct placements and useful connections.
Duct sealant will be used to create airtight joints in the system to increase efficiency.
Remember to follow the guidelines provided by the manufacturer as all peripherals must work with the system’s specifics and the instructions need to be adhered to.
Essential ductwork components and connection materials
Proper ductwork installation relies on a variety of components and materials to ensure efficient airflow and system performance. Below is a concise overview of key elements:
Duct Sections: These include rigid sheet metal ducts (commonly galvanized steel or aluminum) and flexible ductwork, which are used to transport air to different spaces.
Duct Fittings and Elbows: Necessary for changing airflow direction or connecting different duct sections.
Connectors and Collars: Used to join duct sections securely, often paired with clamps to prevent air leaks.
Dampers: Installed within the duct system to regulate airflow and balance pressure throughout the network.
Insulation: Critical for maintaining energy efficiency by reducing heat loss or gain as air moves through the system.
Sealants and Tapes: Often HVAC-rated, these materials ensure airtight connections, preventing energy loss and improving system performance.
Hangers and Supports: Provide proper alignment and structural stability for all duct sections, reducing the risk of sagging.
Vibration Isolators: Installed between components to minimize noise and vibration during system operation.
By combining quality materials with skilled installation, ductwork can be optimized for long-term efficiency and reliability.
Wiring requirements for integrating with your HVAC system
Correct electrical wiring guarantees the safety and operational efficiency of your HVAC system. Key wiring considerations include the following:
Wiring the Thermostat: Ensure that your thermostat is compatible with the HVAC system. Most systems would accept a standard 18/5 or 18/8 wire gauge which accommodates the C-wire, along with cooling, heating, fan, and power functions.
Connections to Control Boards: Make sure all wires are secured to the correct control board terminals. Common ones include R for power, Y for cooling, W for heating, G for fan, and C for common, all of which must also match the thermostat wiring schematic.
Electrical Power Requirements: Ensure that the HVAC system voltage rating is within the limits. Depending on the system, the rating is usually 24V for the thermostat. This means that all circuit breakers and wiring must be rated to the power output limit of the system to prevent overheating damages or faults.
Challenges and Safety: Correct grounding is critical to averting electrical surges. Grounding must also be done with a dedicated breaker and all wires securely attached to the system frame and electrical panel.
Compatibility with Smart Systems: Check the owners manual of the smart system, as Smart Thermostats will usually have wires or adapters enhancing compatibility with other home automation systems.
Dampers and flow control mechanisms for proper installation
Proper installation of dampers and flow control mechanisms is crucial for optimizing airflow within an HVAC system. These components are designed to regulate and balance airflow to different zones, ensuring consistent temperature and energy efficiency. Begin by determining the type of damper required, such as manual, automated, or zoning dampers, depending on the system needs. Ensure dampers are correctly sized and positioned within the ductwork to avoid obstructing airflow.
During the installation, verify that the dampers are aligned and tightly sealed to prevent leakage, which can compromise system performance. For automated dampers, confirm wiring connections align with the control system, and check compatibility with thermostats or zoning controllers. Testing is essential after installation to fine-tune the flow control mechanisms and achieve the desired airflow balance. Always consult the manufacturer’s guidelines and ensure the setup complies with local building codes for safe and efficient operation.
How do I properly size a whole-home dehumidifier for my ducting?
For ducting considerations, several factors need to be taken into account for sizing a whole home dehumidifier. First, estimate the total square footage of your home, identify the humidity levels you would want to control, then measure the air volume in CFM (cubic feet per minute) that your HVAC system works with because it dictates the airflow that has to be supported by the dehumidifier. Choose a dehumidifier that meets your needs, which is usually in pints per day, given the size of the house and climate. Check that the unit is compatible with your ducting configuration and will be able to work properly with your HVAC system because it needs to function seamlessly.
Calculating moisture removal needs based on your home’s square footage
To determine the appropriate dehumidifier for your home, start by calculating the total square footage of the space where moisture control is needed. The general rule is that larger spaces require dehumidifiers with greater capacity, often measured in pints of moisture removed per day. For example, a space of around 500 square feet with moderate dampness may require a 10-pint dehumidifier, while a larger 1,000 square-foot area could need a unit with 20 pints per day capacity. Additionally, more humid climates or significantly damp conditions might demand higher capacity, adding roughly 4-5 pints for every additional moisture concern, such as a basement or high-humidity environment. Many manufacturers provide capacity charts for their products to simplify the selection process based on square footage and relative humidity levels. For best results, ensure accurate measurements and align your choice with the specific conditions of your living space.
Matching dehumidifier capacity to your existing HVAC system
To ensure your dehumidifier works seamlessly with your existing HVAC system, it’s essential to consider compatibility in terms of capacity and airflow. First, check the size of your HVAC system and its cooling capacity, measured in BTUs (British Thermal Units). A dehumidifier should complement this capacity rather than overwhelm it. For example, an oversized dehumidifier could disrupt airflow and reduce system efficiency, while an undersized unit may struggle to reduce humidity effectively.
Next, evaluate your system’s duct and airflow setup. If you’re integrating the dehumidifier directly into the ductwork, ensure it supports the airflow capacity (measured in CFM, cubic feet per minute) to avoid pressure imbalances. Many dehumidifiers include recommended airflow specifications to guide compatibility.
Finally, consider the climate in your region and the specific humidity levels of your home. If you live in a particularly humid area, you might need a larger-capacity dehumidifier. For those integrating a whole-house dehumidifier, consulting with an HVAC professional is highly recommended to fine-tune compatibility and optimize performance.
Special considerations for different climate zones
When selecting and installing a dehumidifier for an HVAC system, climate-specific factors must be accounted for to ensure efficiency and prevent energy waste.
Humid Climates: Areas with consistently high humidity levels require dehumidifiers with greater capacity to manage moisture effectively. Opt for units with energy-saving features to mitigate higher operational costs due to prolonged use.
Arid Climates: While managing moisture is less of a concern in dry regions, installing a dehumidifier may still be necessary in spaces prone to seasonal humidity fluctuations or specific areas like basements. Focus on models designed for precise moisture control to avoid over-dehumidification and maintain comfort.
Temperate Climates: These regions experience variable humidity levels that can change with the seasons. A dehumidifier with adjustable settings and a built-in humidity sensor is ideal to adapt to shifting needs without overcompensation.
Coastal Areas: High salt levels in the air can accelerate corrosion of HVAC components. Selecting a corrosion-resistant dehumidifier is essential for long-term durability and maintaining system efficiency. Regular cleaning and maintenance are also critical in these zones.
By tailoring dehumidifier choice and setup to the local climate, you can ensure peak performance, protect HVAC equipment, and sustain a comfortable indoor environment with minimal disruptions.
What is the step-by-step process to install a dehumidifier into ducting?

Evaluate Your System
Determine the appropriate placement for the dehumidifier within your HVAC system. Ensure compatibility with your ducting layout and calculate the airflow requirements.
Gather Necessary Tools and Materials
Collect all needed tools, such as a screwdriver, ducting tape, clamps, and a saw if modifications to the ductwork are required. Make sure you have the dehumidifier’s installation manual.
Turn Off Power
Before installation, turn off the power to the HVAC system to ensure safety during the process.
Prepare the Area
Identify the ducts where the dehumidifier will be connected, and create openings in the supply and return ducts if required. Ensure all cuts are precise to avoid airflow inefficiencies.
Install the Dehumidifier
Position the dehumidifier in the designated location and secure it in place. Connect the intake and outlet ducts to the corresponding points on the dehumidifier. Use ducting tape or clamps to seal the connections tightly.
Connect Drainage and Power
Attach the dehumidifier’s drainage system to a proper outlet to prevent water buildup. Then, connect the device to the electrical supply as per the manufacturer’s guidelines.
Test the System
Restore power and run the HVAC system to check for proper operation of the dehumidifier. Inspect for any air or water leaks and ensure efficient operation.
By following these steps, you can seamlessly integrate a dehumidifier into your ducting system, enhancing indoor air quality and protecting your HVAC components.
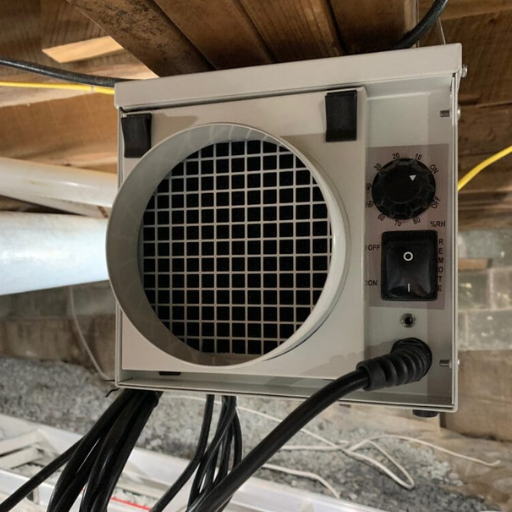
Planning the optimal location (attic, crawl space, or mechanical room)
Determining the best location for your dehumidifier depends on accessibility, drainage options, and airflow requirements. An attic might be suitable if it is accessible, properly ventilated, and well-insulated to prevent temperature extremes that could impact the dehumidifier’s performance. Crawl spaces are another viable option, especially in homes where excess moisture often originates from the ground. Ensure the crawl space is encapsulated or well-sealed and has adequate drainage for efficient operation. Alternatively, a mechanical room can be ideal due to easy access to necessary power and drainage connections, as well as proximity to HVAC systems, making installation and integration more straightforward. Whichever location you choose, always aim for an area with sufficient airflow around the unit and follow manufacturer recommendations for optimal efficiency.
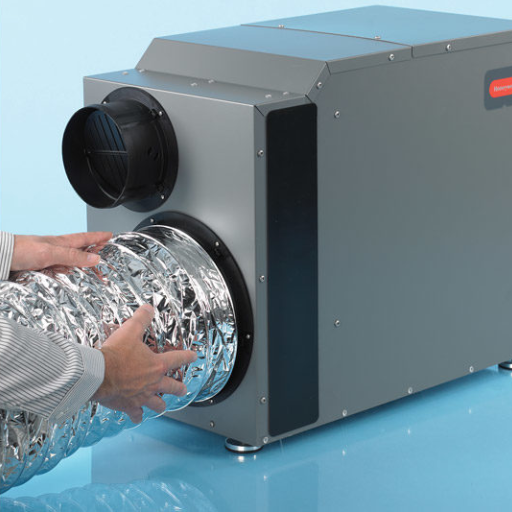
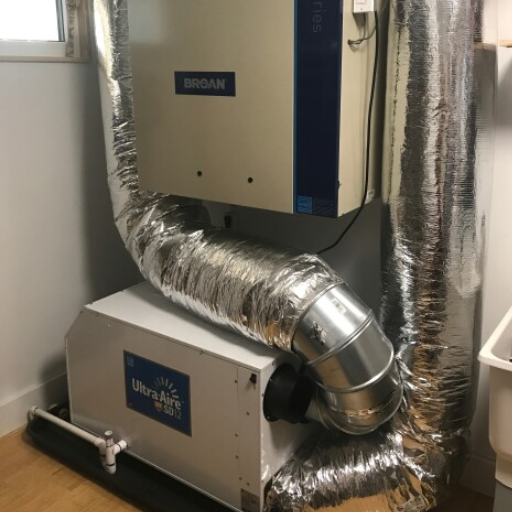
Cutting and connecting dehumidifier to your existing ductwork
Integrating a dehumidifier with your existing ductwork requires careful planning and execution to ensure proper operation and efficiency. Begin by identifying the best location in the duct system for the dehumidifier connection, often near the return air duct to maximize airflow and dehumidification. Measure and mark the duct area where the unit will be installed, ensuring alignment with the dehumidifier’s intake and output ports.
Use metal shears or a similar tool to cut an appropriately sized opening in the ductwork. Securely attach the dehumidifier using brackets or supports, following manufacturer guidelines, and connect the unit’s intake and output ports to the duct system using flexible insulated ducting to minimize vibrations and noise. Seal all connections with foil tape or approved sealant to prevent air leaks, which can reduce efficiency and performance.
Finally, ensure the dehumidifier is properly powered and configured with the HVAC system if integration is required. Double-check that all connections and components comply with local building codes, and test the system to verify that airflow and dehumidification levels meet expectations. Always consult the dehumidifier manual and consider professional assistance to guarantee a safe and effective installation.
Properly sealing all connections to prevent air leakage
To ensure the dehumidifier operates at peak efficiency, it is essential to seal all connections to prevent air leaks. Begin with checking ducts, pipes, and joints for gaps or cracks. Apply a coat of mastic sealant or HVAC tape to all seams and joints to ensure they are sealed properly. Make sure that all flexible ducting is properly secured and clamped to prevent any loose ends. Also, inspect the insulation that is fitted around the ducts and ducts themselves to ensure that there is no exposed insulation that can be classified as leaks and replace if necessary. Following this will improve the system’s energy efficiency and help maintain the desired humidity in the room.
How should I connect the drainage and electrical components?
To connect the drainage components, ensure the drain line is securely attached to the unit’s drain pan and slopes downward to facilitate proper water flow away from the system. Use piping that matches the manufacturer’s specifications and verify that there are no blockages. For the electrical components, follow the wiring diagram provided in the unit’s manual. Turn off the power supply before making connections, and use appropriately rated wires and connectors. Check that all connections are tight and safe before restoring power to the system.
Setting up proper condensate drainage systems
To ensure an effective condensate drainage system, begin by selecting the correct size and type of drain piping recommended by the manufacturer, usually PVC or CPVC, to prevent clogs and ensure durability. The drain line must be installed with a continuous downward slope of at least 1/8 inch per foot to encourage unobstructed water flow away from the unit. Include a P-trap in the system where required to prevent air from being drawn into the HVAC unit. Install secondary drainage, such as an emergency drain pan with a separate outlet, to handle overflows and minimize potential water damage. Regularly inspect and clean the drain lines to avoid algae buildup or debris blockages. Additionally, consider installing a float switch or condensate sensor to shut off the unit in case of drainage failure. Adherence to these practices will enhance system efficiency and prevent water-related issues.
Connecting power and control wiring to your dehumidifier
When connecting power and control wiring to your dehumidifier, begin by ensuring all power supplies are turned off to avoid electrical hazards. Refer to the manufacturer’s wiring diagram provided in the unit manual to identify the correct terminals for power and control connections. Use appropriately rated wires and connectors based on the amperage and voltage requirements of the dehumidifier.
For control wiring, connect the dehumidifier to a thermostat or humidistat as specified by the manufacturer. This allows for precise monitoring and regulation of humidity levels. If integrating the dehumidifier into an HVAC system, ensure compatibility and establish proper wiring connections between the devices. Secure all electrical connections with wire nuts or terminal screws to prevent loose connections, which could lead to malfunctions.
Finally, inspect the wiring for compliance with local electrical codes and standards, and test the system after powering it back on to confirm proper operation. Always consult a licensed electrician or professional HVAC technician if unsure about any step. Proper installation ensures safe and efficient performance of your dehumidifier.
Integrating with smart home systems and humidity controls
Nowadays, smart home systems are fully equipped with smart dehumidifiers that can easily be monitored and operated remotely. To begin, confirm that your device has “smart” attributes, or check if there is compatibility for Wi-Fi and virtual assistants such as Amazon Alexa, Google Assistant, or Apple HomeKit and make sure your model includes smart features. With it, you can use the manufacturer’s app or a third-party one to connect the device to the home network.
For advanced performance, combine smart thermostats or standalone humidity regulation devices for precise climate control. These systems can also measure realtime energy usage and comfort levels while automating alterations to increase comfort further. For example, a specific set of bounds for preferred humidity levels can be activated to easily turn the system on or off.
Make sure that you follow the instructions of the smart home peripherals and the dehumidifier in regard to the combination to ensure seamless integration. Moreover, in order to make the arrangement safe and suitable, constant checking for installation compatibility is essential. Following these steps will allow effortless enhancement to the indoor environment without much hassle.
References
Frequently Asked Questions (FAQ)
Q: What are the initial steps to install a whole-house dehumidifier into your HVAC ducting system?
A: The initial steps include selecting the right unit like an Aprilaire or Ultra Aire, ensuring compatibility with your existing HVAC system, and gathering necessary tools. It’s important to read the product description for specific installation requirements and to consider the layout around the house for optimal placement.
Q: How do I integrate the dehumidifier with my HVAC system’s existing ductwork?
A: You need to assess the supply air and return air paths within your ductwork. A common method involves connecting the dehumidifier to the return duct, allowing it to process the air before it reaches the HVAC system. Ensure the blower is compatible and can handle the additional load.
Q: Can I install a whole-house dehumidifier myself, or should I hire a contractor?
A: While some homeowners with experience in home improvement may choose to purchase DIY kits and install the system themselves, it’s often recommended to hire a contractor, especially if you are unfamiliar with HVAC systems. Contractors ensure proper installation and adherence to local building codes.
Q: What materials are typically required for the installation?
A: Common materials include ductwork components such as vents, grilles, and ties, as well as tools for cutting and sealing ducts. The fabric content of insulation materials, which might include pre-shrunk cotton or rayon, can be important for minimizing noise and optimizing air flow.
Q: How does climate impact the performance of a whole-house dehumidifier?
A: Performance can vary based on climate conditions. For instance, in warmer climates like Georgia or North Carolina, a dehumidifier also helps reduce the load on your air conditioning by removing excess moisture, which can enhance overall efficiency.
Q: Are there any warranties or disclaimers I should be aware of when installing a dehumidifier?
A: Manufacturers often provide warranties that cover parts and labor, but make no warranties regarding the accuracy of this information in specific installations. It’s crucial to read the disclaimer and warranty terms in the product description.
Q: How does a dehumidifier work with a heat pump system?
A: A dehumidifier works alongside a heat pump by removing moisture from the air, which can enhance the comfort level and efficiency of your heating and cooling cycles. It helps the heat pump by reducing the humidity load, allowing it to operate more effectively.
Q: What maintenance is required after installing a whole-house dehumidifier?
A: Regular maintenance includes cleaning or replacing filters, inspecting the evaporator coil and condenser for dust buildup, and ensuring the drainage system is clear. Following the maintenance schedule in the manufacturer’s description is crucial for optimal performance.
Q: How can I learn more about the installation process and get additional tips?
A: Watching videos from reputable home improvement channels like ThisOldHouse and reading detailed installation guides can provide valuable insights. Subscribing to channels that upload original content related to HVAC systems can also be beneficial. Don’t forget to send comments with specific questions if needed.