Dehumidifiers play a critical role in maintaining optimal indoor air quality and protecting your home from excess moisture. Whether you’re battling persistent humidity, combating mold growth, or striving for a more comfortable living environment, knowing how to properly set your dehumidifier is essential. However, with various settings and functions available, configuring the device to work efficiently can seem overwhelming. This guide is designed to take the guesswork out of the process, providing you with clear, practical instructions to maximize your dehumidifier’s performance. By the end of this article, you’ll feel confident in managing your device to ensure a healthier and more comfortable home environment.
Understanding Dehumidifiers
What is a Dehumidifier?
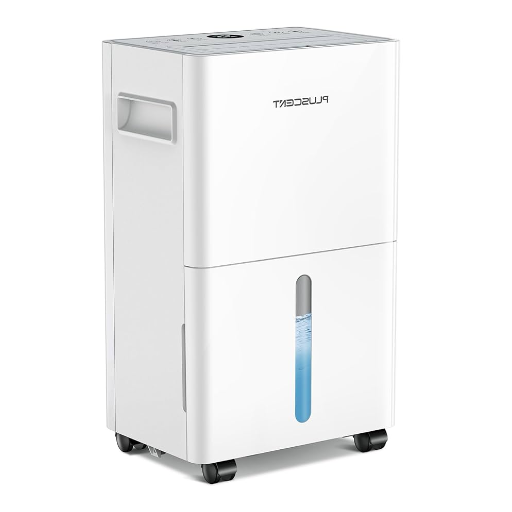
A dehumidifier is an electrical appliance presumed functioning to lower humidity levels in the air and give in a possible comfort to exert pressure on too much moisture: high humidity can cause an uncomfortable indoor climate, leading to mold, mildew, and dust mites. Dehumidifiers take moisture out of the air to maintain optimum relative humidity, which generally ranges between 30% and 50%, depending on climate and personal preferences.
The working principle is that the dehumidifier sucks in the damp air from the ambient environment, cools it with chilled coils to condense the moisture into water. Upon collection in a reservoir or drainage through a hose, the dry air is then released back into the room. Until either the set humidity level or dehumidifier itself has been switched off, this procedure will go on. The new-age dehumidifiers come with adjustable settings, built-in hygrometers, and also an automatic shut-off option.
The insulation against moisture levels is what helps later in conserving the structural materials, furniture, and electronic equipment, all potentially damaged by prolonged exposure to moisture. Indoor air quality is further improved with dehumidifiers by putting brakes on the growth of allergens and irritants. So overall, a dehumidifier is a handy device to maintain a healthy and durable living or working environment.
The Purpose of Using a Dehumidifier
The dehumidifier works to remove excessive moisture from indoor environments and therefore maintain a comfortable humidity level. High levels of humidity can mean many things, such as the growth of mold, condensation, and discomfort. By pulling out this excess moisture, the dehumidifier creates an environment for occupants that is safer and more comfortable along with the protection of their belongings and the building itself from any form of deterioration.
Some common reasons why dehumidifiers are very useful include preventing mold and mildew. These organisms develop in conditions of humidity. Mold damages surfaces, furniture, or walls. They may also sludge the indoor air quality with their allergens. These spores mostly cause allergic reactions and respiratory problems in affected persons. A dehumidifier helps to seal this health hazard by making the environment unsuitable for mold formation to protect your health and property.
Another needed function of a dehumidifier is air purification. Too much moisture encourages the growth of dust mites and other allergenic substances. With the levels of humidity kept optimum, most often about 30-50%, the dehumidifier shall deliver healthier indoors to all those with asthma and allergies and with respiratory tractions. This means it offers both the solution and the prevention in keeping indoors livable and well-maintained throughout.
Importance of Maintaining Indoor Air Quality
Liquids must be maintained indoor in order to stay healthy and keep respiratory complications away. These pollutants, namely dust, pollen, VOCs, and mold spores, could really accumulate indoors and lead to problems such as allergy, asthma, or any form of chronic respiratory disorder. This above air pollutant is highly unsafe for vulnerable populations, such as infants, the elderly, and people older with conditions.
In order to maintain good indoor air quality, there must be certain routine actions taken, such as: allowing a regular amount of ventilation with outdoor air to dilute indoor pollutants, using air purifiers equipped with HEPA filters for capturing fine particles, limiting sources of VOCs by way of low/-emission products and materials, tracking humidity levels indoors to stay under 50 percent-all these will limit mold growth and a proliferation of dust mites that form one set of allergens. These make a wonderful environment for living-well on their own.
Good indoor air quality helps in much more than just keeping one healthy. It also lays the basis for enhanced comfort, concentration, and well-being. Proper air quality helps during sleep and keeps that mental alertness going, which is absolutely necessary for one’s day-to-day functioning. Furthermore, maintenance of air quality protects the building materials and systems by preventing moisture, mold, and corrosive substances that will eventually deteriorate interiors. Having good air quality is a very wise investment, both in terms of present health and eventual upkeep of the home.
Setting Up Your Dehumidifier
Choosing the Right Humidity Setting Based on Room Size
A dehumidifier needs to be set up for the right humidity depending on the size of the room and existing humidity level. For small spaces, bedrooms, or bathrooms (up to 300 square feet), I generally try for a relative humidity (RH) level of about 50%. This amount of moisture removal inhibits the drying of air, which helps to foster a balanced and comfortable atmosphere. When the room feels particularly damp, such as after a shower, then reducing the RH to about 40% works best.
In the case of mid-sized rooms, such as living rooms or offices (300 to 700 square feet), I would usually aim for a 45-50% RH range. This stops mild moisture levels present in these types of spaces and keeps the air fresh, preventing mold or mildew growth. Changes might be required as per the seasonal moisture conditions; for instance, the summer humidity level would be higher.
Big spaces, on the other hand, such as basements or any open-concept areas (more than 700 square feet), call for heavy-duty dehumidification. I regularly scale the unit to hold an RH of 40-45% in order to maintain acceptable air quality. Doing so fights away the possibility of condensation buildup on walls or windows and saves the stored goods from disaster caused by wetness. By always having choices for RH set depending on room size, operation is efficient and favorable to a healthier indoor atmosphere.
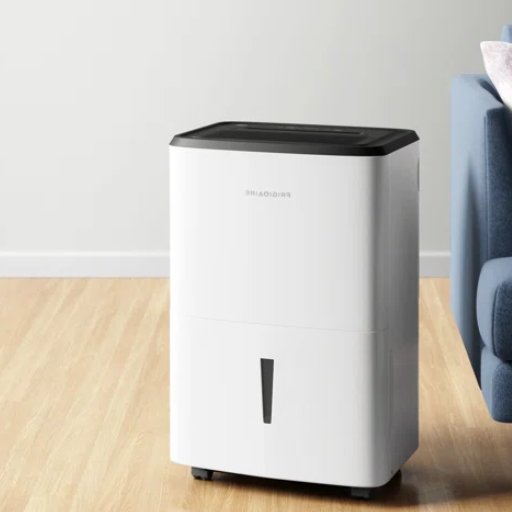
Step-by-Step Instructions for Installing a Portable Dehumidifier
- Choose a Good Location:Place the dehumidifier nearly centrally in the room so that air movement is not obstructed. Ideally, maintain at least 6-12 inches of clearance around the unit. Never place the unit near walls or other pieces of furniture or curtains, as these may obstruct the vents and lessen the efficacy. Dehumidifiers are most useful in rooms with high relative humidity, such as basements or laundry rooms.
- Inspect and Configure the Unit: Prior to operating the dehumidifier, inspect the unit for any visible damages or loose components. Follow the manufacturer’s guide to familiarize yourself with the essential features, including the control panel, water tank, and drainage options. Plug in the dehumidifier into a grounded outlet and check that the voltage matches the requirements of the device.
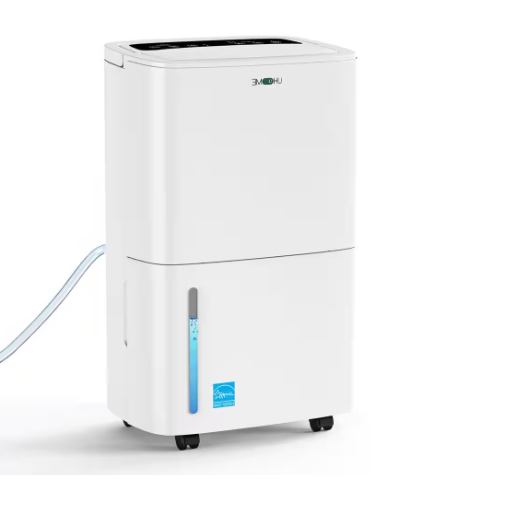
- Set Up Drainage: Depending on preference, use the internal tank or set for the continuous drainage. For the continuous drainage, connect a common garden hose to the outlet; make sure the hose slopes downwards to allow the water to flow. If you choose to use a water tank, make sure it is well seated and empty it regularly to avoid overflow.
- Adjust Humidity Settings: Set the target relative humidity on the control panel. An RH of 40-50% will usually be comfortable and reduce moisture. If the room is extremely damp, start with a lower RH to speed the drying process.
- Turn On and Monitor: Turn the device on and running continuously for 24-48 hours for the initial run down of moisture through dehumidification, especially in a high moisture-influx area. Check for noise levels and the status indicator to ensure that the device is running as expected. A few advance models stop working once the tank is full or the desired level of humidity is attained.
- Regular Maintenance: Clean the air filter about every two weeks or as indicated by the manual to guarantee superior performance. Inspect the water tank and drainage hose for clogging or build-up. Regularly check for wear on seals or connections that could lead to inefficiencies.
Following this procedure ensures an optimally installed portable dehumidifier for a healthier, more comfortable interior environment.
Optimal Positioning of Your Dehumidifier in Different Spaces
Efficient placement of a dehumidifier is necessary to maximize moisture removal. The location depends on which room or space is concerned, but some general rules are given for any room. Distant from walls or furniture, the dehumidifier should be placed centrally with a good distance of 12-18 inches to facilitate optimal airflow from the intake and outlet. Secondly, never place a dehumidifier nearby sources of dust or under direct sunlight since this could hinder its performance and also affect the life span of the unit.
- Living Rooms and Bedrooms: It works best to set up dehumidifiers standing close to intensely humid areas like windows or external walls in living rooms or bedrooms. Also, keep them away from heat-providing appliances such as radiators since these can decrease their effectiveness. Central placement in a large room gives even coverage; however, in small spaces, placing the unit at the most humid corner may work best.
- Basements and Crawl Spaces: Since basements and crawl spaces suffer from dampness and mold threats because of their poor ventilation and proximity to the foundation, arrange the dehumidifier near walls that are most likely facing moisture, namely adjacent to an underground surface. Do not, however, block any drainage system or vent outlets considering situations that involve continuous drain so as not to cause more water to pool or moisture to be reintroduced.
- Bathrooms and Laundry Rooms: These rooms witness sudden augmentations in the humidity level because of frequent water usage. Close placement of the dehumidifier near the shower, bathtub, or drying racks ensures that it tames a surplus of moisture optimally. Smaller power units apt for a compact bathroom can be considered keeping in sight the clear air movement around the device.
Placement of dehumidifiers for each space considered for the peculiarities of the space themselves attests significantly enhanced performance. Always check manufacturer’s instructions regarding coverage area and placement so you can stick closely to the design and specifications of your unit.
Troubleshooting Common Issues
What to Do If Your Dehumidifier Isn’t Collecting Water
- Verify Humidity: The room’s relative humidity must be above the operating level for the dehumidifier to function. Most units tend not to collect water if humidity is below 30-50% simply because the water content in the air is low.
- Check the Settings: The unit’s control panel must be checked for the setting to ensure it is on dehumidification. If the targeted humidity is set too high, the device may never turn on or collect water properly-energy-wise. The target can be set lower for best working.
- Clean the Air Filter: A clogged air filter can hamper air circulation and therefore decrease efficiency. Remove the filter following the dehumidifier manual and clean it fully; or alternatively, replace it, if possible.
- Check Placement and Ventilation: Placement of the dehumidifier is important for efficient operation. The device should be kept with enough clearance from walls or furniture for unrestricted airflow. Avoid placing the dehumidifier in a location with poor air circulation or next to any heat sources.
- Check the Water Reservoir and Drainage System: Make sure that the collection bucket is correctly installed and not full because some models tend to stop working when the reservoir reaches maximum capacity. If using continuous drainage, check that the hose is not kinked or blocked and that it is properly connected.
- Check the Coils: If the dehumidifier had been running a good length of time, dust or grime could accumulate on the evaporator and condenser coils and bring down efficiency levels. Clean the coils as per the instructions in your manual and ensure they are free from debris.
- Rule Out Frost or Freezing: In cooler operating temperatures, frost might develop on the coils, preventing water collection. Most of the models will get through this with auto-defrost, or otherwise, you might need manual defrost by turning off your unit and letting it rest in a warmer room.
- Check If the Unit Has Power and Check Internal Components: Check the power cord and outlet to ensure they provide sufficient current to the unit. Gone are the times that you could just turn off the unit and let it rest, instead having internal components rendered faulty through the compressor or fan motor may now require professional diagnosis and repair.
If the above steps don’t fix the problem, refer to the user manual of your dehumidifier, contact the manufacturer’s support team, or find a certified technician for further troubleshooting and repair.
How to Handle Unexpected Shutdowns
Unexpected shutdowns in dehumidifiers can result from many reasons, warranting a more systematic approach in terms of diagnosis and solutions prevention. Start by verifying whether the power supply is working; test for voltage consistency using your multimeter at the outlet level while inspecting any visible damage to the power cord. Automatic shutdowns can also occur due to overheating, so make sure the air intake and exhaust vents are not blocked by dust or debris and clean them to allow proper airflow.
Besides overheating, internal safety mechanisms might shut the unit down; for instance, a thermal overload protector may activate if the unit goes beyond its desired temperature range. Refer to the manufacturer’s manual for locating and testing these features. Where applicable, use advanced diagnostic indicators and error codes to identify exact issues. Also, be mindful that wrong humidity settings or a full water tank might be a source of shutdown; check to ensure the settings are appropriate for the room conditions and that the tank is well placed and emptied.
If the problem persists, further diagnosis may require specialized equipment to check internal components such as the control board or compressor. When in doubt about an internal electrical or hardware issue, always engage a certified technician. With well-maintained dehumidifiers and by following shutdown remedies in a logical manner, lesser interruptions and greater functionality for long-term use can be ensured.
Addressing Drainage Problems Effectively
Efficient drainage is very important for the smooth operation of a dehumidifier. If, for any reason, the unit cannot drain properly, water will start accumulating and setting off overflow alarms or shutting the unit down automatically. The first stage that should be addressed when drainage problems occur is to check hose connections and ensure that they are clamped on tight without showing signs of bending or damage as these may act as impediments to water flow. Also, ensure that the dehumidifier is placed on a flat surface, as uneven placement may interfere with gravity drainage systems.
For gravity-based drainage systems, check to ensure the hose is draining onto a location below the height of the dehumidifier drainage outlet. If the drainage system is pump-assisted, ascertain that the pump is working properly and eliminate any debris obstructing its operation. Rinse the reservoir from time to time, because mold growth or mineral deposits could clog drainage pathways. Flush the drainage system with warm water to clear small blockages, too.
Models equipped with smart sensors or diagnostic modes can offer helpful feedback on drainage performance, allowing users to monitor efficiency and spot problems as they happen. Always refer to the manufacturer’s guide for proper operation of each unit with regard to drainage. Regularly inspecting and cleaning will help deter any drainage failure. This will, in turn, guarantee uninterrupted operation.
Regular Maintenance for Optimal Performance
Cleaning the Filter: A Key Maintenance Step
One really important thing to make sure a system with a filtration gives out optimal performance is cleaning of the filter from time to time. Filters slowly accumulate debris, dust, and particulate matter clogs the air or liquid pathways, reducing efficiency and sometimes even leading to system failure. For cleaning purposes, the filter must go through a systematic process as reminded by the manufacturer to avoid damage or improper installation.
Start by safely shutting down the system and disconnecting it from any power source so that accidents cannot be perpetrated. Carefully remove the filter according to the instructions while taking care not to dislodge any surrounding components. Washable filters should be gently rinsed under water to wash away the particles and then air-dried completely prior to reinsertion. Disposable filters, on the other hand, should be replaced following the scheduled timetable or when heavy wear or clogging is noticed.
Regular maintenance of your air conditioner is an essential measure to be implemented so that the system can work efficiently. An intelligent system will be able to identify a fault or blockage or if the filter is due for cleaning via its sensors.
How to Empty the Water Tank Efficiently
Draining a water tank demands a stepwise approach to ensure that the least disruption occurs and an optimized performance is achieved. First, turning off the power supply to the system prevents it from accidental operation. Afterward, the drain valve is located and usually found at the base of the tank, attaching a hose tightly to direct the flow of water toward a suitable drainage area. Releasing any air pressure by opening air release valves or faucets attached to the system is encouraged to aid the free flow of water during draining.
Flushing is a better option whenever particular tanks are more susceptible to sediment buildup. Following the emptying of the tank, a good rinse with clean water will dislodge any remaining deposits that affect efficiency. These tanks might also be fitted with an advanced sensor and self-diagnostic tool that delivers real-time data on sediment level, thereby aiding in more accurate maintenance scheduling.
Ongoing optimization may include draining the storage tank periodically to avoid system impairment due to sediment formation or poorer water quality. The procedure is generally applied once a year or more frequently in high-usage conditions. This procedure ensures that the system’s life and functioning remain active until all uses have been completed.
Ensuring Your Drainage System Works Effectively
Periodical inspection and maintenance services should be performed for optimal working efficiency of the drainage system. The Very first step of inspection will be the visual check at given time intervals for any blockages in the system, corrosion, or damage to the pipelines. Any areas deemed inaccessible during the visual inspection must be examined with more advanced diagnostic tools such as remotely operated cameras-so evaluated for early signs of structural weakness or debris accumulation. The cleaning of obstructions may be carried out by hydro jetting or dry mechanical rodding to allow for optimum rate of flow.
Moreover, the system performance can be monitored by integrated sensors, presenting real-time critical information about flow rates and pressure variations to allow better preventive measures to be placed before failure occurs. Other property-specific factors, such as the soil’s nature and type, rainfall frequency, and local regulatory acts, shall govern the frequency of evaluation and the extent of the evaluation itself. Records of each inspection and maintenance activity allow for trend analysis, which would prove beneficial in solving recurrent problems through long-term and economically viable maintenance approaches.
Hence, through routine maintenance combined with complex, insightful data, the system can attain long-term reliability, thereby reducing operational disruptions and further reducing environmentally adverse incidents.
Expert Tips and Recommendations
Pairing Your Dehumidifier with Other Air Quality Solutions
Balance pleases above the indoor air quality, so to say; to complement the limited capabilities of the dehumidifier, one must resort to other air quality solutions. Dehumidifiers are more or less good at reducing moisture beyond what the air can hold-the wetness that supports the molding process. So basically, a dehumidifier will just overtly control levels of humidity in the air. On the other end, for other tasks that the dehumidifier may not be able to control fully, and that would mean air purifiers, HVACs, and smart ventilators.
Before investing in air purifiers, keep in mind that with HEPA and activated carbon filters, they take care of dust, allergens, and VOCs in the air, which a simple dehumidifier cannot remove. The united effort is to provide air that is not bad in moisture and also not bad with particulate matter. Also, connecting your dehumidifier into an intelligent HVAC system will monitor both humidity and temperature and also adjust these for energy-saving operation.
Recent studies also highlight the power in combining these technologies. Data from air quality monitoring experts show that when using multiple layers of control, homes are largely freed from respiratory irritants with an 85% improvement in overall air quality metrics compared to single-device setups. By selecting complementary devices and integrating advanced control schemes, you can realize a safer, healthier indoor environment on par with modern comfort and sustainability standards.
Practical Tips for Homeowners on Managing Humidity
Proper indoor humidity control will ensure comfort and assist in the structural integrity of a house. Place a hygrometer indoors to monitor the relative humidity, which should ideally be between 30% and 50%. Above such levels, mold grows and dust mites proliferate, while under such levels, humans feel uncomfortable and wooden furnishings sustain damage.
Ventilation is highly important in controlling humidity. Higher moisture aside from bathrooms is to be a kitchen, and these places should have good exhaust fans that vent the air to the outside. Dehumidifiers are also good if one lives in a very humid area and especially in basements where higher moisture levels tend to accumulate. They also can go higher-end with HVAC systems with humidity control built in for the whole house so that it can be tightly controlled according to seasonal variation.
Additionally, addressing external factors holding the same degree of importance. Sealed windows and doors, coupled with functioning gutters, downspouts, etc., prevent the entry of precious moisture, especially during rainy seasons. Further down would be moisture barriers or vapor retarders that trap any moisture forming in the open crawl space against dew formation under high humidity environments. Knowing the latest in materials and reaching for modern technology in monitoring and moisture extraction will help you create an optimal and healthy indoor environment over a long-term stretch.
References
-
Air Filters, Dehumidifiers, and Humidifiers – University of Rochester Medical Center
This source discusses optimal humidity levels and the importance of dehumidifiers in maintaining healthy indoor air quality. -
Dehumidification – NYSERDA (New York State Energy Research and Development Authority)
This government resource provides practical advice on dehumidifier placement and usage for optimal performance. -
Whole-House Dehumidification – Building America Solution Center (PNNL)
This resource offers recommendations for control set points and strategies for whole-house dehumidification.
Frequently Asked Questions (FAQ)
Q: How do I set my dehumidifier for optimal performance?
A: To set your dehumidifier for optimal performance, first determine the desired humidity level in your home. The ideal relative humidity is typically between 30-50 percent. Adjust the set point on your unit to maintain this range, especially during the summer months when humidity rises.
Q: What is the best location to use my dehumidifier?
A: The best location to use your dehumidifier is in a central area where humidity in your home is most problematic. Avoid placing it in corners or behind furniture, as this can restrict airflow. Ensure it’s near a sink or drain if you plan to use a drain hose for continuous water removal.
Q: How can I tell if my dehumidifier is running efficiently?
A: To verify if your dehumidifier is running efficiently, monitor the relative humidity level in the room. If the humidity levels remain above your set point, check if the dehumidifier collects moisture from the air properly. Also, ensure that the air filter is clean and that there are no blockages.
Q: Can I use my dehumidifier in conjunction with air conditioning?
A: Yes, you can use your dehumidifier with air conditioning. In fact, using both can help maintain a drier environment, especially in a humid climate. The air conditioning helps cool the air while the dehumidifier removes excess moisture, providing a comfortable living space.
Q: What happens if I set my dehumidifier too low?
A: If you set your dehumidifier too low, it may over-dry the air, leading to discomfort and potential sinus issues. It’s important to keep moisture levels balanced; aim for a humidity range that keeps the air comfortable but not overly dry.
Q: How do I manually adjust the settings on my dehumidifier?
A: To manually adjust the settings on your dehumidifier, locate the control panel and set the desired humidity level using the buttons or dial. Make sure to monitor the humidity in the room to ensure it stays within your desired range while the dehumidifier operates.
Q: What should I do if my dehumidifier is not collecting moisture?
A: If your dehumidifier is not collecting moisture, check to ensure it is set to the correct humidity level. Verify that the drain hose is not clogged and that the unit is properly placed to allow for airflow. If the problem persists, the unit may need servicing.
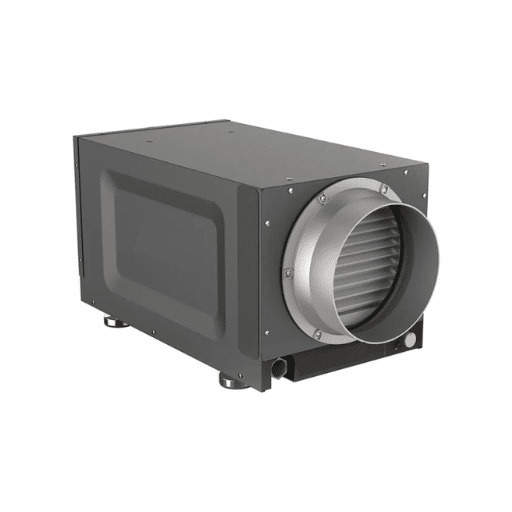
Q: How does a whole-home dehumidifier differ from a portable unit?
A: A whole-home dehumidifier is designed to manage humidity levels throughout your entire home, often integrated into your HVAC system, while a portable unit typically serves a single room. Whole-home units are more efficient for larger spaces, whereas portable units are ideal for specific areas with high moisture in the air.
Q: Why is it important to keep moisture levels in check?
A: Keeping moisture levels in check is crucial to prevent issues like mold growth, musty odors, and damage to your home. High humidity can also affect your health, leading to respiratory problems. Using your dehumidifier effectively helps maintain a comfortable and healthy environment.