Regulating the humidity inside the house is a necessary process that leads to a house with a comfortable, healthy, and energy-efficient environment. In other words, infections, property deterioration, and even health problems could be the result of the moisture that is too much. At this point, a whole-home dehumidifier is a solution that will work miracles. It is an innovative device made specifically to control the humidity levels throughout the house. In addition, this device will not only help you to deal with very hot summers, moist basements, or just to enhance your air quality but it will also allow you to enjoy the change that a whole-house dehumidifier has on your property. This guide will take you through the whole process of installing a whole-home dehumidifier starting from the necessary preparations and tools up to the practical advice for smooth installation.
Understanding Dehumidifiers
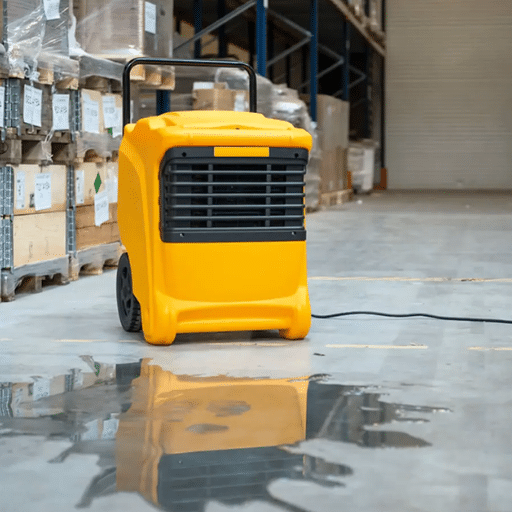
Dehumidifiers are a type of equipment that is especially useful in areas where high humidity is a problem. These devices are very capable of improving the indoor air quality and they can also eliminate the air from the house that has the musty odor and the issues related to the presence of mold. Basically, they operate by sucking in the moist air, treating it by taking away the water content, and then letting the air back into the room but this time it is dry. Whole-house dehumidifiers are part of your house’s HVAC system which makes it easy and convenient for them to manage the whole house humidity efficiently. This is particularly the case if you live in a place that has high humidity or if your house has the tendency to get wet. The dehumidifiers not only help in maintaining a comfortable living environment but also prevent health issues and damage to your house by balancing humidity levels.
What is a Whole Home Dehumidifier?
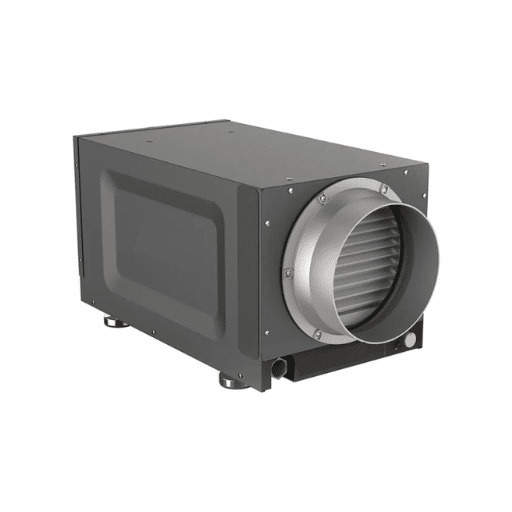
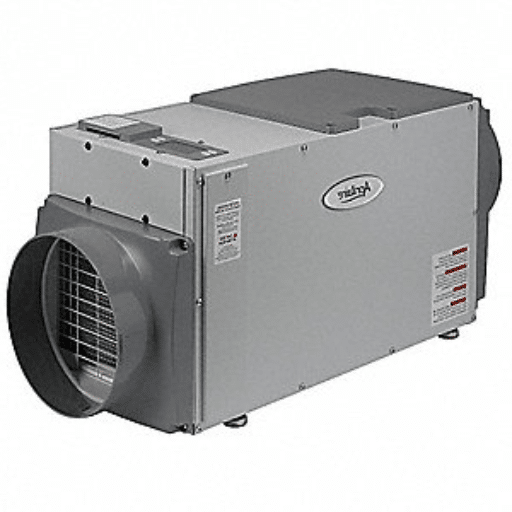
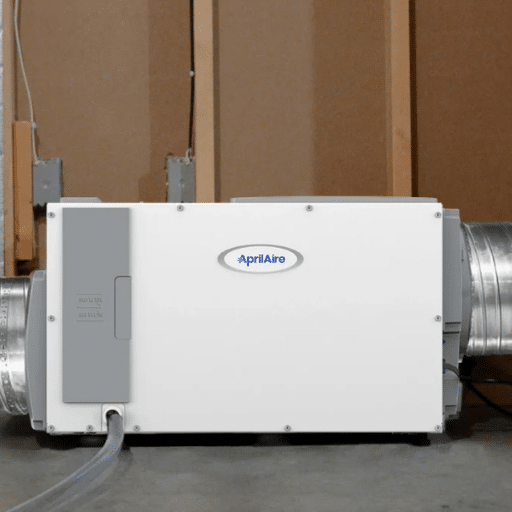
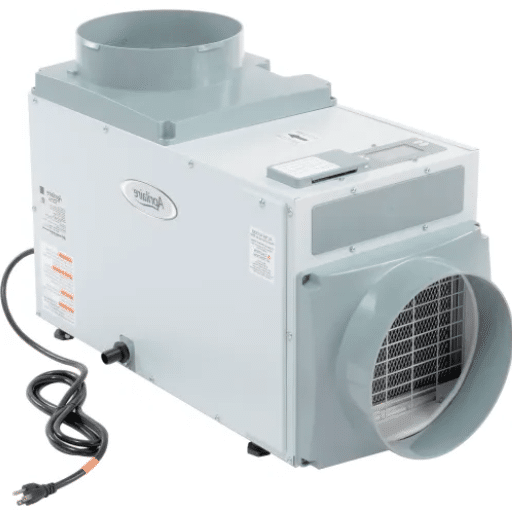
A whole home dehumidifier is an advanced device designed to regulate and maintain optimal humidity levels throughout your entire house. Integrated directly into your home’s HVAC system, it works by extracting excess moisture from the air before circulating drier, healthier air back into living spaces. These systems are particularly beneficial in preventing issues caused by high humidity, such as mold growth, wood warping, or musty odors. Equipped with smart controls and energy-efficient technologies, modern whole-home dehumidifiers not only improve indoor air quality but also contribute to your overall comfort while protecting the structural integrity of your property.
How Do Dehumidifiers Work?
Dehumidifiers do their job by taking away the extra moisture in the air which helps to keep the indoor area comfortable and healthy. In the beginning, the machine takes in the humid air through the intake openings and the fan is responsible for this process. The next step is that the air goes over the cold coils and at this stage, the moisture in the air changes into water droplets because of the difference in temperature. The water that has been condensed is either transferred to a tank that is part of the machine or it is piped off through a hose that is connected to it. When the air has had the humidity removed, it passes over the hot coils to get back to the same temperature as the room before being sent back to the room. The latest dehumidifiers, that come outfitted with cutting-edge sensors and smart technology, not only monitor and control humidity levels automatically but also do it according to the real-time data, thus providing the best performance possible and at the same time conserving energy.
Benefits of Installing a Whole-House Dehumidifier
Enhances Indoor Air Quality
Overly humid conditions benefit the proliferation of mold, mildew, and dust mites, which can lead to allergies and respiratory troubles. An entire-house dehumidifier very successfully limits these contaminants and thus, contributes to the development of a more comfortable and healthier living area for all people who stay in the house.
Secures Your Home and Goods
Wood can become distorted, paint can start to chip, and metal can get ruined due to high humidity. A dehumidifier for a whole house, by keeping humidity levels uniform, helps preserve not only your home’s foundation but also the lives of furniture, electronic devices, and other items.
Improves Living Conditions
Moist air on hot days often makes one feel uncomfortable and sticky. Removing some moisture with a dehumidifier for the whole house not only makes the air cooler and more bearable in summer but also makes the house more pleasant even in the heat of summer.
Decreases Electricity Bills
When the humidity is low, the HVAC system will not have to work so hard to keep the temperature comfortable. This usually results in a substantial reduction in energy costs.
Works Quietly and Efficiently
In contrast to the noisy and inconvenient portable dehumidifiers, whole-house dehumidifiers are silent in operation and perfectly combined with your HVAC system at home. They are operated for efficiency and hence, no regular monitoring or maintenance is needed, making them a convenient option.
Preparing for Installation

- Evaluate Your Home’s Needs: Determine the size and capacity of the dehumidifier by assessing the humidity levels and square footage of your home. For example, a dehumidifier of over 70 pints per day might be needed for a house with a total area of 4,000 square feet.
- Inspect Your HVAC System: It is crucial to check the compatibility between your current HVAC system and the whole-house dehumidifier. Take adequate ductwork, airflow, and necessary upgrades into account in order to achieve seamless integration.
- Choose the Right Location: Installation sites should be located near the HVAC system or in a centralized area such as a basement or utility room that allows for the evenly distributed air throughout the household.
- Plan for Drainage: A drainage system is a must for whole-house dehumidifiers as it will remove water that has been collected. Water buildup will be avoided and continuous operation ensured by connecting a proper drainage line to a floor drain, sump pump, or condensate pump.
- Schedule Professional Installation: A certified HVAC technician should be hired for the installation of the system. The professionals will ensure that the installation is done accurately, calibrate the settings, and test the functionality to confirm that the system is performing optimally and is reliable for the long term.
Assessing Your Home’s Humidity Levels
If you want to know if your home has the right humidity levels, you have to measure it accurately first. A range of 30-50% indoor humidity is the perfect balance between comfort and health, as it prevents mold growth and discomfort caused by breathing issues. Here are five simple methods to check and control your home’s humidity:
- Hygrometer Usage: A hygrometer is a cheap and simple instrument that measures the humidity of your home environment. The digital hygrometers will give you very exact readings and will also help you to monitor the daily changes.
- Look for Water Condensation on the Windows: The most common indoor humidity problem is water vapor condensing on windows, especially in winter. This is a clear indication that the humidity level is probably too high.
- Look for Signs of Mold Growth: When the humidity level is higher than 60%, it supports mold development in areas such as bathrooms and basements or around window frames. Check regularly for any visible mold.
- Inspect for Wooden Products that are Dry or Cracking: Low indoor humidity can lead to wood furniture, floors, and doors becoming dry and cracked. This is one clear sign that air has insufficient moisture.
- Listen to Your Comfort Level: Skin and eyes feeling dry or having breathing problems are signs that the humidity level is low, while being excessively sticky and uncomfortable is often an indicator of high indoor humidity. Therefore, pay attention to these physical signals.
Choosing the Right Dehumidifier Size
The selection of the right size for a dehumidifier is a requirement for keeping the indoor humidity at a comfortable level. The moisture removal capacity of a dehumidifier mainly depends on the humidity level along with the size of the area it has to cover. The following considerations will help you figure out the right size of a dehumidifier for your space:
| Space Size | Conditions | Recommended Capacity |
|---|---|---|
| Small Rooms (Up to 500 sq. ft.) | Bedrooms, bathrooms, or home offices with relatively low moisture levels | 10-20 pints per day |
| Medium Rooms (500-1,200 sq. ft.) | Living rooms or basements with moderate humidity | 30 pints per day |
| Large Rooms (1,200-2,500 sq. ft.) | Open-concept areas or large basements with high moisture | 50 pints per day |
| Damp Spaces (Any Size) | Rooms with constant dampness or musty smells | 50-70 pints per day |
| Extremely Wet Spaces (Any Size) | Areas prone to leakage, flooding, or always wet conditions | 70+ pints per day |
Understanding Ductwork Requirements
Proper ductwork design is significant for smooth airflow, temperature control, and overall HVAC system efficiency. Below are the five critical points to be considered for a successful ductwork installation and operation:
- Correct Sizing: The ducts must be of the right size so as to maintain the good airflow required by the HVAC system. Ducts that are too big can cause uneven air distribution while the ducts that are too small can lead to a system strain and decreased efficiency.
- Proper Sealing: Air leaks that cause energy loss and higher operational costs should be prevented by sealing all duct joints and connections with mastic sealant or metal tape tightly.
- Insulation: Ducts situated in spaces with no heating or cooling, like attics or crawl spaces, should be insulated properly to avoid heat loss or gain and make sure that indoor temperatures are stable.
- Efficient Layout: The ductwork system must have a logical and efficient layout with very few twists and turns so that airflow resistance is low and optimal performance is maintained.
- Adequate Ventilation: The supply and return vents must be correctly balanced, so that the air distribution throughout the house is equal, thus preventing the generation of hot or cold spots and ensuring comfort.
The Installation Process
For an HVAC system to work properly, it is important to go through a very careful installation process. Following are the five main steps involved in the installation:
Assessing System Requirements
Determine the necessary capacity for the HVAC system by carrying out a thorough assessment of the building’s dimensions, and configuration as well as insulation. Proper sizing leads to energy savings and efficient operation.
Ductwork Inspection and Preparation
Look at the current ductwork for leaks, blockages, and damage. If needed, make repairs or substitute parts to assure proper airflow and system effectiveness.
System Placement
Choose the location of the indoor and outdoor units in a way that easy access, good ventilation, and quiet are the least interfering with each other. Correct placement is very important for the system’s lifetime and efficiency.
Electrical Connections
Securely install and connect electrical wiring to the HVAC system. This includes the establishment of circuit breakers, grounding, and adherence to local electrical codes.
Testing and Calibration
After it is installed, check the system to make sure it is working properly. Set the thermostat, look for constant airflow, and confirm temperature settings so that the system is running at its best.
Tools and Materials Needed
To carry out an HVAC system installation in a manner that is both efficient and safe, the use of the following tools and materials becomes a necessity:
- Screwdrivers and Wrenches – A variety of sizes and types will be needed for tightening parts and adjusting them.
- Refrigerant Gauge Set – It is utilized for controlling the refrigerant through measuring the pressure levels.
- Multimeter – A must-have for verifying the conditions of electrical circuits and ensuring safe operation.
- Duct Tape and Sealant – Sealing of ducts will not only prevent air leaks but will also increase the system’s effectiveness.
- PVC Pipes and Fittings – They are an integral part of the condensate drainage that contributes to the proper functioning of the system.
Steps to Install a Whole-House Dehumidifier
Choose the Installation Location
Pick an appropriate spot for the dehumidifier like close to your HVAC system or in the middle of the house. Make sure there is enough room for airflow, maintenance, and drainage connections.
Prepare the Ductwork
Bring into play supply and return ducts which are linked to the dehumidifier. Choose either flexible or rigid ductwork according to the situation and wrap the joints with duct tape or sealant to stop any leaks.
Connect the Condensate Drain
Fix the pipes made of PVC to the outlet of drain of the dehumidifier for the proper disposal of the water collected. Be sure the pipe leading to the drain has a downward slope to prevent it from getting clogged and fasten it to an existing drainage line or a sump pump.
Wire the Electrical Connections
Switch off the electricity and connect the dehumidifier to the circuit of your house or a nearby outlet. Adhere to the manufacturer’s wiring diagram and employ a multimeter to check that the electrical connections are safe.
Test the System
After installation is completed switch the system on and observe for correct working. Humidity levels can be checked with a hygrometer and it is necessary to make sure that airflow and drainage are functioning well. If required, change settings on the dehumidifier to reach the wanted humidity level.
Connecting to Ductwork: Return and Supply Ducts
The dehumidifier has to be properly connected to the ducts through the return and supply ducts to ensure its efficient performance and to have uniform control of humidity throughout the house. Below are the steps and important considerations to make when connecting to the ductwork:
- Assess Ductwork Compatibility: Get the size and type of the existing ductwork to verify its compatibility with the dehumidifier. It is necessary that the duct connections of the unit’s inlets and outlets align to enable seamless airflow.
- Select Appropriate Transition Pieces: In case the sizes do not match, then transition fittings are to be used between the duct and the dehumidifier. This helps to maintain airtight connections and prevent leakage of air through operation.
- Install Dampers for Airflow Control: Dampers are to be installed on the return and supply ducts to control airflow and also to avoid any backflow problems. Through adjustable dampers, air distribution is controlled with high precision.
- Seal All Connections: Seal every duct connection with sealant or tape made of foil to stop any gaps or leaks from forming. Sealing done properly brings about maximum efficiency and also prevents conditioned air from being lost.
- Position Ducts Strategically: The return duct connection should be placed very close to the main return line of the HVAC system, and the supply duct connection should be located in such a way that the dehumidified air is evenly distributed in the desired space. Proper positioning increases the system’s performance and comfort significantly.
Post-Installation Considerations

Taking measures to ensure the utmost ductwork and HVAC performance and detection of any possible troubles are the steps to follow after the installation is done. Here are five main points to consider after the installation:
Post-Installation Checklist
- Conduct a Leakage Test: Check the system for leaks with diagnostic tools like a duct blower or smoke test. Even the tiniest of leaks can lead to a great reduction in efficiency and an increase in energy costs.
- Monitor Airflow: Use an anemometer to measure the airflow rates at different supply registers. Consistent airflow is one of the keys to balanced temperatures and overall comfort in the area.
- Inspect System Insulation: Check if the insulation of all the ducts is correct, especially for ducts that go through unconditioned spaces. Otherwise, there will be energy loss and condensation buildup.
- Perform a Temperature Differential Check: Check the temperature difference between the air entering and that exiting the HVAC unit. A proper range (usually around 16-22°F) indicates that the system is performing its function of dehumidification and cooling correctly.
- Schedule Routine Maintenance: Plan a maintenance schedule for periodic inspections and filter replacements. This practice along with regular maintenance will ensure the system’s longevity and peak performance over time.
Testing the System for Proper Functionality
The functionality of the HVAC system is confirmed through thorough testing and analysis of crucial data points. We are listing five critical checks to make sure the system is working correctly:
- Check Airflow: Airflow at the vents must be read with an anemometer. Blockages, duct leaks, or blower motor problems can all be indicated by low or uneven airflow.
- Inspect Refrigerant Levels: The refrigerant pressure should be checked with gauges. An undesirable level can either lead to lower cooling efficiency or the compressor being subjected to damage.
- Thermostat Calibration: The temperature display of the thermostat should be compared to that of a reliable external thermometer. A thermostat that has been miscalibrated can create uneven temperatures and potentially cause higher energy bills.
- Examine System Voltage and Amperage: Voltage and amperage of the system should be measured with a multimeter. If the readings are within the specified range of the manufacturer, it means that all electrical components are working properly.
- Measure Return and Supply Air Temperature: Air temperature entering the system (return air) and air temperature exiting the system (supply air) must be recorded. Check the temperature difference and ensure it is within the recommended range to confirm effective cooling and dehumidification.
Maintaining Your Whole Home Dehumidifier
The whole home dehumidifier requires proper maintenance to work efficiently and to last longer. So, the following are the five main maintenance activities that will ensure that your dehumidifier does not run into problems:
Regular Maintenance Tasks
- Air Filter Cleaning or Replacement: The cleaning or replacement of the air filter should be done according to the manufacturer’s recommendations, which might be done on a regular basis or at longer intervals. A thickly clogged filter could limit the airflow and thus result in poor performance.
- Coils Inspection and Cleaning: Evaporator and condenser coils should be inspected every now and then for the possible dust or debris accumulation. The accumulation of dirt on coils can cause the system to overheat and ultimately damage it as the heat exchange process will be hampered.
- Drain Line Check: It is very important to make sure that the drain line is clear of blockages to facilitate smooth and effective condensation removal. A blocked line might result in water damage or even failure of the system.
- Humidity Levels Monitoring: A hygrometer can be used to measure the indoor humidity levels. The humidity range of 30-50% is considered ideal. If the humidity is more than the set level, the dehumidifier will have to be adjusted accordingly.
- Fan and Motor Examination: Make sure the fan and motor are operating smoothly. Do not forget to listen for any unusual noises or vibrations that could be a sign of wear or damage that needs to be fixed.
Common Issues and Troubleshooting Tips
| Issue | Possible Cause | Solution |
|---|---|---|
| Clogged Air Filters | Dust and debris accumulation | Replace air filters regularly—usually every 1 to 3 months, depending on the circumstances and environmental factors |
| Refrigerant Leaks | Wear and tear on refrigerant lines | Get a qualified technician to find and fix the leaks, then add the refrigerant |
| Frozen Coils | Lack of airflow or insufficient refrigerant | Look for dirty filters or closed vents; solve refrigerant problems quickly to avoid more damage |
| Water Leaks | Blocked condensate drain line | Clean the drain line to restore functionality and avert water damage |
| Unusual Noises | Loose parts, motor problems, or debris | Check the unit and tighten or replace worn out parts; consult a technician if the problem continues |
Cost of Whole Home Dehumidifier Installation
The cost of setting up a whole-home dehumidifier can differ a lot by the type of system, area of the house, and charges for labor charges, among other things. The following are five main points to installing a dehumidifier that affect the price:
Cost Breakdown: Key Factors
Type of Dehumidifier
Refrigerant-based or desiccant models
$1,000 – $2,500
Home Size
Larger homes require more powerful systems
$2,000+
Labor and Installation Fees
Professional installation costs vary by complexity
$500 – $1,200
Ductwork Modifications
Necessary alterations to existing HVAC system
$300 – $700
Additional Features and Accessories
Built-in humidistats, smart controls, specialized filters
$200 – $500
Factors Influencing Dehumidifier Cost
The comprehension of the different areas that affect the price of a dehumidifier system can indeed assist the house owners in making correct choices. Mentioned here are the five vital factors along with their descriptions:
- Dehumidifier Capacity: The dehumidifier’s size and its capacity are of utmost importance in ascertaining the price. Models that are made to cater to bigger spaces or to endure more humidity will obviously cost more. Small units meant for single rooms will have a price tag of about $150 to $300, while the prices of dehumidifiers intended for the whole house can vary from $1,000 to $3,000.
- Type of Dehumidifier: The overall cost is influenced by the kind of dehumidifier used—either refrigerant or desiccant. Refrigerant units, which are the most popular ones, are reasonably priced starting from about $200. The cost of desiccant units, better for colder areas, ranges from $400 to $800.
- Efficiency and Energy Ratings: The highly efficient models that are certified by ENERGY STAR, though they are costly at first, are the ones that eventually save on energy bills. The prices of these units can be up to 15–30% higher than those of the usual models, leading to an increase in the upfront cost but adding value over time.
- Installation Costs: For the dehumidifiers that serve the whole house, you almost always have to go for the professionals for the installation. It could be anywhere from $500 to $2,000, depending on the labor rates, the difficulty of the installation, and the modifications needed for the current HVAC systems.
- Maintenance and Replacement Parts: The maintenance that will be done regularly, such as changing filters or cleaning coils, will be another factor to consider. The annual costs for these parts that have to be replaced may be anywhere from $50 to $150, depending on the brand and the type of unit.
Long-Term Savings from Improved Humidity Control
Humidity control that is improved by investing in it can result in huge long-term savings over quite a few areas. The financial part of the homeowners’ bills would then be the same plus a little bit more through energy efficiency and comfort enhancement. Here are five instances of cost savings that are very thoroughly discussed and listed below:
| Savings Category | Annual Savings | Description |
|---|---|---|
| Lower Energy Costs | Up to 15% reduction | Proper humidity balance allows HVAC systems to work less, significantly reducing overall energy consumption |
| Extended HVAC Lifespan | 5-10 years longer life | Reduced wear and tear prevents frequent breakdowns, saving thousands in replacement and maintenance costs |
| Prevention of Mold Growth | $500 – $3,000 | Better humidity control eliminates costly mold remediation expenses |
| Reduced Furniture & Flooring Damage | $100+ per year | Controlled humidity prevents wood warping and damage, avoiding expensive repairs or replacements |
| Improved Health & Lower Medical Expenses | Hundreds of dollars | Proper humidity reduces respiratory problems and allergies, lowering medication and doctor visit costs |
References
- Field-Monitoring of Whole-Home Dehumidifiers: Initial Results of a Pilot Study – This study provides insights into the usage and performance of whole-home dehumidifiers in residential settings.
- Whole-Home Dehumidifiers: Field-Monitoring Study – A detailed field study on the effectiveness of whole-home dehumidifiers in managing indoor humidity.
- Further Investigation of Energy and Performance Impacts of Whole-House Dehumidifier Duct Configurations – This research explores the energy efficiency and performance of ducted whole-house dehumidifiers.
Frequently Asked Questions (FAQ)
What is a whole-house dehumidifier, and how does it work?
A whole-house dehumidifier is a system designed to remove excess moisture from the air throughout your home. It connects to your existing HVAC system and works by drawing in humid air, passing it over a coil where moisture is condensed and collected, and then distributing dehumidified air back into your living space. This process helps maintain optimal humidity levels, improving indoor air quality and preventing mold growth.
How do I know if I need to install a whole-home dehumidifier?
If you experience high humidity levels in your home, such as condensation on windows, musty odors, or mold growth, it may be time to consider installing a whole home dehumidifier. Monitoring indoor humidity levels can help you determine if they are consistently above 60%, which indicates that excess moisture is present and should be addressed.
What is the cost to install a whole-house dehumidifier?
The cost to install a whole-house dehumidifier can vary depending on factors such as the size of your home, the complexity of the installation, and the type of unit you choose. On average, homeowners can expect to pay between $1,200 and $2,500 for a professional installation by a licensed HVAC contractor. It’s essential to get multiple quotes and consider the long-term savings on energy bills and improved indoor air quality.
Can I install a whole-house dehumidifier myself?
While some homeowners may attempt to install a whole-house dehumidifier themselves, it is generally recommended to hire licensed HVAC technicians for optimal results. Proper installation ensures that the unit works efficiently with your existing HVAC system, maintains proper airflow, and adheres to local building codes. DIY installation may lead to complications and could void the manufacturer’s warranty.
What is the installation process for a whole-home dehumidifier?
The installation process involves several steps, including selecting the right location for the dehumidifier, connecting the dehumidifier to the existing HVAC system’s supply plenum and return duct, and ensuring proper drainage for the collected moisture. A professional installer will assess your home’s layout and humidity levels to determine the best approach for connecting the dehumidifier and optimizing its performance throughout the home.
How does a whole-house dehumidifier affect my HVAC system?
A whole-house dehumidifier can enhance the efficiency of your HVAC system by reducing the load on your air conditioning unit. By removing excess humidity from the air, the dehumidifier allows the cooling system to operate more effectively, leading to improved comfort and lower energy bills. Additionally, maintaining proper humidity levels can extend the lifespan of your HVAC equipment.
What factors should I consider when choosing a whole home dehumidifier?
When selecting a whole home dehumidifier, consider factors such as the size of your home, the unit’s capacity (measured in pints per day), energy efficiency ratings, and noise levels. It’s vital to choose a unit that meets your specific needs and is compatible with your existing HVAC system. Consulting with a licensed HVAC contractor can help you make an informed decision.
How can I maintain my whole house dehumidifier?
Regular maintenance of your whole house dehumidifier is crucial for optimal performance. This includes cleaning or replacing filters, checking the drainage system for clogs, and ensuring that the unit is free from dust and debris. Schedule professional maintenance at least once a year to keep the system running efficiently and to prolong its lifespan.